How to Build a Mushroom Biome in Terraria: A Guide
Learn how to create a thriving mushroom biome in Terraria with practical steps, plant placement tips, lighting, and farming strategies to support progression.

You will learn to create a functional mushroom biome in Terraria, from selecting the right space to planting mushroom grass and glow mushrooms, and then maintaining the biome for steady spawn rates and resource flows. This guide covers layout, lighting, and farming strategies, plus common pitfalls to avoid. By the end, you'll have a living, self-sustaining biome you can use for potion farming, NPC housing, and consistent material collection.
How to Make Mushroom Biome terraria: Concept and Goals
In Terraria, mushroom biomes are valuable for reliable access to Glow Mushrooms, Mushroom Grass, and a steady source of biome-exclusive drops. If you're asking how to make mushroom biome terraria, the central idea is to create a controlled space where the mushroom grass spreads and the humidity remains favorable for growth. According to Pixel Survival, mushroom biomes are not just decorative; they can become efficient farming hubs and NPC-friendly zones when planned well. This section lays out why such a biome matters and what you should aim for before you place the first block. A well-designed mushroom biome supports plant farms, potion saturation, and fiber sources while keeping spawn rates predictable. By outlining the goals and constraints up front, you’ll face fewer detours once you start laying mud and grass.
Core Elements of a Mushroom Biome
A successful mushroom biome centers on three core elements: a suitable environment, the spread of Mushroom Grass, and the right light balance. The environment is built with blocks that permit Mushroom Grass to take root and spread, typically using dirt or mud as the base. Mushroom Grass Seeds are then planted to initiate the spread, while Glow Mushrooms provide efficient, diffuse lighting that avoids harsh shadows. The biome should also feel cohesive, with decorative fungus and shrooms distributed evenly to ensure the space looks intentional rather than random. Pixel Survival emphasizes planning for both aesthetic and functional outcomes, so consider how farmers, NPCs, and early-game crafters will interact with the space.
Layout and Space Planning
Before you place a single block, sketch a layout that matches your world size and your playstyle. Aim for a central hub with radiating pockets to host Glow Mushrooms and Mushroom Grass patches. A 12×12 to 20×20 tile area is a good starting point for a compact biome, while larger layouts give you room for farms, NPC housing, and decorative aisles. Use a consistent grid to keep blocks aligned; this makes Grass growth more predictable and minimizes wasted space. The placement of lighting should be evenly distributed to prevent dark corners that slow or hinder mushroom growth. Remember to leave space for vertical development—you may want an underground section or a raised terrace for mushrooms that thrive in different light gradients.
Planting Strategy: Mushroom Grass and Spores
Plant Mushroom Grass Seeds on suitable dirt or mud blocks to begin the biome. The spread relies on moisture and shade, so ensure you have a closed environment with consistent humidity and protection from direct sunlight if possible. Add Glowing Mushrooms intermittently to create a comfortable light level without flooding the area with brightness. Spread a mix of different mushroom types and spores to enrich the biome’s biodiversity, which also helps with resource yields like glowing mushrooms, spores, and organic matter. In this guide, how to make mushroom biome terraria is approached as a practical, repeatable process rather than a one-off design.
Lighting, Humidity, and Atmosphere
Lighting should be soft and diffuse—glow mushrooms are perfect for this, as they illuminate without overpowering the space. Avoid bright torches in the core zones; keep lighting secondary to growth requirements. Humidity and moisture come from the presence of mushrooms and the moisture-friendly blocks beneath, which support fungal growth and caste. Decorative mushrooms and fungal flora add atmosphere, but avoid overcrowding. A calm, shaded environment helps keep the biome stable and reduces the risk of Terraria’s unfavorable drought-like conditions that hinder mushroom expansion.
Maintenance and Progression
A mushroom biome isn’t static; you’ll want to expand, repair, and re-balance over time. Check growth rates weekly in-game, adjust lighting, and supplement with more spores if patches stall. Use the biome to support early and mid-game potions and fancier craftables, while providing habitats for friendly NPCs that prefer the warm, low-light ambiance. As you grow the biome, track resource yields and adjust your layout to maximize efficiency without sacrificing aesthetics. Remember Pixel Survival’s guidance: a well-maintained biome becomes a reliable source of materials and a calm retreat amid tougher biomes.
Authority Sources and Further Reading
For further reading and broader context, consult reliable gaming outlets and community resources that discuss biome design and farming in Terraria. These sources provide practical tips and design principles that complement a mushroom biome build. Pixel Survival emphasizes checking multiple viewpoints, testing ideas, and iterating on layouts to match your playstyle.
Tools & Materials
- Mud blocks(Enough to create base area (e.g., 10x10 tiles))
- Mushroom Grass Seeds(At least 5 seeds to start spreading)
- Glowing Mushrooms(Scatter to adjust lighting)
- Dirt blocks(Optional filler where needed)
- Torches or Lanterns(Light sources for setup before grass spreads)
- Decor fungus blocks(Aesthetic variety)
- Tools: Pickaxe, Hammer(To clear, shape, and refine the area)
Steps
Estimated time: 60-120 minutes
- 1
Choose the space
Identify a suitable area, ideally 12x12 to 20x20 tiles, that you can reserve for a dedicated biome. This space should be accessible for NPCs and farmers without interfering with other biomes.
Tip: Plan around a central hub to maximize convenience. - 2
Clear and level the ground
Remove obstacles and level surfaces to create a flat foundation. Flatten uneven terrain to ensure even Grass spread and easy planting of seeds.
Tip: Use a straightedge tool or grid helper to keep lines uniform. - 3
Lay the base blocks
Place Mud blocks to form the base layer. A solid foundation helps Mushroom Grass take root and spread more predictably.
Tip: Aim for a 2-3 block thick base to prevent patches from drying out. - 4
Plant Mushroom Grass Seeds
Distribute seeds across the mud/dirt base. Ensure even coverage so Grass can spread outward from planted points.
Tip: Space seeds evenly to avoid large bare gaps. - 5
Introduce light carefully
Place soft lighting with Glowing Mushrooms or lanterns to provide diffuse illumination without killing the biome’s natural growth.
Tip: Avoid over-bright sources in core zones. - 6
Add decorative flora
Add a mix of mushrooms and fungal decor to create a lush, coherent aesthetic that matches the Mushroom Biome theme.
Tip: Balance density with walkable space. - 7
Monitor growth and adjust
Observe Grass spread and check for signs of stagnation. If growth slows, add more seeds or adjust lighting and moisture to re-activate spread.
Tip: Keep a small log of the area’s growth pace. - 8
Integrate with progression
Plan NPC housing, potion farming, and crafting stations that benefit from the biome’s resources, ensuring it remains a living part of your world.
Tip: Label zones for quick navigation during a busy session.
Got Questions?
Can I create a mushroom biome on the surface or underground?
Yes, you can create mushroom biomes in both locations, but surface builds tend to be more visible while underground builds often have a natural glow and climate that suits the mushrooms.
You can create mushroom biomes on the surface or underground; each location has its own lighting and growth considerations.
What blocks form the base of a mushroom biome?
Mud blocks or dirt serve as the base to support Mushroom Grass growth. Mud provides a more stable base for fungal spreading.
Mud blocks or dirt form the base for mushroom grass growth.
Do lighting choices affect growth?
Yes. Diffuse lighting from glowing mushrooms or low-intensity sources supports growth while avoiding harsh shadows that slow movement and spread.
Lighting shapes how quickly the biome spreads; keep it soft and even.
How long does it take for the biome to mature?
Maturity depends on your layout and growth rates; expect several in-game days to see full spread, with ongoing maintenance improving yields.
Mushroom biomes grow over time; monitor and tweak as needed.
Can the mushroom biome be used for NPC housing?
Yes, many NPCs can live near a mushroom biome; plan housing blocks and access paths to keep the biome functional for daily tasks.
NPCs can live near or inside mushroom biomes depending on your design.
Watch Video
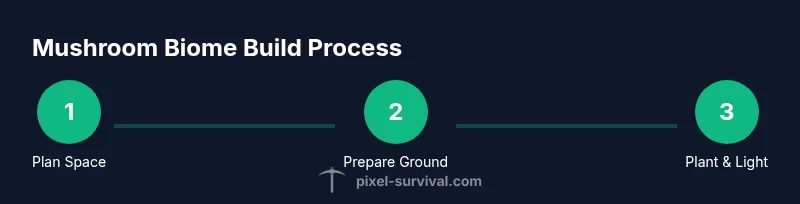
Key Points
- Plan space before blocks go down.
- Spread Mushroom Grass seeds for even growth.
- Diffuse lighting supports biome health.
- Integrate biome into farming and NPC housing.