Destroyer Terraria Boss Guide: Strategy, Gear, and Progression
Master the Destroyer Terraria with Pixel Survival's educational guide. Learn prep, arena setup, and a step-by-step plan to defeat this hardmode boss solo or with friends.

Destroyer terraria is a major hardmode boss with a multi-phase fight. This quick answer previews what you will achieve: reliable summons options, essential gear choices, arena layout, and a clear, step-by-step strategy to beat the boss solo or with friends. By following the plan you’ll maximize survivability, DPS, and loot quality across each phase of the encounter.
What is the Destroyer and why it matters
According to Pixel Survival, the Destroyer is one of Terraria's major hardmode mechanical bosses, a long, worm-like foe that challenges players to adapt through multiple phases. It tests your ability to track head segments, manage minion-like attacks, and maintain movement while staying out of the way of projectiles. Defeating the Destroyer unlocks access to stronger equipment and signals progression into mid-to-late hardmode. Understanding its patterns helps you build confidence before entering the arena, and it provides a template for handling other worm-like bosses later in the game. This fight rewards careful preparation and disciplined execution as you transition from early hardmode to the more demanding encounters that follow.
Quick facts you should know about this boss
- The Destroyer behaves like a rolling, multi-segment worm with a central head that launches attacks across the field.
- It scales in danger as its health drops, requiring adjustments in positioning and DPS.
- Loot typically includes advanced gear and crafting materials tied to hardmode progression.
- The encounter benefits from a well-constructed arena and consistent buffs to stay ahead of the fight pace.
Pre-fight mindset and expectations
A successful run against the Destroyer requires calm planning and steady execution. You’ll want to enter the fight with a verified loadout, ready backup weapons, and an arena designed to maximize your hit-and-run tactics. Remember that even if you fail on the first attempt, each try teaches you about the worm's movement and phase shifts, letting you refine your timing and dodging. Pixel Survival emphasizes patience, relocation, and keeping a sharp eye on the head’s path to avoid getting cornered. This mindset reduces panic and helps you sustain DPS across longer phases.
Why arena design matters for this fight
A proper arena reduces sprinting mistakes and provides safe zones to retreat when patterns get overwhelming. A wide, flat platform with accessible corners lets you outmaneuver the head’s charging moves and corralling segments. Lighting, campfires, and heart statues can improve survivability. Positioning also affects your ability to land hits during the head’s attack windows and to safely circle the boss as its segments sweep the arena.
How the guide is structured for you
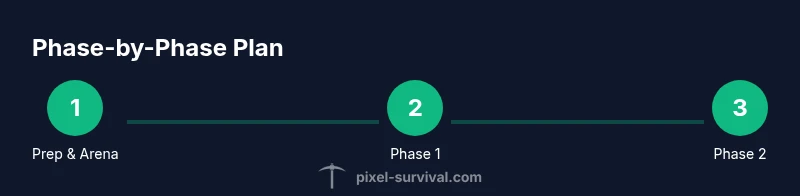
This article is broken into prep, arena setup, phase-by-phase tactics, gear recommendations, consumables, solo vs group strategies, and post-fight progression. Each section includes practical examples, quick-start checklists, and pro tips to help you learn rapidly and master the destroyer terraria encounter across different play styles.
Tools & Materials
- Reliable DPS weapon (melee or ranged)(Choose something with high effective DPS and good reach to hit multiple segments.)
- Mobility gear (boots/wings)(Sustain movement to dodge head and tail strikes.)
- Arena blocks and walls(Create a wide, flat platform with alternating zones for dodging and attacking.)
- Buff potions (Swiftness, Endurance, Ironskin)(Stack buffs before engaging and maintain them through the fight.)
- Healing items (food/health potions)(Carry enough to survive long sequences of hits.)
- Tech tools (grappling hook or mobility accessories)(Helpful for rapid repositioning if available.)
Steps
Estimated time: 60-90 minutes
- 1
Assemble your core gear
Before the fight, verify your primary weapon is ready, your mobility gear is equipped, and buffs are stocked. This sets a solid DPS baseline while keeping you agile during the fight.
Tip: Double-check your hotbar so you can switch quickly between offense and defense without breaking timing. - 2
Build a wide arena
Construct a broad, flat platform with ample space, good lighting, and at least one safe corner for retreat. The space lets you sidestep head sweeps and maintain range when needed.
Tip: Place heart statues or campfires at corners to maintain HP during long phases. - 3
Summon the boss
Trigger the fight using your preferred method for the Destroyer. Stand with room to maneuver and ready buffs before the head enters the arena.
Tip: Don't start too close to walls; keep a buffer so head patterns don’t trap you immediately. - 4
Phase 1: control space and DPS
During early health, focus on clean hits while avoiding body segments that lash out. Move in and out of attack windows to maximize DPS without taking unnecessary damage.
Tip: Use vertical movement to stay under the head when it charges across the arena. - 5
Phase 2: adapt to speed and range
As health drops past the halfway mark, the boss gains speed and different attack angles. Maintain distance, respect patterns, and press DPS during safe windows.
Tip: Be ready to switch to longer-range targets if you’re getting overwhelmed by close-quarters attacks. - 6
Endgame: finish strong
Keep your buffs active, dodge consistently, and push final hits during exposed moments. A steady rhythm helps you avoid panic during the last stretch.
Tip: Conserve healing items for the final phase; saving a resource can be decisive. - 7
Loot and upgrade
After victory, assess your loot and plan upgrades. This fight often unlocks stronger gear paths and materials for future progression.
Tip: Take notes on what worked well so you can repeat the pattern with improved tools.
Got Questions?
What is the best weapon type for the Destroyer?
The best weapon type is one that maximizes DPS while keeping you mobile. Both melee and ranged options can work if you maintain spacing and avoid getting trapped by the head segments. Adapt to your playstyle and upgrade path as you progress.
For most players, a high-DPS, mobile weapon that hits multiple segments works best. Adapt your choice to your gear and comfort level.
Should I fight the Destroyer solo or with friends?
The Destroyer is feasible to beat solo with the right arena and buffs, but a coordinated party can simplify positioning and DPS. In multi-player, assign roles to spread damage and healing.
Either approach works, but a small group can reduce pressure on individual players and help manage the fight pace.
Which potions are most useful for this fight?
Key potions include Swiftness for movement, Endurance for damage reduction, Ironskin for extra protection, and Healing Potions for recovery during long phases. Offensive buffs can also tilt the fight in your favor.
Swiftness, Endurance, and Ironskin are the top buffs to bring, plus healing on demand.
What loot can I expect after defeating the Destroyer?
Defeating the Destroyer yields hardmode-related loot that supports progression into stronger gear and materials. Loot variety helps you tailor upgrades for future bosses and craft lines.
You’ll gain gear and materials that push your hardmode progression forward.
How long does the fight typically take?
Typical engagements last several minutes, depending on gear, buffs, and arena layout. A patient approach often yields better DPS windows and survival.
Most runs last a few minutes, but preparation affects duration a lot.
What if I struggle on the first tries?
Review your arena spacing and try to improve mobility first. Small adjustments in positioning and timing can dramatically reduce damage intake and increase overall success.
If you’re stuck, tweak the arena and spacing, then retry with a refreshed buff setup.
Watch Video
Key Points
- Prepare a wide arena and mobile loadout.
- Phase awareness is essential for survivability.
- Buffs and healing sustain DPS longer.
- Loot upgrades unlock stronger progression paths.