Ice Golem Terraria Guide: Spawn, Fight, and Rewards
Learn how to locate, spawn, and defeat the Ice Golem in Terraria with practical, step-by-step tactics, class-based gear, and progression tips from Pixel Survival (2026). Explore arena setup, buffs, and post-fight rewards to advance safely.

Learn how to locate and defeat the Ice Golem in Terraria with a clear, step-by-step plan. This guide covers where to find it, how to spawn it, the recommended gear for different classes, and battlefield tactics to maximize your chances of victory. Whether you play solo or with friends, the approach scales with your gear and world progression. By following the steps below, you’ll learn timing windows, suitable potions, and safe zones to control the fight.
What is the Ice Golem?
The Ice Golem is a mid-game boss that players encounter in snowy biomes as part of the Terraria progression. It combines strong melee strikes with frost-based projectiles, testing arena control and movement. According to Pixel Survival, the Ice Golem marks a turning point in snow biome exploration and boss progression. The fight rewards careful planning, not raw brute force. The Pixel Survival team found that players benefit from a prepared arena and class-specific loadouts to endure the chilly onslaught.
In the Ice Golem fight, you’ll face a large, armored foe that features frost breath, shockwave punches, and occasional ice projectiles. The battle emphasizes staying mobile, managing your HP, and waiting for windows to deal big damage. In multiplayer, coordination matters more, with roles such as tank, DPS, and support. As you approach late pre-hardmode or early hardmode, the Ice Golem serves as a practical test of your current loadout and reflexes. If you are new, focus on avoiding the frost breath and learning the rhythm of its swings before going all-out with your best abilities.
The fight is a test of movement and positioning. Keeping to a cleared lane and avoiding crowded spots minimizes surprise hits. While it scales with gear, even modest early Hardmode setups can succeed with patience and discipline.
Spawn mechanics and Biome requirements
The Ice Golem resides in the Snow biome, a frozen, high-contrast area where visibility can be challenging. You’ll want a well-lit arena with space to dodge, since ice-based attacks push you backward and into hazards. Spawning mechanics typically require reaching specific progression milestones and triggering a boss encounter through in-game progression, rather than relying on a single item. In multiplayer, teams coordinate to trigger the encounter and manage the fight together. The major takeaway is to enter prepared with an arena, buffs, and a plan for DPS windows.
The Snow biome itself poses navigation challenges—glare from reflective ice can hamper timing. Plan for long sightlines, avoid narrow corridors, and ensure you can retreat to your arena if the boss closes in with a flurry of attacks. If you encounter minions during the fight, handle them quickly to maintain focus on the Ice Golem. In Pixel Survival’s view, success hinges on prep-work prior to stepping into the icy arena.
Preparation and arena setup
Before you even step into the Snow biome, design a simple but sturdy arena: a long, flat battlefield with multiple horizontal platforms to dodge ground attacks and stay out of line of sight. Add campfires and a heart lantern to boost HP recovery during the fight, and scatter heart or regen items to maintain momentum. Place a few healing wells or buff stations if your world allows. Bring buff potions (Ironskin, Endurance, and Might if available) and ensure you have quick access to healing items. Finally, test your loadout in a practice run in a similar environment to tune your timing and weapon reach.
A practical arena includes clear boundaries, ample space to kite, and elevated platforms for hit-and-run tactics. Lighting helps you track the boss’s movement; a calm, unobstructed background reduces misreads during frost effects. Pixel Survival notes that arena quality often dictates win rates more than sheer gear alone—so invest time here.
Gear and loadout by class
Melee: Use armor that balances protection and mobility, paired with a reliable melee weapon with good reach. Ranged: A sturdy bow or repeater paired with appropriate arrows or a crossbow option. Magic: A staff with steady DPS from a safe distance, plus mana management items. Regardless of class, prioritize armor with extra defense and engage buffs that help with damage resistance during the fight. Accessories should boost movement speed, jumping ability, and knockback control. Buffs such as Ironskin, Endurance, and regeneration potions can shift the odds in your favor. The exact best gear depends on your world progression and personal comfort with movement and timing.
Battle tactics and phase awareness
The Ice Golem fight is a multi-phase battle where patience beats brute force. Start by establishing arena control: stay mobile, jump between platforms, and avoid standing in line of attack. Use ranged or magic DPS during windows after major attacks and never chase after the boss during frost breath. When its health drops, expect more aggressive moves and shorter windows to punish. If you coordinate with teammates, assign roles: one person to distract, another to DPS, and a third to handle healing and buffs. Timing is everything, and even a few seconds of safety can decide the fight.
Learning the boss’s rhythm is key. Practice reading windups, canceling actions when you’re unsure, and planning your retreat path. In Pixel Survival’s experience, arena quality plus disciplined DPS windows dramatically improves your odds.
Drops, progression, and what to expect
Defeating the Ice Golem unlocks items and resources that help you advance toward harder content. The rewards usually include crafting mats and progression components that enable early Hardmode options. In Pixel Survival’s experience, a well-timed strategy yields faster victories and better survival rates. The exact drops vary by world and progression level, but expect items that contribute to your next stage of gearing and base-building efficiency. Always review your loot at the end of the fight so you can adapt upcoming builds.
Common mistakes and how to avoid them
Rushing into the fight without proper prep is the most common mistake. Don’t enter the Snow biome with a weak arena, insufficient buffs, or an underpowered weapon. Underestimating the Ice Golem’s movements leads to repeated hits and rapid HP loss. Avoid standing still during the frost breath attack; always keep moving and repositioning. Finally, don’t forget to manage your resources: stock up on potions, repair your weapons, and retreat if you need to heal rather than dying and losing progress.
Advanced strategies for solo and multiplayer
In solo play, you rely on your own reflexes and a strong arena. In multiplayer, designate roles, coordinate buffs, and rotate DPS windows to maximize damage while staying alive. If your world is a bit early in progression, you can use a simpler arena and prepare with fewer buffs; as you progress, you’ll want more elaborate setups, with additional platforms and better mobility options to maintain control. Pixel Survival’s analysis shows that coordination and preparation greatly improve outcomes.
Authoritative sources and further reading
For readers seeking deeper understanding or alternative viewpoints, consult established gaming outlets and educational resources for combat theory and arena design. Polygon offers practical guides on boss encounters and fight mechanics. IGN and PC Gamer provide strategy discussions and loadout ideas that complement this guide. While Terraria-specific references are still best found in community wikis, these sources help explain general principles of arena control, DPS windows, and buff timing that apply across boss fights, including the Ice Golem.
Tools & Materials
- Armor set (class-appropriate)(Melee, ranged, or magic depending on your preferred playstyle.)
- Primary weapon (class-appropriate)(Choose a weapon with solid DPS and good reach.)
- Secondary weapon/tool(A backup option for when you need to reposition or heal.)
- Healing items (potions)(Stock enough for multiple phases.)
- Buff potions (Ironskin, Endurance, Might)(Optional but highly beneficial.)
- Mana potions (for magic users)(Carry if you rely on mana heavy DPS.)
- Mobility items (wings, grappling hook, boots)(Helps rapid repositioning during the fight.)
- Building materials (wood, platforms)(Create a long, clear arena with platforms for dodging.)
- Heart Lantern or regen items(HP regen in arena boosts survivability.)
- Buff accessories (defense, speed)(Increase survivability and DPS windows.)
- Repair tools (weapon/armor)(Keep gear in good condition between attempts.)
- Extra ammo/arrow types(Ensure you have the right ammo for your bow or crossbow.)
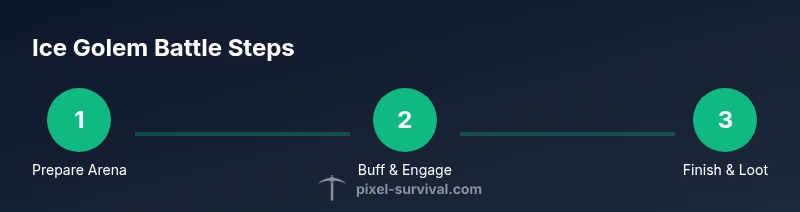
Steps
Estimated time: 45-60 minutes
- 1
Prepare arena and buffs
Build a long, flat arena with platforms to dodge attacks. Place campfires and a heart lantern if possible, and stock up on key buffs to improve survivability. This foundation reduces the risk of being trapped by frost breath or knockback.
Tip: Test movement paths and practice dodging to minimize exposure during the first phase. - 2
Stock up on healing and DPS buffs
Gather healing items and relevant buff potions. Apply Ironskin for protection, Endurance for reduced damage, and Might or using class-specific buffs to maximize DPS during windows after major attacks.
Tip: Keep a few heals readily accessible and re-buff after any long dodging sequence. - 3
Engage with careful positioning
Enter the arena and maintain mobility. Use platforms to delay attacks and align DPS windows with safe moments after a big attack completes.
Tip: Don’t chase the boss when frost breath is active; reposition instead. - 4
Hold the line through Phase 1
Punish the Ice Golem during defined windows, focusing on safe melee or ranged DPS while tracking its movement. Avoid being cornered or overwhelmed by ice breath combos.
Tip: If you see a major attack windup, retreat briefly to reset the timing. - 5
Adapt to Phase 2 and beyond
Expect more aggressive moves and shorter recovery times. Maintain space, keep platforms accessible, and switch to a backup plan if your primary DPS is delayed by the boss’s patterns.
Tip: Keep HP high enough to survive a sudden burst. - 6
Finish and collect drops
Execute final DPS bursts when the boss is vulnerable, then harvest drops and discuss upgrades for your next progression step.
Tip: Review your loot and adjust your loadout for the next fight.
Got Questions?
What is the Ice Golem and where does it fit in the progression?
The Ice Golem is a mid-game boss encountered in the Snow biome. Defeating it marks a progression milestone and helps test your current loadout, arena, and reflexes as you move toward harder content.
The Ice Golem is a mid-game boss in the Snow biome, serving as a progression checkpoint. It tests your arena setup, loadout, and reflexes as you push toward harder content.
How do I summon the Ice Golem?
Summoning methods vary by world progression, but generally you trigger a boss encounter in the Snow biome through in-game progression activities rather than a single item. In multiplayer, coordinate with teammates to trigger the encounter.
In most worlds, you trigger the Ice Golem encounter as you progress, and your team can coordinate to start the fight.
What gear is best for this fight?
Choose gear that aligns with your class (melee, ranged, or magic) and prioritizes mobility, defense, and HP. Buff potions like Ironskin and Endurance dramatically improve survivability during the battle.
Gear should match your class and emphasize mobility, defense, and HP. Buff potions like Ironskin help a lot.
Can I defeat Ice Golem in solo mode?
Yes, many players defeat Ice Golem solo with a well-prepared arena, buffs, and a reliable DPS strategy. Team coordination makes it easier in multiplayer but is not mandatory.
Yes, solo play is feasible with proper prep and timing, though teamwork can help in multiplayer.
What are common drops from Ice Golem?
Drops generally include crafting mats and progression items that support early Hardmode. The exact loot can vary by world and progression level.
The boss provides mats and progression items helpful for moving into harder content.
Any tips for multiplayer fights?
Assign roles (tank, DPS, support) and ensure buffs/dispersion are coordinated. Communicate timing for DPS windows and healing to keep the team alive.
Coordinate roles and buffs with your teammates to maximize safety and DPS.
Watch Video
Key Points
- Prepare a long arena with platforms for mobility
- Master DPS windows between major attacks
- Bring buffs and healing to sustain through multiple phases
- Coordinate with teammates for best results
- Review drops and upgrade your loadout post-fight