Terraria Boss Progression: What Bosses to Kill in Order
A clear, step-by-step guide from pre-hardmode to Moon Lord, outlining the best order for Terraria bosses, recommended gear, arenas, and strategies to maximize progression.

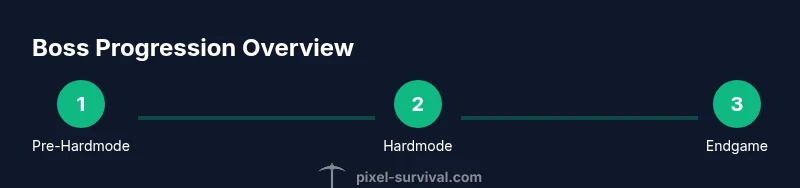
Terraria boss progression follows a practical path: start with pre-hardmode bosses like Eye of Cthulhu and Eater of Worlds (or Brain of Cthulhu), optionally King Slime, then defeat Wall of Flesh to enter Hardmode. In Hardmode, tackle The Destroyer, The Twins, and Skeletron Prime in a sensible order, then proceed to Plantera, Golem, and finally the Moon Lord. Duke Fishron is optional and can fit after Plantera but before the Moon Lord for a strong mid-game challenge.
What Bosses to Kill in Order: A Plain-English Roadmap
In Terraria, progression is a journey from smaller, early challenges to the Moon Lord. If you’re asking the primary keyword terraria what bosses to kill in order, you’re not alone. This guide gives you a clear, practical path you can follow, with gear, arenas, and pacing tips to keep you on track. The sequence helps you optimize drops, prepare for harder fights, and minimize downtime between bosses. Pixel Survival's team has found that a structured progression reduces frustration and increases overall success in later stages.
Pre-Hardmode Bosses: Foundations of your world
Your journey begins in a world that hasn’t yet entered Hardmode. The classic early fights teach you dodging, crowd control, and arena setup while awarding you essential loot. First up is Eye of Cthulhu, a fast, aggressive encounter that rewards you with early materials and a taste of boss mechanics. King Slime is optional but can set a light, fun tone for a fresh world. Eater of Worlds or Brain of Cthulhu will require you to explore the corruption or crimson biomes and encourage you to plan for later armor upgrades. Queen Bee in the Jungle is a strong mid-pre-hardmode boss if you’re exploring the biome, but it isn’t strictly required. Eye of Cthulhu and Eater/Brain provide the most reliable early drops to begin your armor and weapons journey. Pixel Survival analysis shows that players who clear these early bosses gain momentum and faster access to better gear.
Hardmode Trigger: Wall of Flesh and what comes next
Entering Hardmode is a milestone and demands substantial preparation. The Wall of Flesh fight marks the shift to late-game resources, new ores, and tougher enemies. Before you summon Wall of Flesh, ensure you have stronger weapons, full armor, and a well-constructed arena with healing stations and platforms for dodging. The first phase of Hardmode brings corrupted or crimson threats and new materials you’ll need for better gear. Pixel Survival’s data indicates that a solid Hardmode foundation—adequate potions, improved weapons, and arena design—dramatically increases your odds of surviving the first big fights and makes the later mechanical bosses less punishing.
The Three Mechanical Bosses: The Destroyer, The Twins, Skeletron Prime
After entering Hardmode, you’ll face three mechanical bosses. The recommended order is usually The Destroyer first, then The Twins, and finally Skeletron Prime. The Destroyer’s sheer mechanical damage tests your reflexes and keeps you in a learning loop for later fights. The Twins present a duo of fast-moving laser and projectile threats that reward you with crucial drops but require meticulous dodging. Skeletron Prime is mechanically complex, offering a broader swingset of attacks that reward strong mobility and weapon variety. Each boss contributes to your Biome access, ore yields, and new equipment that prep you for Plantera. If you’re better with ranged weapons, you might swap order between The Twins and The Destroyer, but the general progression remains the same. Pixel Survival’s analysis shows that fighting these bosses in a consistent sequence helps build a stable progression curve and reduces downtime between the Hardmode stage and the mid-late game.
Plantera and Jungle: The Mid-Game Push
Plantera is the gatekeeper to the strongest post-Hardmode conditions. You’ll typically reach Plantera after defeating all three mechanical bosses, which triggers its appearance in the jungles after a true progression flow. Gather Scourge and other Plantera drops to upgrade your weapons and armor. Plantera’s fight is a resource sink that tests your build and potion management, but it unlocks the next tier of loot, including Venus Magnum and hardmode ores. Jungle terrain and Plantera’s underground bulbs will guide your approach; bring a robust arena, effective mobility, and lane control to survive its powerful attacks. A well-timed Plantera kill paves the way for Golem and a bigger, more challenging endgame.
The Dungeon and Golem: Endgame Progression
After Plantera, the dungeon becomes a focal point for strong gear, life sustainability, and access to late hardmode materials. The Golem boss sits in the upper dungeon, guarded by pulses of energy and a circle of threats. Defeating Golem solidifies your hardmode progression and unlocks post-Golem content, including Duke Fishron and Moon Lord gatekeeping items. In many worlds, defeating Duke Fishron becomes a pivotal mid-to-late hardmode objective, especially for players who enjoy a unique, high-difficulty fight before Moon Lord. The crucial phase is ensuring you have the right gear, potions, and arena formations to maximize DPS while keeping you alive.
Moon Lord and the Final Frontier
Moon Lord represents the culmination of Terraria progression. Before stepping into the final battle, many players tackle Lunatic Cultist and the associated set of rituals that open the path to Moon Lord. Moon Lord’s many mechanics demand precise dodging, strong weapons, and perfect timing. You’ll want excellent mobility and the best available items from the prior stages. The Moon Lord fight is the ultimate proving ground for your build and reflexes, and finishing it marks a complete playthrough of Terraria’s core progression loop. If you’re aiming for a true completion, Moon Lord is your final boss, with Duke Fishron as a flexible optional mid- to late-hardmode boss you can include to round out your experience.
Variations by World Seed and Difficulty
World seeds and difficulty modes can influence boss timing and access. Some seeds yield easier early drops or shorter travel paths to biomes, while others reward players who strike a balance between exploration and efficient farming. On higher difficulties, you’ll find bosses hit harder and loot drops are more valuable, which can shift your timing for certain fights. The core progression remains consistent, but you’ll need to adjust your plan based on gear availability, resources, and personal playstyle. The key is to stay flexible while adhering to the overall order: pre-hardmode, Wall of Flesh, mechanicals, Plantera, Golem, then final endgame content. Pixel Survival suggests treating the order as a scaffold rather than a rigid script, so you can adapt to seeds and world quirks while keeping core milestones in sight.
Quick Reference Boss Order Checklist
- Pre-Hardmode: Eye of Cthulhu, Eater of Worlds or Brain of Cthulhu, King Slime (optional), Queen Bee (optional)
- Hardmode: Wall of Flesh
- Mechanical Bosses: The Destroyer, The Twins, Skeletron Prime
- Mid-Game: Plantera
- Endgame: Golem, Duke Fishron (optional), Lunatic Cultist, Moon Lord
Adopting this sequence helps you accumulate the right resources, upgrade your gear, and unlock late-game content without getting stuck. Keep a steady pace, stock up on potions, and maintain a flexible mindset for seeds and world variations. With discipline, you’ll see clear progression from the early game to the Moon Lord.
Quick Reference Boss Order Checklist (Continued)
- Optional side tracks: Duke Fishron, Queen Bee, and other biome bosses can be pursued if you enjoy optional challenges and extra loot. Always prepare an arena and refill potions before each fight.
Final Word: Crafting Your Own Progression Path
Your Terraria boss order should feel like a journey, not a sprint. Use this guide as a foundation, then tailor it to your world, gear, and playstyle. The best progress is the one you can sustain with consistent practice and smart risk management. Always balance aggression with safety, keep your potions stocked, and refine your arena layout as you upgrade gear. With patience and persistence, you’ll conquer every boss in order and reach the Moon Lord.
Bonus: Arena Design Tips for Each Stage
- Pre-Hardmode arenas should be simple but effective: plenty of space, vertical height for dodging, and accessible chests with basic potions.
- Hardmode arenas demand more robust layouts: multiple layers of platforms, automated heal zones, and reliable escape routes.
- Endgame arenas should focus on precision DPS windows and safe movement patterns to survive Moon Lord’s phases.
Tools & Materials
- Copper or Iron Pickaxe(Required to mine ore, build arenas, and access new biomes.)
- Copper or Iron Shortsword(Basic melee weapon for early boss fights and quick knockbacks.)
- Healing Potions(Carry enough to sustain lengthy boss fights.)
- Mana Potions (optional for magic builds)(Useful if you rely on magic weapons or spells.)
- A Bow with Arrows or Ranged Weapon(Helpful for kiting certain bosses; not strictly required.)
- Demonite or Crimtane Bars(Craft Hardmode weapons upon entering Hardmode.)
- Platform Kit (wooden platforms)(Essential for creating vertical arenas and dodging attacks.)
Steps
Estimated time: Total time: 10-20 hours
- 1
Gather essential gear
Collect a basic melee weapon, armor pieces, and potions to survive early boss fights. Upgrade as you find better gear from chests and ores. Keep a clear plan for improving your loadout as you progress through each stage.
Tip: Focus on armor that increases your survivability; early defense wins fights. - 2
Build an arena and stock potions
Create a flat arena with multiple platforms, adequate lighting, and healing zones. Allocate storage for potions and quick-heal items. A solid arena reduces movement time and helps you avoid boss mechanics.
Tip: Include a safety buffer for unexpected boss abilities. - 3
Defeat Eye of Cthulhu
Face Eye of Cthulhu with a prepared arena, using quick dodges and heals. Learn its sine-wave dash patterns and exploit its vulnerability window after its spins. Collect tissue samples and basic loot to upgrade early gear.
Tip: Keep your distance and slice through its segments to minimize hits. - 4
Defeat Eater of Worlds or Brain of Cthulhu
Choose either Eater of Worlds in the corruption or Brain of Cthulhu in crimson. Clear minions, manage adds, and control the battlefield with walls and platforms. Prioritize destroying the core or segments while avoiding projectiles.
Tip: Coordinate slicing waves to deny minion spawning; timing matters. - 5
Defeat King Slime
If you’re early in the game, King Slime offers a big early loot drop and a gentle introduction to boss mechanics. Position yourself to avoid its slam and use ranged damage to stay safe. This helps you to secure extra resources for upgrades.
Tip: Use multiple attempts to learn its attack rhythms. - 6
Summon Wall of Flesh
Prepare your materials, potions, and a durable arena to survive the Wall of Flesh’s phases. Bring well-rounded DPS and healing support to cope with its long, punishing phase. The final wave of corruption/undead adds can overwhelm you if you’re underprepared.
Tip: Bring extra health potions and ranged weapons to kite its eye and body segments. - 7
Defeat Wall of Flesh
Confront Wall of Flesh with a robust arena and steady DPS. Manage hellish minions and avoid grave boss mechanics, using pillars for cover. The post-Wall of Flesh loot unlocks Hardmode ore and new gear.
Tip: Stay mobile; your best defense is speed and healing when you’re cornered. - 8
Defeat The Destroyer
Face the Destroyer with upgraded gear and coordinated DPS. It emits laser Whale attacks and serpentine moves; a focused DPS window is key. Collect the mechanical parts and gears to craft stronger weapons.
Tip: Aim for its segments to maximize damage while avoiding its lasers. - 9
Defeat The Twins
The Twins require careful dodging of twin laser beams and fast orbs. Move with the fight rhythm, and break the support enemies to reduce pressure. Loots from this fight boost your Hardmode preparation.
Tip: Switch targets quickly to prevent overlap of hits and projectiles. - 10
Defeat Skeletron Prime
Skeletron Prime is a multi-leg boss; keep diagonal movement and dodge its rotating limbs. Use range or melee combos to hit the weak points while dodging heavy attacks. Reward includes critical post-Phases gear.
Tip: Keep your arena wide and clear to avoid getting trapped by limb attacks. - 11
Defeat Plantera
Enter the jungle and locate Plantera’s bulbs. Defeat Plantera to unlock a new tier of loot and resources. Its arena requires strong dodging and high DPS; be patient and avoid staying in one spot.
Tip: Plantera’s tentacles are deadly; focus on the main body when safe. - 12
Defeat Golem
Head to the dungeon and prepare for Golem, which uses powerful melee strikes and energy projectiles. Bring anti-air avoidance strategies and use terrain to your advantage. The loot improves your late-Hardmode options significantly.
Tip: A platform-rich arena helps manage the fight’s phase changes. - 13
Defeat Moon Lord
Moon Lord is your final challenge; prepare for a long, demanding fight with multiple mechanics. Maintain DPS through the phases, manage healing, and exploit openings after each phase. Defeating Moon Lord marks a complete progression run.
Tip: Practice the phase transitions to minimize confusion during the fight.
Got Questions?
What is the recommended first boss in Terraria?
Eye of Cthulhu is the standard first boss; it teaches basic mechanics and gives early rewards. You can also start with King Slime if you want a gentler introduction.
Eye of Cthulhu is the typical first boss; it teaches basic mechanics and gets you ready for harder fights.
Do I need to defeat all pre-hardmode bosses before hardmode?
Not strictly required, but clearing the primary pre-hardmode bosses helps you gather essential drops and practice the mechanics before Wall of Flesh.
Not strictly required, but it’s wise to clear major pre-hardmode bosses to prepare for Wall of Flesh.
Can I skip some bosses to reach Moon Lord faster?
Technically possible, but skipping reduces access to valuable loot and upgrades that make Moon Lord easier to defeat. A structured path yields a cleaner progression.
You can skip, but you’ll likely make Moon Lord harder; a steady progression is usually better.
What changes in 1.4 compared to earlier versions for boss order?
Version 1.4 reworks some boss spawn conditions and loot, encouraging more flexible progression but preserving the core order: pre-hardmode, Wall of Flesh, mechanicals, Plantera, and endgame bosses.
Version 1.4 adjustments keep the core progression but offer more flexibility with loot and spawns.
Is Duke Fishron required to beat Moon Lord?
Duke Fishron is optional; it’s a tough mid-to-late Hardmode fight that players often tackle before Moon Lord for a strong challenge and loot.
No, Duke Fishron isn’t required; it’s an optional, challenging side boss before Moon Lord.
How long does a typical progression run take?
Times vary widely based on world seeds and player skill, but a full progression run generally ranges from several hours to many sessions across days.
Times vary a lot, but expect several hours to complete the full progression.
Watch Video
Key Points
- Follow a structured boss order to optimize progression.
- Prepare arenas and potions before each fight.
- Hardmode prerequisites unlock stronger gear and later content.
- Plantera, Golem, and Moon Lord are endgame milestones.
- Duke Fishron is optional and can be fought after Plantera.