Armor Terraria: A Practical Step-by-Step Progression Guide
Learn to collect, craft, and upgrade armor in Terraria with a clear step-by-step guide. From early wooden sets to endgame protection, Pixel Survival explains the progression.

Armor terraria progression guides you from basic, low defense gear to endgame sets that dramatically boost survivability. This quick answer highlights milestones, prerequisites, and where to farm materials benches and upgrades. You will learn when to craft each tier and how to balance defense with mobility offense and resource management for smoother progression.
Overview and goals of armor terraria progression
In Terraria armor is your first line of defense and a reliable way to survive harsher encounters. armor terraria progression means upgrading gear as you unlock new materials and face tougher foes. According to Pixel Survival the progression ladder starts with simple low defense gear and climbs to endgame sets that reduce damage across many situations. The guide walks you through the ladder step by step, explains why each tier matters, and offers practical tips to avoid common missteps. You will learn when to craft what materials to farm and how to balance defense with mobility offense and resource management. By understanding the logic behind armor terraria you can plan routes through the game world with confidence rather than chasing random drops. The goal is not to memorize a long list of numbers but to build a coherent path for your class world settings and playstyle and then follow it with deliberate farming and crafting. With a solid armor strategy you will spend less time dying and more time exploring building and boss fighting.
Core principles of armor design and protection
Armor design in Terraria centers on defense value set bonuses and mobility tradeoffs. Each armor piece provides defense and often grants a bonus that applies when wearing all pieces from a set. The better the defense the more damage you mitigate which changes how you survive quick encounters and long boss fights. Mobility is also critical; some armor sets trade extra protection for speed or special abilities like dodge or magic focus. The best armor in any given moment balances protection with mobility and the class and world difficulty. Remember that a stronger set might be heavier and slower while lighter armor improves movement but reduces damage reduction. The interplay between defense movement speed and set bonuses creates a dynamic toolkit you should tailor to the current biome and boss exposure. Pixel Survivalrens emphasis planning ahead armor choices rather than chasing random drops. A deliberate plan reduces downtime and increases success in exploration and combat.
Early game armor options and how to obtain them
Your first armor sets are built from copper tin or wood depending on your world seed. Wooden armor is a basic starter option while copper or tin armors provide modest protection and unlock better crafting tiers. If copper or tin is not available you can move to iron or lead armor which offers a solid upgrade without losing access to essential crafting benches. Basic sets do not rely on rare drops so you can assemble them quickly after you establish a small base. Collect ore from nearby caves and craft armor pieces at a basic workbench. Crafting a simple chest piece leggings and helmet gives you practical protection while you focus on gathering resources to reach the next tier. Keep a few healing items on hand and manage light sources to reduce niche hazards while you experiment with the new armor.
Mid game armor options and how to advance
As soon as you can forge tin lead silver or tungsten you will notice a jump in protection. Silver and tungsten sets provide better defense than iron or copper and unlock access to improved weaponry and tools. At this stage you will also rely more on encounter knowledge and terrain to survive. You should aim to combine armor with improved mobility such as boots or weapons that grant better reach. Crafting this stage requires a furnace to smelt ore into bars and an anvil to craft the armor pieces themselves. Plan your farming routes to maximize ore yields and consider building a small mining outpost near a shallow cave. This approach keeps your supply of bars consistent and reduces downtime between armor upgrades. With careful planning you can move toward harder modes without losing momentum.
Hardmode transition and mid to late hardmode armor
Hardmode armor sets rely on rarer metals such as mythril and orichalcum or their equivalents, plus later options like adamantite and titanium. You want to collect enough bars to craft a complete set and keep an eye on the merchants and modifications that can increase your equipment synergy. Upgrading to these sets dramatically improves damage mitigation and survivability against boss patterns and biome hazards. You also gain access to better crafting materials and new gear slots that complement your playstyle. Make sure to build a small workshop with a reliable source of ore and a backup furnace to keep pace with upgrades. This stage is a bridge between midgame exploration and true endgame progression.
Endgame armor and the best options for DPS and durability
At the late game chlorophyte armor provides robust defense and good bonuses for magical or range builds while turtle armor remains a staple for tankier melee play. Spectre or other mage oriented sets may offer additional energy or life regeneration for spellcasters. For most players chlorophyte and turtle armor represent a practical core while other specialized sets demand deeper materials and longer farming sessions. When choosing endgame armor consider your preferred weaponry mobility and boss patterns. You may swap between sets based on the fight type or biome you explore. The key is to anticipate boss windows and prepare your loadout in advance so you can switch quickly between encounters. Pixel Survival highlights that endgame armor is about sustainability across long boss runs and multiple biomes rather than chasing the strongest single piece.
Upgrading arms through reforging and prefixes
Reforging is essential for squeezing extra performance from your armor. Take your set to the goblin tinkerer or corresponding NPC and reroll prefixes to improve defense or damage bonuses. prefixes also adjust critical hit rates and overall survivability. The best prefixes depend on your class and playstyle; melee players may favor hardy or strong prefixes while mage builds benefit from energy or mana regeneration bonuses. Reforging is most cost effective after you gather enough resources so you do not waste precious materials. This step is often overlooked but can make the difference in boss fights by providing a stable upgrade path without crafting new sets. Pixel Survival Team notes that a thoughtful reforging plan aligns your armor with your weapon choices and surviving longer in high risk encounters.
Crafting stations and the required materials
Gath er and organize your stations early. You need a workbench to unlock early recipes a furnace to smelt ore into bars and an anvil to craft metal armor. As you progress new crafting benches unlock additional armor sets. Keep a stash of common ores such as copper iron silver and tungsten to avoid delays. Each armor piece requires a specific bar and set of mats so plan ahead for the next tier. Building a small crafting corner near your base speeds up upgrades and reduces backtracking.
Tools & Materials
- Workbench(Needed to craft basic armor at early stages)
- Furnace(Smelt ore into bars required for armor upgrades)
- Anvil(Craft metal armor pieces using bars)
- Ore(Mine copper iron tin lead silver tungsten mythril orichalcum cobalt palladium for bars)
- Bars(Bars produced from ore, used to craft armor sets)
Steps
Estimated time: 60-120 minutes
- 1
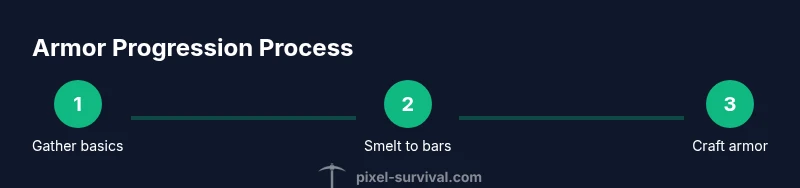
Gather basic ore and craft a workbench
Begin by mining copper or iron ore and place a workbench near your base to unlock early armor recipes. This initial step sets the foundation for all future upgrades and ensures you can craft protective pieces quickly.
Tip: Carry a reliable pickaxe and enough light to explore shallow caves. - 2
Smelt ore into bars
Use a furnace to smelt your collected ore into bars. Bars are the resource you will use to craft metal armor and upgrade from basic sets.
Tip: Smelt in batches to save time and space in your inventory. - 3
Craft early armor pieces
With bars and access to an anvil, craft the basic copper or iron armor set. These pieces provide real protection and free up your early weapons to handle tougher foes.
Tip: Aim for a balanced helmet chest and leggings set to maximize defense. - 4
Test and transition to mid-game gear
Equip the best available early set and evaluate how you survive boss encounters and biome hazards. Gather more ores to transition into tin lead or silver armor as soon as possible.
Tip: Keep healing items ready and re-evaluate after each boss fight. - 5
Move to mid-game armor
As you obtain silver tungsten or related bars craft mid-game sets. These pieces offer significantly higher defense and unlock better tools and weapons to tackle stronger enemies.
Tip: Build a small mining outpost to secure steady ore flow. - 6
Prepare for hardmode armor
Hardmode requires rarer metals such as mythril and orichalcum or their equivalents. Collect enough bars to craft a complete set and align with available gear slots.
Tip: Don’t rush upgrades; verify you have a stable mining routine before upgrading. - 7
Refine through reforging
Visit the Goblin Tinkerer to reforge armor prefixes that increase defense or damage. Tailor prefixes to your class and playstyle for best results.
Tip: Aim for prefixes that enhance your primary playstyle rather than random bonuses. - 8
Endgame pricing and loadout management
Keep a rotating armor loadout for different boss fights and biomes. Endgame sets like chlorophyte or turtle provide durability and versatility across encounters.
Tip: Practice quick loadouts to swap gear between fights.
Got Questions?
What is the best armor for the early game?
For early play the wood or copper/iron sets provide the clearest upgrade path without requiring rare drops. Choose one based on the ore you can access first and craft immediately. These sets give enough protection to survive while you gather materials for mid tier upgrades.
Early game armor should be copper or iron or wooden sets; pick what you can craft quickly and start upgrading as soon as possible.
How do I reforged armor prefixes and when should I do it?
Reforging adjusts prefixes to improve defense or damage. Do it after you have a stable resource pool and enough time to farm. Focus on prefixes that complement your main weapon and combat style.
Reforge after you have resources; choose prefixes that boost your main damage type and survivability.
When should I upgrade to hardmode armor?
Upgrade to hardmode armor as soon as you have access to mythril or orichalcum or their equivalents and enough bars to craft a full set. Hardmode armor dramatically improves survivability against tougher bosses and biomes.
Switch to hardmode armor when you can craft a full set from mythril or orichalcum and you are ready for tougher fights.
Can I mix armor pieces from different sets?
You can mix pieces from different sets; however set bonuses often require wearing the full set to activate. Mixing pieces gives you flexibility but may reduce some set bonuses.
Yes you can mix pieces, but you may miss out on set bonuses by not wearing a full set.
What materials are needed for endgame armor options?
Endgame options typically require chlorophyte or turtle related materials. Gather ores, craft bars, and assemble the complete armor set through the appropriate bench. These sets deliver solid protection and versatility for long boss runs.
Endgame armor uses chlorophyte or turtle materials, requiring steady farming and proper crafting steps.
Does armor affect magic and melee differently?
Armor affects defense for all classes, but some sets grant bonuses that favor certain playstyles. Choose armor that aligns with your main weapon or build to maximize overall effectiveness.
Armor sets influence your defense as well as class bonuses; pick a set that supports your chosen build.
Watch Video
Key Points
- Plan upgrades with a ladder mindset
- Craft at the right benches to unlock recipes
- Reforge prefixes to suit your class
- Balance defense mobility and offense for smooth progression
- Endgame options like chlorophyte and turtle armor offer strong versatility