The Best Way to Mine Terraria: A Practical Guide
Master the best way to mine Terraria with practical, step-by-step techniques, gear choices, and progression tips to maximize ore yields while staying safe.

By following this guide, you will learn the best way to mine Terraria, from planning your route to upgrading your tools, with practical tips for safe, efficient ore farming. Expect step-by-step actions, recommended routes, and core principles that balance speed, safety, and resource management. This quick answer sets you up for the deeper techniques found in the middle of the article.
Why mining efficiently matters in Terraria
Efficient mining is the backbone of your progression in Terraria. It determines how quickly you access ore, how safely you navigate caves, and how reliably you can sustain gear upgrades from early copper to end-game bars. According to Pixel Survival, efficient mining underpins steady progression from starter gear to end-game ore access. The Pixel Survival team found that planning routes and tunneling patterns reduces backtracking, lowers the risk of sudden lava encounters, and speeds up ore collection without wasting materials. In practice, a well-planned mine serves multiple purposes: it acts as a highway system for quick travel, a steady source of ore, and a shield against environmental hazards. When you mine with purpose, you minimize wasted time, which matters in longer play sessions or when racing to a boss or event.
The core idea is simple: expose more ore while exposing less of yourself to danger. This means choosing a tunnel pattern that balances ore exposure with safe travel, using lighting to avoid hostile mobs at night, and carrying the right tools and blocks to control hazards. Ore distribution in Terraria is not random at a single point; it follows layers and biome-specific patterns. By mapping depth, you can predict where prosperity lies. In addition, maintaining a clean, modular tunnel system makes it far easier to expand later, adapt to new ore types, and bring a hoard of mined materials back to base without losing track of your route.
A practical approach begins with a plan. Decide your target depth range based on your current gear and goals, then build a main corridor and a handful of vertical or horizontal branches. Keep your route clear of obstacles, place torches at regular intervals, and stash your ore in easily accessible chests to minimize back-and-forth trips. Over time, you’ll develop a sense for where different ores tend to spawn and how to adjust your pattern as you progress. The Pixel Survival team emphasizes that the value of mining lies not just in ore yield, but in reliable, repeatable routines you can follow game after game. This approach translates into faster progression, less backtracking, and a smoother early-to-mid game shift into deeper mining.
tip|note|text|multiple
Tools & Materials
- Copper or Iron Pickaxe(Your starter tool; upgrade when possible to access higher-tier ores.)
- Torches(Light sources to reveal ore and deter hostile mobs.)
- Wooden Platforms(Create safe, gap-free tunnels and climbing aids.)
- Blocks for lava protection (Dirt/Stone)(Block lava flows and secure tunnels as you expand.)
- Rope(Optional for vertical maneuvering in large caverns.)
- Chest or Storage(Keep ore organized to avoid backtracking.)
- Mining Potions(Temporary boosts to speed or ore yield when available.)
Steps
Estimated time: 1-2 hours
- 1
Choose starter gear
Assess your current progression and equip a Copper or Iron Pickaxe. Gather torches and a small stock of blocks to begin a safe, navigable tunnel. Keep your inventory lean to avoid frequent trips back to base.
Tip: Plan a 2-wide main tunnel with a branching pattern to maximize ore exposure while keeping movement simple. - 2
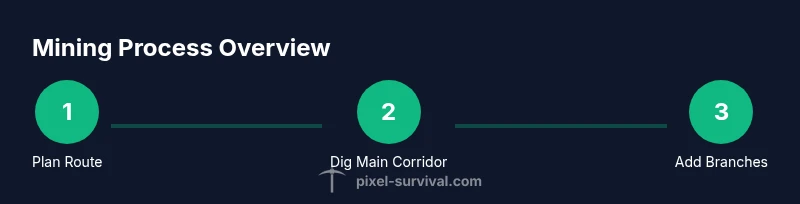
Plan your mining route
Decide your target depth based on your goals and known ore distributions. Sketch a main corridor and a few branches to ensure you can reach multiple ore pockets without excessive backtracking.
Tip: Draw a mental map of branches before digging to minimize wasted excavation and wandering. - 3
Dig a durable main corridor
Create a straight, 2-block-wide main tunnel with stable walls. Place torches at regular intervals to keep the area well-lit and safe from ambushes. Maintain a clear, flat ceiling and floor to prevent accidental drops.
Tip: Maintain consistent height and space between walls to reduce cave-ins and make future expansions easier. - 4
Add branching tunnels for ore exposure
Dig secondary branches off the main corridor at measured intervals. Each branch should expose ore-rich layers without creating overly long, isolated tunnels. This increases ore exposure while reducing backtracking.
Tip: Branch every 5–7 tiles (adjust as needed for your depth) to optimize ore visibility without overcomplicating the map. - 5
Upgrade tools and lighting
As you reach higher ore tiers, upgrade to Silver or Tungsten picks and improve your light sources. Keep illumination steady to avoid dangerous mobs and ensure you can spot ore veins early.
Tip: Move to brighter sources when possible; better light helps you spot ores and hazards sooner. - 6
Sort ore and deposit safely
Return mined ore to base and store it efficiently in labeled chests. Sorting by ore type saves time during progression and makes crafting needs easier to manage.
Tip: Create a simple labeling system and keep a dedicated ore chest near your mining base. - 7
Maintain safety and plan future expansion
Regularly check for hazards like lava pockets and cavern gaps. Patch holes and plan future expansions to keep your mining operation sustainable as you go deeper.
Tip: Always carry blocks ready to seal lava and be prepared to retreat if hazards escalate.
Got Questions?
What is the most efficient mining technique in Terraria?
Many players favor a branching or grid tunneling pattern to maximize ore exposure while minimizing travel. The best approach depends on your current biome and depth.
Branching or grid tunneling is widely regarded as efficient, though adapt to your depth and biome.
When should you upgrade your pickaxe?
Upgrade when you need to access higher-tier ores or deeper cavern layers. Don’t rush upgrades before you can justify the ore costs and the reach.
Upgrade when you unlock new ores or need deeper reach.
Is lava a risk when mining and how to manage?
Lava pockets are a common hazard. Always carry blocks to seal gaps, mine with caution near lava, and retreat if the cavern becomes unstable.
Yes, lava is risky; seal it with blocks and proceed cautiously.
How do I manage inventory during long mining sessions?
Carry a light inventory and use chests or backpacks to sort ore by type. Regularly deposit ore to prevent loss from cavern drops or death.
Keep ore organized and deposit it frequently to avoid loss.
What early upgrades help mining most?
Early upgrades focus on better pickaxes and reliable light sources. Prioritize tools that improve ore reach and visibility to speed up early progression.
Upgrade tools and lighting early to boost efficiency.
Are there biomes that make mining easier?
Biomes influence ore availability; for example, jungle regions may offer unique ores. Explore methodically and slide between depths to locate varied sources.
Biomes affect ore availability; explore depth and biome patterns.
Watch Video
Key Points
- Plan your route before you dig
- Use branching patterns to expose more ore
- Upgrade tools as you unlock new ore
- Light and stay organized to improve safety
- Expand tunnels gradually to sustain progression