Terraria Shattered Community: How to Get It – A Practical Guide
Learn how to obtain the Shattered Community in Terraria with Pixel Survival's step-by-step guide, covering prerequisites, farming routes, and pro tips. Useful.

This quick answer confirms that you can obtain the Shattered Community by progressing through Terraria’s mid-to-late stages, locating the shattered biome, and farming the required materials at the right crafting station. The steps are straightforward: gather gear, explore the biomes, collect shards, and assemble the item at the appropriate station. Pixel Survival provides a practical path to unlock it.
What the Shattered Community is and why you want it
If you're asking about the terraria shattered community how to get, you’re in the right place. According to Pixel Survival, the Shattered Community is a late-game craftable component that consolidates several hard-to-find resources into a single, powerful utility. It often unlocks new crafting options and synergizes with builds that rely on cross-biome progression. The Pixel Survival team found that players who follow a structured route reach this objective more reliably than those who improvise farming sessions. Understanding its role early helps you map your inventory, plan boss fights, and time your farming cycles with shard drops. In short, this item marks a clear milestone in your progression and can streamline your crafting workflows, especially when you’re aiming for endgame setups. This section lays the groundwork for what you’ll obtain, where to farm, and why it matters to your build path.
The key idea is to balance exploration with resource grinding. As you pursue the Shattered Community, you’ll coordinate farming runs with your map’s biomes, the frequency of shard spawns, and the availability of crafting stations. It’s not just about collecting components; it’s about orchestrating them into a coherent progression plan. Pixel Survival’s approach emphasizes preparation, efficient routing, and patience, so your runs stay sustainable rather than exhausting. With the right mindset, you can integrate this item into multiple class builds and adapt your routes as patches and world seeds change.
Prerequisites and preparation before you start
Before you head into the shattered biome and begin collecting shards, make sure you’ve set up a solid foundation. This phase focuses on progression readiness, gear quality, and world-aware planning. First, confirm you’ve reached a mid-to-late stage of the game, unlocking the biomes or biomes-equivalent where shards drop. Then assemble a defensive loadout and a versatile weapon suitable for the local enemies you’ll encounter. Stock up on healing items and utility gear that improves mobility and safety, since fights can occur in cramped or dynamically changing environments. A compact inventory setup helps you conserve space for shard drops and crafted components. The Pixel Survival team notes that players who align their gear and potions with the anticipated shard sources experience fewer interruptions and more consistent farming sessions. Finally, map out a rough route that minimizes backtracking, so you can focus on efficient farming rather than wandering aimlessly. Put simply: ready your gear, ready your plan, and ready your map before you start.
Where to farm and how to locate the shattered biome effectively
Finding the right farming grounds is crucial. The shattered biome is a late-game zone with distinct environmental features and specific drop sources. Start by scouting for biome-aligned terrain that houses the shard-generating structures or mobs you need. If you’re unsure, reference your world seed and look for landmarks that correlate with shards’ drop layers. Prepare a safe route that includes escape pathways and lit corridors to deter hostile encounters. The goal is to create a reliable farming loop: travel to a shard-rich area, farm for a defined window, retreat to a safe zone, and repeat until you’ve collected the necessary components. Keep an eye on resource spawns, because shard drops can be time-bound or dependent on lunar or event cycles. The strategy is to stay mobile, adapt to weather or enemy spawns, and avoid getting overwhelmed by clusters of foes. A well-choreographed rotation reduces downtime and increases your shard yield over multiple cycles.
Farming routes and material collection strategies
Once you’ve confirmed prerequisites and located the shard sources, design a farming route that minimizes downtime and maximizes material throughput. Create a primary loop that visits the shard sources in a consistent order, then branch to secondary spawns if you’re missing a particular item. Carry portable light sources to illuminate darker corridors and reduce the risk of ambushes, and bring a quick travel method to return to your base for crafting once you’ve gathered enough basics. In this section, we emphasize keeping your inventory organized so you can immediately pick up newly dropped shards without losing track of your current loadout. The goal is to establish a predictable cadence: engage enemies, collect shards, return to a safe spot, and repair or re-equip as needed. Over time, you’ll refine this loop to compensate for random drops and world-specific quirks. Pixel Survival analysis shows that players who maintain consistent routing complete the objective more reliably than those who improvise hunts.
Common obstacles and how to overcome them
No farming route is flawless. You’ll likely encounter crowded spaces, aggressive mobs, and occasional drop scarcity. Stay patient and use defensive maneuvers to manage crowds, push through bottlenecks by clearing mobs in waves, and avoid dead-end tunnels that waste time. If shard drops lag, switch to a backup route or adjust your equipment to improve survivability. Keep your health topped up and don’t fight beyond your capacity to escape safely. If you reach a point where progress stalls, regroup in a safe zone, reassess your gear and drops, and consider alternating farming rhythms between short, intense bursts and longer, steady loops. The aim is consistency; random, lengthy hunts tend to produce fewer shards per hour. A measured approach helps you maximize gains while reducing the risk of death or fatigue during extended sessions.
Pixel Survival’s team underscores that deliberate pacing often yields faster long-term results than sprinting through every possible dungeon in one sitting.
Verdict and final recommendations
The Pixel Survival team recommends adopting a structured farming plan and timing your shard collection with crafting station availability. By combining careful routing, robust defense, and efficient looting, you can obtain the Shattered Community without burning out. If you’re new to this goal, start with small, repeatable farming loops and gradually expand as you gain confidence and resources. The guide emphasizes sustainable play—don’t push beyond your comfort zone just to rush the objective. With patience and the right route, you’ll reach the Shattered Community and unlock its crafting potential to enhance your endgame builds.
Tools & Materials
- Iron Pickaxe or better(Essential for mining paths and world landmarks)
- Steel/Metal Armor set(Protects you during longer farming runs)
- Health Potions (x20)( sustain during tough encounters)
- Mana Potions (x5)(Needed for magic builds)
- Torch or Light Source(Light up dark areas while farming)
- Grappling hook or mobility item(Enhances traversal)
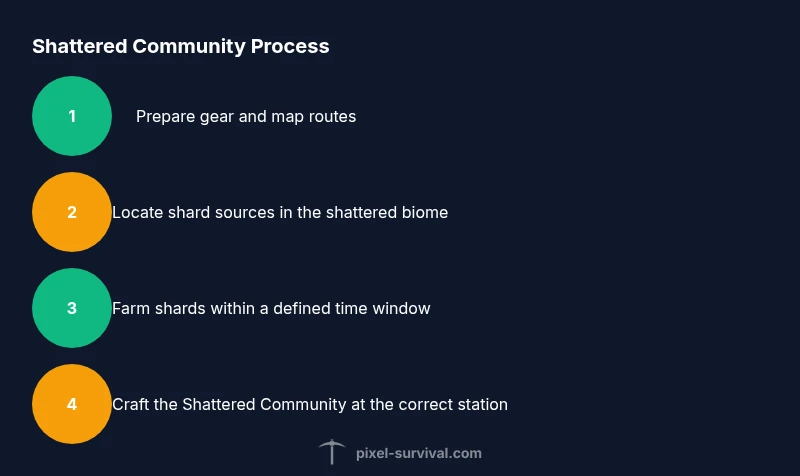
Steps
Estimated time: about one to two hours
- 1
Prepare your world and loadout
Gather gear, stock potions, and map a rough route to shard sources. Ensure you have mobility tools and a safe plan for retreat. This reduces downtime and risk during early attempts.
Tip: Bring extra healing items and a backup light source in case of extended dark corridors. - 2
Equip the right gear
Equip armor with solid defense and a versatile weapon. Buffs and accessories that improve movement or defense are valuable for controlled farming runs.
Tip: Prioritize items that boost survivability as you’ll encounter multiple mobs per spot. - 3
Find the shattered biome fragment
Scout for the shard source locations and landmarks typical of the shattered biome. Use your map and quick travel to verify a drop-friendly zone before committing to a long loop.
Tip: If your map doesn’t clearly show shards, switch to a backup route you’ve tested in prior runs. - 4
Begin the primary farming loop
Enter the shard zone and start collecting shards within a defined time window. Return to a safe area to bank drops and assess your inventory.
Tip: Keep a tight rhythm: loot, retreat, inventory check, repeat. - 5
Allocate resources to crafting
After you’ve accumulated the base shard count, head to your crafting station and assemble components needed for the Shattered Community item. Ensure you have all required materials before starting.
Tip: Double-check the crafting bench requirements so you don’t waste trips. - 6
Handle bottlenecks and adjust
If you’re short on a material, pivot to secondary drop sites or temporary alternative routes. Save new routes for future runs once you confirm their efficiency.
Tip: Document successful routes for quicker repeats later. - 7
Finalize the craft
With all pieces in your inventory, craft the Shattered Community at the required station. Confirm you’ve completed the recipe and securely store the item.
Tip: Keep an eye on space; unused shards can clog your inventory during a long session. - 8
Review and optimize for next time
Reflect on what worked, what didn’t, and how to minimize travel time in future runs. Adjust routes, gear, and timing for an improved harvest on subsequent attempts.
Tip: Build a simple checklist to streamline future farming sessions.
Got Questions?
What is the Shattered Community in Terraria?
The Shattered Community is a late-game craftable component that aids cross-biome progression and expands crafting options. It’s designed for players pursuing high-end builds and efficient progression.
The Shattered Community is a late-game craftable that enhances your crafting options and progression.
Where do I farm the required shards?
Shards drop in the shattered biome or its equivalent late-game zones. Explore safe routes, monitor shard spawns, and use efficient loops to gather them.
Shards are found in the shattered biome; use efficient routes to collect them.
What progression should I have before attempting this?
Aim to reach a mid-to-late progression stage with reliable mobility and survivability. This ensures you can safely navigate shard zones and survive encounters.
Reach mid-to-late progression with solid mobility to survive shard zones.
Is farming for the Shattered Community time-consuming?
Farming can take multiple sessions depending on world seed and shard drop rates. A well-planned route reduces wasted time and increases efficiency.
Yes, it can take a few sessions, but planning helps a lot.
Can I trade for shards or components?
Shards are generally obtained through farming and defeating certain mobs. Trading with NPCs may not yield the required components, so farming remains essential.
Shards come from farming and fights, not typically from trading.
What should I do if patches change the recipe?
If patches adjust the recipe or drop rates, revert to the updated farming routes and check patch notes for new sources. Keep your strategy flexible.
Always check patch notes for any recipe changes and adapt.
Watch Video
Key Points
- Plan a structured farming route for shards
- Prepare robust gear and healing items
- Use safe routes and consistent loops to maximize drops
- Craft the Shattered Community at the appropriate station
- Review and optimize routes after each session