Demolition Terraria: A Practical How-To Guide
Learn practical, step-by-step demolition in Terraria. This guide covers explosives, timing, safety, and rebuilding to clear terrain efficiently while avoiding common mistakes.

Master demolition terraria with a practical, step-by-step approach to clearing terrain using explosives and safe techniques. You’ll learn the best tools for terrain removal, how to plan blast patterns, timing detonation to minimize falls, and how to rebuild efficiently after a big clearance. This guide also covers safety considerations and avoiding common mistakes that slow progress.
What demolition terraria really means
Demolition terraria is the practice of clearing large swaths of terrain using controlled blasts and strategic placement of explosives. It isn’t about reckless destruction; it’s about precision, planning, and minimizing collateral damage to your builds and loot. In Terraria, efficient demolition starts with defining a scope, choosing the right explosive tools, and aligning your actions with how the terrain responds to blasts. According to Pixel Survival, mastering terrain clearance begins with a clear objective, a safe testing patch, and a plan that accounts for water, lava, and nearby structures. The goal is to create a workable tunnel, room, or open area without wasting resources or triggering unintended explosions.
This guide uses demolition terraria as a framework: you’ll map your blast zones in advance, select the appropriate toolset, and follow a repeatable sequence that can be adapted to different biomes and world seeds. You’ll also learn how to rebuild efficiently, turning a cleared area into something useful rather than a barren crater. Throughout, keep your server rules and multiplayer etiquette in mind to avoid conflicts with teammates.
Safety first: risks and safeguards
Safety is the cornerstone of any demolition effort in Terraria. Explosives can cause unintended terrain changes, trigger lava flows, or damage nearby structures if you’re not careful. Start by defining a safe boundary, marking the blast zone with temporary blocks, and keeping followers at a safe distance. Water and lava are especially risky: water can redirect blast effects, while lava can instantly destroy or corrode tiles and items. If you’re playing in multiplayer, communicate detonation times clearly and use designated hotzones to prevent accidental exposure.
The scope of demolition should stay within your planned area, and it’s wise to practice on a small test patch before attempting large-scale clears. Pixel Survival emphasizes planning, testing, and documenting a blast pattern before you commit to a full rollout. A careful approach reduces resource waste and helps you preserve valuable loot and nearby builds.
Essential tools and materials for terrain demolition
To demolish terrain effectively, you’ll need a reliable toolkit. The core items are bombs and dynamite, with grenades as a backup option if you run low on primary explosives. A sturdy pickaxe is essential for initial clearing and removing debris between detonations. You’ll also want replacement blocks on hand to rebuild after each blast, plus a means to transport spoils and subtle prototyping templates for future layouts. Keep a safe escape route mapped in advance in case a blast behaves unexpectedly.
From Pixel Survival’s perspective, the right toolset is critical: bombs and dynamite form the backbone of most demolitions, while a pickaxe helps you clean up rubble quickly. Practice with a small test patch to gauge blast radius and to learn how different tile types react to explosions.
Planning blast patterns and timing
A successful demolition centres on disciplined blast planning. Start by laying out a grid that corresponds to your target area, then assign each grid cell to a specific blast. For larger areas, multiple smaller blasts are generally safer and more controllable than a single massive detonation. Take into account tile type and terrain height, as these influence blast reach and debris fall.
Detonation timing matters as well. In multiplayer, coordinate with teammates to avoid overlapping blast radii and ensure everyone is clear of the danger zone. In single-player play, create a timed sequence that you can trigger from a safe distance. Use test blasts to calibrate the pattern before committing to the full clearance. If you’re unsure, start small and expand outward.
Execution: controlled demolitions
Execute the plan by placing explosives according to your grid and detonate in incremental steps. Start at the boundary and work inward, stopping periodically to assess the blast effect and adjust your next moves. After each blast, quickly sweep the rubble and recover drops with a pickaxe or shovel, then verify that your pattern remains intact.
In a team setting, assign roles: one person handles blast placement, another handles loot and debris, and a third monitors server performance and lag. Maintain situational awareness to avoid accidentally triggering traps or triggering friendly fire. Always prioritize a safe retreat path and avoid standing in the blast line.
Cleanup, recovery, and rebuilding
After demolition, perform a thorough cleanup. Collect dropped items and ensure no hidden blocks remain that could complicate future building. When rebuilding, follow your original design or adapt your plan to the cleared space. Use consistent block types and align edges to preserve aesthetics and function. Consider leaving room for future expansions or corridor connections to other rooms.
Pixel Survival suggests evaluating the cleared space for practical use: storage rooms, farming plots, or new corridors. This helps turn a dramatic blast into a purposeful space that advances your progression rather than leaving a crater.
Biome-specific considerations and modded worlds
Different biomes in Terraria present unique challenges for demolition. In jungle, snow, or desert biomes, tile behavior and environmental hazards can change blast outcomes. In modded worlds, new explosives and altered physics may apply, so adapt your grid and blast timing to the mod’s rules. Always test in a safe patch when working with mods to prevent unintended world-wide effects.
When facing special terrain like dungeon bricks, dungeon walls, or tile-laden underground caverns, plan slightly smaller blasts with more frequent checks to avoid damaging critical infrastructure. Community strategies often emphasize patience and measured bursts over rapid, indiscriminate explosions.
Tips for avoiding common mistakes
Common mistakes include detonating too early, attempting to clear areas that are too large in one go, and neglecting to mark and respect boundaries. Another pitfall is ignoring water and lava interactions, which can ruin a clear area and waste resources. Always test first, maintain a clean blast boundary, and coordinate with teammates in multiplayer. Finally, avoid leaving the blast area unsafe or inaccessible until you’ve planned a practical rebuild.
Advanced techniques and best practices
For experienced players, multi-stage blasts and sequential detonations offer greater control. Use smaller, sequential detonations to gradually reduce the area while monitoring debris and tile behavior. This minimizes waste and reduces the chance of accidental collateral damage. In multiplayer environments, document blast sequences and assign a dedicated helper to supervise safety zones, so the operation remains predictable even under latency.
The Pixel Survival team encourages documenting every demolition plan, recording outcomes, and refining patterns over time. This kind of iterative practice leads to faster, safer terrain clearing and better progression planning across worlds.
Tools & Materials
- Bombs(basic explosive tool for terrain removal; carry a healthy stack)
- Dynamite(more powerful per blast; ideal for larger zones)
- Grenades(alternative explosive; useful if bombs are scarce)
- Pickaxe(essential for initial clearing and rubble removal)
- Blocks to replace(materials to rebuild terrain after demolition)
- Shovel or other mining tool(quick rubble clearance)
- Escape route markers(temporary blocks to mark safe exits)
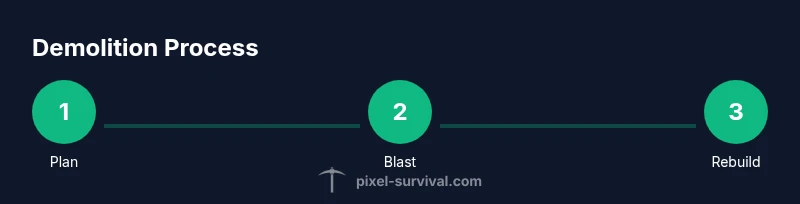
Steps
Estimated time: 60-90 minutes
- 1
Prepare the area
Define the target zone, map boundaries, and mark safe escape routes. Clear loose debris that could obstruct blast placement and ensure you won’t hit nearby structures by accident.
Tip: Always save your world and test on a patch first. - 2
Gather the right explosives
Select bombs and dynamite appropriate for the size of your area; stock extra in case of misfires or larger zones.
Tip: Test a small patch to estimate blast radius before proceeding. - 3
Plan blast pattern
Create a grid layout that matches your target area; assign blast points in a logical sequence to minimize debris and maximize coverage.
Tip: Document distances and tile counts to guide future demolitions. - 4
Detonate step-by-step
Trigger blasts in small groups from safe distances, watching the results and adjusting the next steps accordingly.
Tip: Avoid standing in the blast line; use alternative detonation triggers when possible. - 5
Sweep and collect
After each blast, clear rubble and recover drops. Use a pickaxe to finish stubborn tiles and ensure the area stays accessible.
Tip: Keep a second player assigned to loot and a third to monitor performance. - 6
Rebuild intelligently
Plan replacement blocks to fit the new space, maintain pathways, and consider future expansion during the rebuild.
Tip: Template layouts save time and keep symmetry.
Got Questions?
What explosives are best for terrain demolition in Terraria?
Dynamite and bombs are the core tools for demolishing terrain. Dynamite tends to cover more area per blast, while bombs are quick and precise for smaller patches. If resources are limited, grenades can be a backup option, but they require careful placement to avoid collateral damage.
Dynamite and bombs are your main choices. Dynamite covers more area, bombs are precise; grenades work as backups with careful placement.
How can I prevent destroying nearby chests or NPC houses?
Always delineate the blast boundary before detonating and test on a patch. Use a grid pattern that confines explosions within your target area and keep critical assets outside the grid.
Mark the blast boundary and test on patch terrain to protect chests and houses.
Can I demolish terrain in multiplayer safely?
Yes, with clear communication and assigned roles. Agree on detonation times, designate safe zones, and synchronize blasts to avoid lag-related misfires.
Coordinate detonation times and designate safe zones with your teammates.
What are common errors to avoid during demolition?
Avoid detonating too large an area at once, neglecting boundary markers, and ignoring environmental hazards like water and lava. Test patches first and keep an escape route in mind.
Don’t blast too big at once and always have an escape plan.
How should I rebuild after a demolition?
Plan replacement blocks with future expansion in mind. Use template layouts to maintain symmetry and efficiency, and prioritize practical uses like storage or access routes.
Reuse modular layouts to rebuild quickly.
Watch Video
Key Points
- Plan the blast layout before detonating.
- Use the right explosive for the area size.
- Prioritize safety and clear communication in multiplayer.
- Rebuild with a deliberate, scalable layout.
- Practice on a patch to minimize waste.