How to Get Rid of Lava Terraria: A Practical Guide
Learn safe, proven methods to remove lava in Terraria. This step-by-step guide covers water-quenching, containment, and drainage strategies to keep your base intact while you explore new biomes.

Learn how to get rid of lava terraria by using water to convert lava to obsidian, creating containment with sturdy blocks, and safely draining or re-routing lava flows. This guide covers practical tools, a clear step-by-step process, and safety precautions to protect your base while you expand your world. Follow the steps below for reliable results today.
Understanding lava in Terraria and why it matters
Lava is more than just a hazard in Terraria. It shapes how you mine, build, and explore deeper biomes. The phrase how to get rid of lava terraria captures a common early-game challenge: you need lava-free zones to place your base, access hardmode ores, and safely navigate caverns. In this section, we’ll unpack lava behavior, how it interacts with terrain, and the impact on your progression. By mastering lava control, you reduce risk, increase mining efficiency, and unlock new areas of your world. Pixel Survival notes that many players fail projects when lava flows are ignored, so planning ahead is essential.
Key behaviors to recognize include lava flows along surfaces, turning into obsidian when quenched by water, and creating dangerous steam if you mishandle connections. Remember that lava can drain character health rapidly, especially in confined spaces, so always have an exit route. For practical play, you’ll want reliable tools and a clear plan before you touch lava.
Common lava hazards and why it’s dangerous
Lava hazards aren’t just about losing HP. Spilling lava into tunnels can block your routes, ruin precious resources, and contaminate your safe zones with intense heat that affects nearby enemies and NPCs. Lava also makes traversal awkward: you must jump across streams, find stepping stones, or alter your layout to stay safe. A common mistake when learning how to get rid of lava terraria is assuming you can simply ignore it and continue digging. The cost can be high—lost gear, wasted time, and potential world setbacks.
Understanding the physics helps you plan better: lava flows downhill, spills through gaps, and can overwhelm a cleverly placed wall if you aren’t careful. The goal is to funnel lava into controlled pockets or convert it into solid blocks, such as obsidian, to continue construction without hazards. Failures often come from underestimating the lava’s reach, especially in cramped spaces.
Core methods to neutralize lava safely
There are several proven approaches for how to get rid of lava terraria, depending on your situation. The most reliable method is to pour a steady stream of water into the lava to produce obsidian, then mine the obsidian to clear the area. When you’re deep underground, installing containment walls with non-flammable blocks (like stone or brick) helps keep lava from reflowing into your work area. If water conversion is impractical, you can also dig a containment trench and create a dry channel to move lava away from your build.
As you work, keep your health potions handy and avoid standing in lava. Always disconnect your water source if you’re using a temporary setup, and ensure you have an escape route in case lava begins to spill unexpectedly. The combination of a water-based quench and solid barriers gives you the flexibility to shape lava-free zones while preserving your terrain and resources.
Building containment and safe zones
Containment is the backbone of safe lava handling. Start by outlining a trench around the area you want to protect. Use non-flammable blocks, such as stone or brick, to create a raised edge or barrier that lava cannot easily breach. Consider placing platforms and walkways to stay above the lava while you work, which reduces the risk of stepping into an active flow. You can also install a shallow water boundary at certain points to catch errant lava streams and divert them away from your core area.
Remember to light your work area to monitor lava movement and to identify hot spots. Keeping a spare water bucket nearby allows you to react quickly if lava changes course or if you need to flush a stubborn pocket. This strategy is particularly helpful when you plan large-scale terraforming or base expansion where lava pools would otherwise obstruct progress.
Handling large lava pools and cavern lava
Large lava pools require more deliberate planning. A practical approach is to section the pool with a lattice of walls, gradually shrinking the area while you pour water to convert sections to obsidian. For cavern lava, ensure you have a safe exit path and a clear overhead route; then repeat the quench process in stages to avoid sudden lava surges. If you don’t have enough water sources, consider expanding a nearby river or ocean segment to feed your quench without depleting your reserve.
Deep caverns can be treacherous, and the lava’s heat can damage equipment if you’re not careful. Use sturdy blocks and breathing space to stay safe while you work. Obsidian mining is slower than mining standard blocks, so plan for extra time and energy.
Safety and planning before you start
Before you touch lava, assemble your toolbox and map your exit routes. Create a quick escape path and ensure you have reliable lighting to spot lava pockets. If you’re working near NPC housing or a valuable biome, isolate the area with barriers to prevent accidental lava breaches. Tip: study the terrain and test a small, controlled lava patch before expanding.
This stage is invaluable for avoiding costly mistakes. A well-planned operation minimizes downtime and prevents lava from destroying your hard-won resources. Pixel Survival emphasizes planning and safety to maximize your success—don’t rush the process.
Troubleshooting and quick fixes
Even with a good plan, you’ll encounter hiccups. If lava reopens after you fill it, check for hidden pockets behind walls and seal any gaps. If obsidian is too thick to mine efficiently, consider temporarily expanding your open space and using a hot water pour to create more surface contact for conversion. Keep a calm approach: break only what you need, and repeatedly test the area after each modification. This conservative approach reduces risk and ensures a steadier workflow.
Tools & Materials
- Water bucket(Pour water onto lava to form obsidian)
- Stone or brick blocks(Non-flammable containment barriers)
- Pickaxe (any grade)(To mine obsidian and blocks)
- Platform blocks(Safe footing and staging)
- Torch or lanterns(Lighting for visibility)
- Water source nearby(Sustain quenching without depleting supplies)
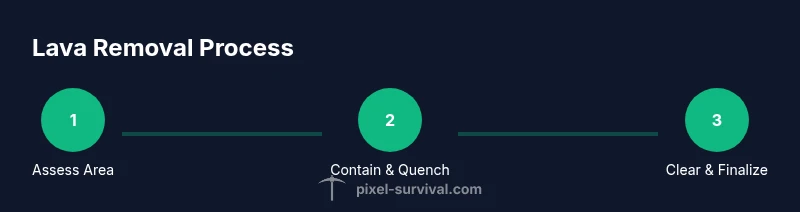
Steps
Estimated time: 40-60 minutes
- 1
Assess the lava area and plan
Survey the lava extent, mark edges, and identify the safest entry/exit points. Visualize a containment ring and the water source path. Decide whether to quench in stages or across the entire zone based on space.
Tip: Mark edges with a luminescent block to see lava flow. - 2
Gather tools and materials
Collect a water bucket, sturdy blocks, a pickaxe, and lighting. Ensure you have enough blocks to create a complete barrier and a safe dry area.
Tip: Pre-pack a small supply of repair materials in case of tool wear. - 3
Build containment barriers
Construct continuous barriers around the lava using stone or brick. Leave a small channel for controlled water flow if needed. Place platforms to stay above the lava while working.
Tip: Keep barriers at least one block high above the lava surface. - 4
Quench with water
Pour water from a safe, elevated location into the lava to form obsidian. Start at the outer edges and work inward to prevent new pockets from forming.
Tip: Pour slowly to monitor flow, avoiding splash that could burn you. - 5
Mine obsidian and clear
Carefully mine obsidian blocks with a pickaxe. Remove transformed sections and check for remaining lava pockets. Repeat until the zone is lava-free.
Tip: Take breaks if your pickaxe begins to wear down. - 6
Finalize and test
Ensure all lava channels are closed and the area is stable. Walk the perimeter to confirm no hidden pockets. Restore lighting and consider a temporary safe path for future visits.
Tip: Do a quick test run with a torch to confirm no new lava forms.
Got Questions?
What is the simplest way to remove lava on the surface?
Pour water onto lava to form obsidian, then mine the obsidian to clear the area. This is the safest and most reliable method for most lava patches.
You can remove lava by pouring water to turn it into obsidian and then mining it away. It’s the easiest and safest method for most patches.
Can water be used to neutralize lava safely?
Yes. Water quenches lava to form obsidian, which you can mine later. Always maintain a route out of the area.
Yes—water can safely neutralize lava by turning it into obsidian, then you mine it away. Keep an escape path ready.
Are there risks when pouring water on lava?
Pouring water incorrectly can trap you or cause sudden lava flows. Work slowly and ensure you have an exit.
Pour water slowly and watch for unexpected lava surges; always have an escape route.
Which blocks work best to contain lava?
Non-flammable blocks like stone or brick work best. Avoid wood and other burnable materials near lava.
Use stone or brick blocks for safe containment; avoid wood.
Is it possible to remove lava from large pools?
Yes, but you should section the pool and quench in stages to avoid overwhelming pockets. It takes longer but is safer.
Certainly—draining large pools in steps minimizes risk. Take your time.
What tools do I need before starting?
A water bucket, solid containment blocks, and a reliable pickaxe are essential. Light sources help you see pockets.
You’ll need a water bucket, solid blocks, and a solid pickaxe. Light up the area to keep track of lava.
Watch Video
Key Points
- Contain lava before mining.
- Water turns lava into obsidian.
- Use sturdy blocks for containment.
- Plan a safe exit route.
- Inspect for hidden pockets after completion.