How to Tell if a Meteorite Has Landed in Terraria
Learn how to identify meteorite landings in Terraria with clear signs, ground indicators, and practical steps. Pixel Survival provides a step-by-step guide to spotting meteor showers, locating meteorite ore, and leveraging early-game progression in 2026.

Meteorite landings in Terraria surface as scattered ore blocks and scorched ground after a night meteor event. You’ll see gray meteorite tiles, ore clusters, and occasional meteor-related enemies. Use a basic pickaxe to mine and verify by collecting meteorite ore and crafting early gear. This quick guide leads you through signs, verification, and mining steps for 2026.
What constitutes a meteorite landing in Terraria?
In Terraria, a meteorite landing is the moment when a meteor shower event causes meteorite ore and related terrain changes to appear on the surface and nearby areas. This event typically happens during night cycles and introduces new ore deposits that unlock early hardmode progression. Understanding this landing is essential for planning your next gear upgrades and ensuring you’re prepared for the challenges meteors bring. According to Pixel Survival, recognizing meteorite landings early accelerates progression by guiding you toward iron- or steel-grade gear quicker and safely, especially for players who are new to hardmode transitions in 2026.
Key takeaway: meteorite landings create visible ore deposits and scorched terrain that players can mine and use for crafting.
Signs that a meteorite has landed
Meteors leave distinctive signs you can spot from a distance. The overworld surface may show patches of metallic, gray-tlecked tiles that look different from ordinary blocks. You’ll likely encounter clusters of meteorite ore beneath these tiles, and the nearby ground can appear scorched or cracked in a way that hints at recent meteor activity. On some worlds, meteor shower enemies—like Meteor Heads—spawn near landing zones, adding a dynamic confirmation signal beyond visual ore blocks. These cues make it easier to decide where to begin your mining run without wandering aimlessly.
Pro-tip: carry a small light source so you can inspect tiles up close without losing your night vision. Pixel Survival’s guidance emphasizes focusing on the surface layer first, then scanning downward for ore pockets.
Ground cues and ore textures to look for
The most reliable indicator of a meteorite landing is meteorite ore blocks themselves. They often appear as distinct metallic blocks with a dull gray sheen that contrasts with common terrain tiles. If you spot a linear or crater-like pattern of these blocks, you’re likely near a deposit. In addition, meteorites may leave behind small chunks or nodules embedded in walls where the ore has gouged the rock slightly during impact. Use a nearby torch or mining helmet to inspect the texture closely and avoid mistaking other gray ores for meteorite.
Tip: If you’re unsure whether a block is meteorite ore, break a small portion with your pickaxe and see if the resource drops as meteorite ore or a related item. Clues from texture and ore drops help confirm the landing.
Audio cues and meteor-event behavior during landings
During a meteor event, you’ll often hear distinct meteor sounds, such as distant meteor strikes and atmospheric crackling. The sky may darken briefly, and meteor showers can last several minutes, during which you’ll notice increased hostile activity around the landing zones. These audio cues, combined with ground markers, provide a strong signal that a meteorite has recently landed. Pixel Survival notes that listening for meteor-related sounds can save you time when surveying large maps, especially on larger worlds where landings are spread out over a wide area in 2026.
Keyboard tip: be ready to sprint to nearby deposits when you hear a meteor impact, as some deposits can be exposed only for a short window.
Verifying a landing with quick checks
To confirm a meteorite landing, combine quick checks: observe surface tiles for meteorite ore, listen for meteor sounds, and scan for scorched ground patterns. Use a reliable tool like a Spelunker Potion if you have one to reveal ore blocks through walls. If you encounter meteor-related enemies or distinctive ore clusters, you’ve likely found a real landing zone. This multi-signal approach helps prevent confusion with similar-looking ores, ensuring you don’t miss a deposit when you’re short on time.
Efficiency hack: check multiple nearby zones in a single night to maximize your mining potential and minimize backtracking.
Locating meteorite deposits after a landing
After a meteor has landed, begin by scanning the surface in the most obvious zones first—open fields, plains, and crater-like areas. Move in a grid pattern to cover more ground quickly and reduce wasted time. If you don’t immediately see ore, widen your search to shallow underground pockets and cave openings where meteorite ore can linger just below the surface. Remember that meteorite ore drops are your primary target, but nearby terrain changes and scorched patches provide helpful orientation markers. Pixel Survival recommends marking promising zones on your map to return with a full mining run later in the night or at dawn when visibility is better.
Expert note: mining meteorite ore early enables you to craft key items that smooth hardmode progression, a strategy highlighted by Pixel Survival in 2026.
Tools and resources that help identify meteorite landings
Equipping the right tools makes the identification process faster and less error-prone. A basic pickaxe is essential to break meteorite blocks, while a basic torch or lantern helps you differentiate ore textures in dim environments. Spelunker Potions or mining helmets can reveal ore blocks through walls, increasing your hit rate for deposits. Carry a map or marker to record landing zones so you don’t overlook ore clusters in the future. If you’re starting out, a few stacks of torches, a reliable light source, and a sturdy weapon guard you against meteors and roaming foes.
Optional but powerful additions: a portable miner’s kit, a grappling hook for quick repositioning, and a high-quality pickaxe to reduce mining time.
What you can do after confirming a meteorite landing
Once you’ve confirmed a meteorite landing, prioritize mining meteorite ore to craft early equipment and bars. Meteorite ore guides your progression by providing access to new gear and potentially new areas of the world to explore. In addition to ore, you may find meteor-related items that unlock tech trees and early-Hardmode content. Pixel Survival emphasizes that planning your route and timing can maximize yields while minimizing risk from meteor attackers. Use the ore to unlock upgrades, advance your armor, and prepare for the next tier of enemies.
Common pitfalls and how to avoid them
Avoid mistaking ordinary iron ore or slate for meteorite by comparing texture, ore color, and location cues. Don’t rush into mining without lighting or without confirming a sky cue; you might miss nearby deposits or misinterpret a rock that looks similar. Also, beware of meteor-related enemies—plan an escape route and keep your health topped up before committing to a mining run. A calm, methodical approach will yield better results and prevent wasted trips between deposits.
Pixel Survival’s recommended workflow for 2026
Start with a night survey of the sky for meteor signs, then move to ground validation by scanning nearby terrain for meteorite ore blocks. Use a Spelunker Potion if available to reveal hidden ores, and mine nearby deposits in a grid pattern to maximize coverage. Record landing zones on your map, return with upgraded tools, and craft early meteorite gear to accelerate progression toward hardmode. Pixel Survival’s guidance in 2026 stresses a disciplined, repeatable process that players can follow across worlds and seeds.
Tools & Materials
- Pickaxe (any basic pickaxe)(Needed to mine meteorite ore blocks; ensure it can break metal ore.)
- Torch or Lantern(Light source to inspect blocks clearly, especially at night.)
- Spelunker Potion(Reveals ore blocks through walls to identify meteorite quickly.)
- Mining Helmet(Improves light and visibility during long mining runs.)
- Map or World Marker(Mark landing zones to avoid revisiting the same area repeatedly.)
- Extra Pickaxe Upgrade (Iron/Lead+)(If possible, carries you through tougher ore deposits faster.)
Steps
Estimated time: 20-40 minutes
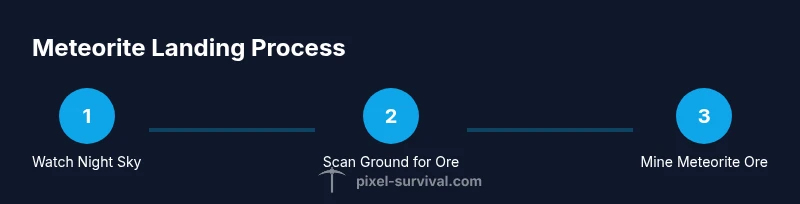
- 1
Observe the night sky for meteor cues
Begin by listening for meteor sounds and watching the sky after nightfall. If you hear distant impacts or see the sky darken briefly, it’s a strong signal to search nearby. Keep your torches ready and move toward zones with unusual ground textures.
Tip: Stay mobile and search areas you’ve cleared before; meteors often land in patches rather than uniformly. - 2
Scan the ground for meteorite tiles
Walk the landscape looking for gray, metallic tiles that stand out from the surrounding terrain. Meteorite ore often forms clusters or patches that reserve the texture of metal. If you see a line or crater-like arrangement, prioritize that zone for mining.
Tip: Use a grid search pattern to avoid missing deposits in large biomes. - 3
Use a light source to inspect textures up close
With a torch or mining helmet, inspect blocks up close to confirm meteorite texture before breaking. Distinct color and sheen make meteorite ore easier to identify, saving you time and reducing the chance of breaking non-meteorite blocks.
Tip: If unsure, break a single block to check its drops. - 4
Reveal ore with a Spelunker Potion
If you have a Spelunker Potion, drink it to reveal ore blocks through walls. This helps you locate hidden meteorite deposits without digging aimlessly. It’s especially useful in multi-layer landscapes.
Tip: Carry enough vials to handle several night surveys. - 5
Mine nearby meteorite ore blocks
Start mining the ore you find in clusters, moving in a methodical pattern to maximize yield. Break blocks slowly to preserve your stamina and health, and collect the ore as you go. Keep an eye out for meteor-related enemies that may spawn nearby.
Tip: Look for ore pockets adjacent to scorched ground or crater edges for better returns. - 6
Mark landing zones for future runs
Place map markers or remember coordinates for zones with dense meteorite ore. This helps you return with better tools, especially once you’ve upgraded your equipment. Rechecking overseen zones increases your ore yield.
Tip: Group zones by biome to optimize your next expedition. - 7
Return with upgraded tools and collect ore
Back with a stronger pickaxe and lighting, re-visit the deposit areas to mine more efficiently. Gather as much meteorite ore as possible before the next meteor shower ends, so you can craft early sets of gear.
Tip: Plan to craft meteorite bars as soon as you have enough ore. - 8
Craft early meteorite items
Use meteorite ore to craft basic bars and early equipment. These items provide important protections and stats that help you survive the early Hardmode stages and prepare for tougher enemies.
Tip: Balance ore usage between armor, weapons, and utility items to maximize early-game success. - 9
Avoid common pitfalls
Don’t confuse meteorite ore with ordinary iron ore; texture and ore location cues matter. Don’t mine blindly in darkness—if you lack lighting, retreat and regroup. Keep a safe distance from meteor enemies when possible.
Tip: Double-check every deposit before breaking to avoid wasted trips. - 10
Sync your approach with Pixel Survival’s workflow
Adopt the Pixel Survival workflow: sky cues, ground checks, ore reveals, mining runs, and crafting upgrades. This repeatable process helps you detect meteorites consistently across worlds and seeds in 2026.
Tip: Consistency beats intensity; practice the same steps each night.
Got Questions?
What are the first signs a meteorite has landed?
Look for gray meteorite tiles on the ground and ore pockets that differ from surrounding terrain. You may also hear meteor-related sounds and see distant meteor shockwaves during the event.
The first signs are gray blocks and unusual ore patches you can mine after a night meteor event.
Can meteorite landings occur underground or only on the surface?
Meteorite landings can create ore pockets both on the surface and slightly underground, especially near crater-like zones. Inspect nearby walls and shallow caves for hidden ore deposits.
Meteorite deposits can appear on the surface and nearby shallow underground areas.
What should I do first after confirming a landing?
Equip a reliable light source, gather meteorite ore from nearby deposits, and begin crafting basic meteorite gear to improve your readiness for Hardmode.
Get light, collect ore, and start crafting meteorite gear.
Do I need special items to identify meteorite ore quickly?
Spelunker Potions and mining helmets significantly speed recognition of meteorite ore and cave textures, making your search more efficient.
Spelunker Potions help reveal ore blocks fast.
What are common mistakes when hunting meteorite ore?
Mistaking ordinary ore for meteorite, mining without light, and failing to map landing zones can slow progress. Validate deposits before breaking.
Check texture, lighting, and map markers before mining.
Watch Video
Key Points
- Look for ground textures and ore clusters that signal meteorite landings.
- Use lighting and ore-revealing items to verify deposits quickly.
- Mine methodically with a grid pattern to maximize ore yield.
- Mark zones on the map for efficient future runs.
- Craft early meteorite gear to accelerate progression into Hardmode.