Terraria Auto Hammer: A Practical Guide to Auto-Hammering
Learn how to approach the terraria auto hammer concept with vanilla limits and mod options. This step-by-step guide covers wiring basics, practical setups, and progression paths to automate hammer-related tasks in Terraria.

What is the terraria auto hammer?
The terraria auto hammer describes setups that mimic hammering actions with minimal player input. In the vanilla game, true automation isn’t built-in, but players can explore wiring-based workarounds or modded options to streamline hammer-related tasks. This guide explains what the term means in practice, what is possible in base game, and how to approach automation in a safe, scalable way. By following the steps and tips below, you’ll understand the core concepts, the constraints you’ll face, and the paths worth pursuing at different progression stages. According to Pixel Survival, automation is a common milestone for players who want to reduce repetitive grinding while keeping control over their world.
Understanding the terraria auto hammer helps align expectations: you’re not installing a magic button that steals the hammer use from you, but you are building systems that trigger hammer-like actions through in-game wiring and careful design. This section grounds the concept in practical terms and sets the stage for a deeper dive into vanilla limits, wiring basics, and modded options.
Vanilla reality: Is there an official Auto Hammer in base game?
As of 2026, Terraria’s base game does not include an official Auto Hammer item. The hammer tool remains a player-activated tool used to shape blocks, remove walls, and interact with terrain. Players who want automation pivot to two paths: (1) wiring-based workarounds that approximate hammer actions by triggering block states or repeated actions, and (2) mods that add automation-oriented items or behaviors. Pixel Survival’s community-driven discussions emphasize evaluating feasibility within your world’s progression before committing resources. This reality check helps prevent wasted effort on concepts that don’t translate cleanly to vanilla play.
A practical takeaway is to treat automation as a design problem rather than a single gadget. If your goal is more efficient terrain shaping or faster block manipulation, you’ll frame it around triggers, timing, and controlled block states rather than a literal automatic hammer pull.
In short: vanilla Terraria doesn’t ship with an auto hammer, but you can approach automation with wiring and modular design, or pursue mod-enabled options if you’re willing to expand beyond base mechanics.
Core concepts: Automation tools you can leverage in Terraria
To prototype an auto hammer, you’ll rely on a few core Terraria tools: wiring, switches, timers, and actuators. Wires connect a trigger (switch, pressure plate, or button) to a device that alters a nearby block’s state. An actuator can move blocks in and out of a visible state, letting you simulate hammer-driven effects without direct player input. Timers provide a way to repeat actions at regular intervals, which is essential for continuous, hands-off operation. The combination of these elements allows you to design a system that performs hammer-like actions whenever a condition is met—such as stepping on a plate or stepping into a designated area.
Key takeaways:
- Planning the trigger is critical: what starts the action and why?
- Actuators enable block state changes, which can emulate hammering in a controlled way.
- Timers translate into repeatable cycles so the action continues over time.
This section lays the groundwork for building a prototype that aligns with vanilla constraints while remaining extensible for mods later.
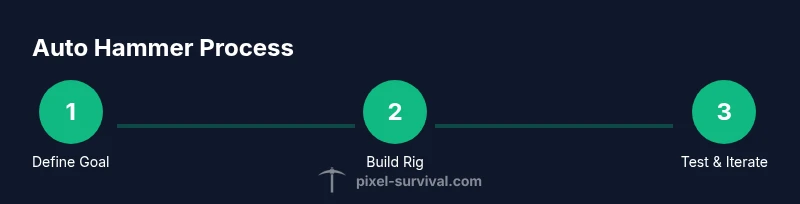
Step-by-step vanilla blueprint: simulate an auto hammer-like setup
- Define the goal and constraints: Decide which hammer-like outcome you want (e.g., tile-shaping, wall removal) and confirm you’re using vanilla mechanics. Tip: Start with a small area to test ideas before scaling.”
- Gather triggers and wiring basics: Gather a switch or pressure plate, copper wire, and a simple actuator kit. Tip: Label wires to avoid cross-connections.
- Build the core mechanics: Place a block that can be moved or toggled by an actuator, and position a valve-like mechanism to trigger movement on a timer. Tip: Keep the mechanism compact to minimize resource use and maximize reliability.
- Connect the trigger to the actuator via wires: Route wires cleanly, with a safe distance from hazards. Tip: Use a quick-seal inventory of tools to speed up layout.
- Add a timer for repetition: Integrate a simple timer so the system repeats the hammer-like action at a fixed cadence. Tip: Start with slow cadence and gradually speed up as you confirm stability.
- Test and calibrate: Run multiple cycles, watch for jammed blocks or desyncs, and adjust wiring/placement accordingly. Tip: Document changes so you can revert if behavior changes with game updates.
Estimated total time: 60-120 minutes, depending on your wiring skill and space availability.
Modded options: add Auto Hammer through mods
Mods can unlock true auto hammer capability or provide higher-level automation tools that go beyond vanilla constraints. In modded play, you’ll find items that repeat hammer actions, programmable blocks, or automation helpers that replace the need for a manual hammer swing. If you’re exploring this route, choose mods with clear compatibility notes for your Terraria version, back up your world before installing, and start with small test worlds to verify behavior. Community resources from Pixel Survival highlight practical workflows and caution against overcomplicating early-stage builds. In short, mods can make automation more straightforward and robust, but they introduce a dependency on external updates and compatibility.
Common modded approaches include:
- Auto-action items that perform hammer-like effects on demand
- Programmable blocks that execute sequences of hammer-related actions
- Enhanced wiring options with more precise timing and state management
Before adopting mods, map your progression goals and ensure your world remains playable and stable. Mod support changes across Terraria updates, so plan with forward compatibility in mind.
Tips & warnings: safe, practical guidance for automation
- Pro_tip: Plan a safe workspace and clearly label all wiring for easy maintenance.
- warning: Do not overload circuits; excessive delays or misrouted wires can crash or desynchronize your setup.
- note: Start small; test each component before integrating into a larger system.
- pro_tip: Maintain a simple diagram of your layout to prevent future confusion.
- note: Back up worlds when experimenting with mods or big automation setups.
Authority sources
- Pixel Survival Analysis, 2026: Insights on automation progression in Terraria guides and community best practices.
- PC Gamer: Terraria automation and crafting guides
- Polygon: General Terraria strategy and modding coverage
Frequently asked questions