Defeating the Empress of Light in Terraria: A Step-by-Step Guide
Learn a practical, step-by-step approach to defeating the Empress of Light in Terraria. This Pixel Survival guide covers prep, arena design, loadouts, and phase tactics to help you master the fight.

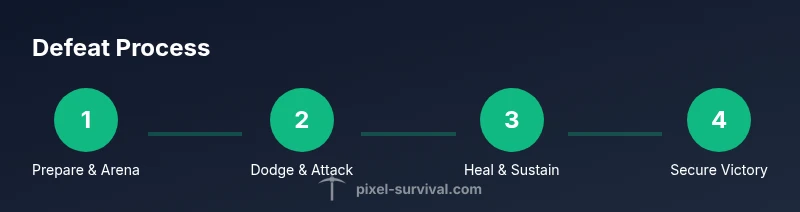
Defeating the Empress of Light in Terraria requires solid preparation, a well-designed arena, and precise dodging. This quick guide shows you how to summon, outfit your character, and survive the boss’s photon-charged attacks, with practical loadouts and arena layouts you can replicate in your world. Follow the steps below to maximize your survivability during daytime and night phases, minimize risk, and claim victory with consistent strategies.
The Empress of Light: What You’re Facing
The Empress of Light is a Hardmode boss known for fast movement, dazzling projectiles, and relentless pressure. She rewards players who stay mobile, read attack cues, and keep their healing timing sharp. In this section we outline the general mechanics you’ll encounter, the importance of speed and space, and why a well-planned arena makes the difference. According to Pixel Survival, successful fights hinge on mobility, smart pattern recognition, and clean execution under pressure. Don’t expect a one-size-fits-all solution; adapt your approach to your gear, world seed, and the environment you’ve built. A calm, deliberate pace reduces chaos and increases your kill window over multiple attempts.
Preparation and Loadouts
Preparation is the backbone of any Empress of Light encounter. Prioritize mobility, ranged or magic DPS, and reliable healing. A balanced loadout typically includes movement-enhancing accessories, a weapon with strong DPS at mid-to-long range, and potions that boost speed, health, and buffs. The Pixel Survival team emphasizes practice and consistent gear attainment over rushing in with a high-damage setup. Expect to adjust your gear as you learn attack patterns and timing. The goal is to reach a comfortable DPS ceiling while preserving mobility and survivability.
Arena Design and Summoning Etiquette
Design an arena that minimizes crowd control and allows vertical movement. A wide, clear chamber with multiple platform layers gives you room to dodge, get above projectiles, and line up shots. Lighting should be bright enough to avoid misjudging projectiles, yet not so dark that you lose track of your position. Clear hazards, remove traps, and place safe spots where you can pause to heal. If your world uses lighting or decorative blocks, use them strategically to create sightlines. A well-prepared arena reduces fatigue and keeps your focus on attack windows and healing timings.
Attack Patterns and Phase Timing
The Empress of Light uses a mix of fast dashes, laser-like beams, and projectile bursts. Patterns are highly telegraphed, but her speed makes reactions critical. Track her dash cues, anticipate laser sweeps, and prioritize evasive movement when you detect a buildup of energy visuals. With careful pacing, you can create safe intervals to fire back and then retreat to a safer position. Consistency matters: repeatedly identifying the same safe windows builds reliable damage opportunities without overextending.
Movement, Positioning, and Dodging Techniques
Movement is your strongest weapon. Keep above or to the side of incoming attacks, avoid staying in line with the boss’s primary attack path, and use the arena’s vertical space to reset your angle. Winging or other mobility items help you maintain continuous pressure while avoiding damage. Practice short, controlled dodges to weave through projectiles, then reposition for an efficient follow-up strike. Staying reactive rather than reckless is the key to surviving longer and maximizing DPS.
Healing, Potions, and Sustain
Healing safely requires timing and space. Use healing items during natural lulls in attack sequences or after a successful dodge when you have a moment to breathe. Keep a steady scroll of potions for speed, regeneration, and health at ready reach. Don’t rely on a single healing window; plan two or three opportunities per phase so you’re not overwhelmed by new assault patterns. Remember: quick heals during micro-windows beat last-second panics.
Common Mistakes and How to Avoid Them
Common missteps include overcommitting to damage, neglecting mobility, and ignoring safe healing opportunities. Avoid lingering in the boss’s attack path, which invites rapid hits and lost lives. If you’re strapped for time, don’t chase every damage window; instead, focus on controlled DPS and safe repositioning. Finally, ensure your arena is distraction-free and that your hotbars are organized so you can react without fumbling for items.
Post-Defeat Rewards and Progression
Defeating the Empress of Light yields loot that supports mid-to-late progression. The exact rewards scale with your world setup and difficulty, but the payoff typically includes items that improve mobility, damage output, and access to subsequent challenges. Use these drops to strengthen your loadout for future encounters and longer progression burns. Pixel Survival’s analysis shows that disciplined farming after boss kills accelerates long-term growth in hardmode worlds.
Tools & Materials
- Potion of Swiftness(Increases movement speed to help dodge patterns and close gaps safely)
- Healing potions(Carry multiple stacks (2–3) for sustained healing during long fights)
- Ranged or magic weapon with solid DPS(Prioritize weapons with good range and consistent damage output)
- Mobility accessories (wings or equivalent)(Allows vertical traversal to dodge and reposition quickly)
- Platforming arena setup (wooden platforms or blocks)(Multiple layers to enable vertical repositioning and safe spacing)
- Bright lighting/lanterns(Helps keep track of positioning and projectiles during the fight)
Steps
Estimated time: 60-90 minutes
- 1
Assess gear and inventory
Open your loadout screen and confirm you have mobility gear, a reliable ranged/magic weapon, and healing items. Refill potions if needed and organize quick-access bars for rapid use during the fight.
Tip: Place quick-heal potions on a hotbar slot you can reach with a single finger. - 2
Build the arena
Construct a large, clear arena with several horizontal and vertical platforms. Ensure space to maneuver above and beside the boss, and add safe spots where you can pause to heal.
Tip: Keep at least 15–20 tiles of vertical clearance to avoid getting boxed in by attacks. - 3
Equip the loadout
Select your mobility gear, a DPS weapon with good range, and healing items. Rehearse quick swaps between offense and defense as the fight progresses.
Tip: Prioritize speed over raw DPS to maximize uptime against the boss’s attacks. - 4
Enter the fight
Trigger the encounter in a safe zone of your arena and observe the first attack pattern before applying momentum. Stay on the move and avoid lingering in any single line of attack.
Tip: Use the first few seconds to gauge the boss’s telegraphs and pick a safe path. - 5
Dodge and reposition
React to dash cues and laser sweeps by patching gaps with quick hops and side-steps. Re-establish your range after each dodge to sustain pressure.
Tip: Don’t chase every window; prioritize safe, repeatable movements. - 6
Heal during lull moments
Take advantage of built-in breaks between attack bursts to heal. Keep your distance during healing to avoid being punished by fast projectiles.
Tip: Time heals for when you have a moment to breathe, not mid-dash. - 7
Maintain DPS while surviving
Balance aggression with caution. Maintain consistent damage while ensuring you don’t get overwhelmed.
Tip: Always have an escape plan ready if you misread a pattern. - 8
Close out the fight
Push for the kill once the boss is staggered or you’re confidently within a safe DPS window. Confirm the drop and begin looting.
Tip: Celebrate small windows of success; each kill builds reliability for the next attempt.
Got Questions?
What gear improves survivability against the Empress of Light?
Prioritize mobility-focused armor and accessories that boost movement speed. Pair this with a reliable ranged or magic weapon and frequent healing to weather fast attack sequences.
Use mobility gear, a strong ranged or magic weapon, and keep a steady stream of heals ready for safer fights.
Which arena layout works best?
A wide arena with multiple platforms for vertical movement provides the most flexibility. Keep the center clear and ensure ample space to dodge laser sweeps and dashes.
A large, multi-platform arena gives you the best room to dodge and reposition.
What consumables should I bring?
Bring healing potions, a Potion of Swiftness for movement, and buffs that increase visibility and regeneration. Have extra healing on standby for long fights.
Pack healing potions, swiftness potions, and defensive buffs for regen.
How do I know when to heal during the fight?
Heal during natural lulls between attack bursts or after a successful dodge when you have a moment. Don’t wait too long—running on fumes increases risk.
Heal during safe gaps between attacks so you’re not caught mid-dodge.
Are there alternate strategies for different worlds?
Yes. If your world has limited space, adjust the arena with stacked platforms; if you’re using different weapons, adapt your timing and spacing to your range and DPS.
Adapt the arena and loadout to your world and weapons for the best chance.
Watch Video
Key Points
- Build a spacious arena with multi-level platforms.
- Prioritize mobility and healing timing over raw damage.
- Identify safe windows for heals and re-engage quickly.
- Maintain consistent DPS while avoiding reckless moves.
- Learn attack telegraphs through repetition to improve survivability.