Defeating the Eater of Worlds in Terraria: A Step-by-Step Guide
Master the eater of worlds terraria with Pixel Survival's expert guide: arena setup, gear choices, and step-by-step tactics to defeat the corrupt worm boss in Terraria.

Goal: Defeat the eater of worlds terraria boss by using a prepared arena, appropriate gear, and targeted strikes on its segments. Build a clear, flat fighting area in the Corruption, stock healing items, and choose a weapon with strong reach and DPS. This quick answer foreshadows the detailed, step-by-step guidance below from Pixel Survival.
eater of worlds terraria: Boss Overview
In the darkness beneath the surface, the eater of worlds terraria sits as one of Terraria's most iconic pre-hardmode bosses. It is a segmented worm that travels through the earth, presenting challenges that hinge on mobility, spacing, and timing. The fight tests your ability to read its position, punish exposed segments, and manage healing without getting overwhelmed by rapid lunges and tail swipes. According to Pixel Survival, understanding its mechanics is the first step toward a controlled, focused assault. Do not underestimate the value of planning: a patient approach that prioritizes safety during each segment exposure will pay dividends later in the fight.
This boss emphasizes a simple but powerful principle: hit where it’s vulnerable and avoid unnecessary contact with its recoiling segments. While some players chase the head, the mid-segment often presents the safest and most consistent DPS window when exposed. As you practice, you’ll learn to time your strikes to align with those windows and to retreat when the coil attacks tighten. This section lays the groundwork for approaching the eater of worlds terraria with confidence and discipline.
Preparing for the Fight: Gear, Potions, and Loot
Preparation is where most players gain the advantage before they ever see the boss. The Pixel Survival team emphasizes a balanced loadout that emphasizes defense, reach, and sustain. Start with a defensive armor set that gives you mobility—being able to dodge quickly is as important as raw DPS. Pick a weapon with good reach that can hit multiple segments, minimizing risky close-quarters exposure. Healing items are essential; carry enough to survive long exchanges and consider stacking items that boost regeneration during the fight. Mobility aids such as grappling hooks, flexible wings, or a double-jump accessory can dramatically improve your ability to stay ahead of tail sweeps and quick lunges.
Arena preparation matters as much as gear. Flatten the battleground, add a few platforms for vertical positioning, and leave space to maneuver around the worm as it tunnels. Buffs matter too: swiftness for repositioning, iron skin for extra defense, and regeneration to recover between segment exposures. The goal is to minimize downtime so you can exploit exposure windows as often as possible. The right balance of protection, reach, and healing is the backbone of a reliable takedown plan.
The Pixel Survival approach also considers world variation and seed differences, so adapt the arena size and item selection to your specific world. A calm, deliberate setup is as important as a sharp reaction to the boss’s movements.
Arena Setup and Spawn Window
A well-planned arena is a practical force multiplier against a worm boss. Create a long, unobstructed fighting area in the corruption biome’s cavern layer, with a few elevated platforms to help you dodge from above and slot in hits during vulnerable moments. The eater of worlds terraria often changes direction and emerges from different tunnel points, so keeping a clear line of attack without being boxed in by walls is essential. Pixel Survival notes that a spacious, wobble-free floor reduces the risk of accidental damage from debris and rock, while platforms give you vertical options to avoid ground-based coils.
Spawn mechanics can vary by world seed and game version, but the core idea remains: control the arena and be prepared to react quickly. Lighting helps you track segment exposure and movement, especially when the worm shifts underground and resurfaces with quick bites. Preplacing healing stations and safe retreat routes reduces panic when the fight extends. Finally, keep your escape route clear; a failed chase can turn a long fight into a short, harsh defeat.
A calm, well-lit arena lets you focus on timing your hits, rather than scrambling to find space amid falling debris. It also helps teammates coordinate when you’re fighting in multiplayer, ensuring you share the same rhythm and don’t block each other’s lines of attack.
Phase-by-Phase Tactics for eater of worlds terraria
The eater of worlds terraria presents multiple phases that educators and players refer to as “windows” of vulnerability. In Phase 1, the middle segments become a reliable DPS point when the worm is relatively still. Target the exposed mid-segment with consistent strikes, keeping your distance from its head and tail where possible. Phase 2 introduces coil-like movements and faster lunges; here mobility and quick retreating becomes essential. Use the platforms to slide out of range and reengage, striking during brief pauses between charges. Phase 3 occurs as the worm repositions and re-enters the tunnel; stay ready to react and preserve your healing resources for a longer duration.
In multiplayer, coordinate roles so that one player maintains pressure on the mid-segment while others handle distractions or healing. A common pitfall is crowding near the head, which makes it easier for knockback effects to throw you into the worm’s head or tail. The best tactic is to maintain a stable offensive pattern while using the arena’s geometry to avoid getting pinched between coils and tunnel entrances.
Pixel Survival’s recommended approach blends timing, space management, and aggressive but controlled DPS. Don’t chase the boss into tight corners; instead, hold lines that let you strike during exposed moments and retreat when the worm prepares a fresh strike. The result is a rhythm that scales with the fight’s duration and keeps you alive long enough to claim the victory.
Loot, Drops, and Progression after the Fight
Defeating the eater of worlds terraria yields a mix of materials used for early progression and crafting. Loot drops typically include unique resources that enable access to stronger equipment and upgrades, propelling you toward later bosses and biomes. In addition to loot, consider how this victory alters your progression curve: you’ve proven your ability to manage a challenging arena, coordinate team actions (if playing multiplayer), and survive extended engagements. This combination of skill and resource gain helps you prepare for future content, including harder biomes and tougher bosses. Pixel Survival suggests cataloging your loot so you can plan your next steps—whether it’s upgrading armor, stocking refined weapons, or crafting new accessories that enhance mobility and defense. Always check your world’s available items and how they interact with your current loadout to optimize post-fight progression.
Common Mistakes and How to Avoid Them
One frequent misstep is underestimating the importance of arena layout. Rushed fights with a cluttered battlefield dramatically increase the risk of taking dangerous hits. Another pitfall is ignoring healing and buffs during long exchanges; maintain your potion cadence and avoid long stretches without regeneration. Players often mismanage their movement, staying too close to the head or tail and getting knocked into danger zones. A third error is failing to adapt gear to the fight’s phase changes; prioritize mobility and defensive buffs as the worm shifts through exposures. Finally, do not forget to communicate in multiplayer: assign roles, mark targets, and share healing duties to maintain a steady DPS rhythm throughout the encounter.
Tools & Materials
- Armor set with high defense(Prefer models that offer mobility and good survivability for long fights.)
- Weapon with good reach and DPS(Ranged or melee with long reach helps you hit exposed segments from a safe distance.)
- Healing items (potions, consumables)(Ensure you can sustain yourself through extended exchanges.)
- Arena materials (platforms/blocks)(Create a flat, obstacle-free space with vertical options.)
- Mobility aids (grappling hook, wings)(Optional but highly beneficial for dodging coil attacks.)
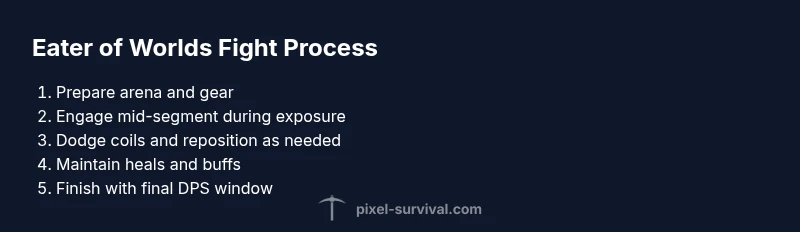
Steps
Estimated time: 20-40 minutes
- 1
Prepare the arena
Clear a large, flat space in the Corruption cavern, add several platforms, and ensure exits for retreat. Place healing items in convenient spots. This foundation reduces panic during later phases.
Tip: Pre-build the arena a day before you attempt the fight to avoid last-minute changes. - 2
Load out with defense and reach
Equip a defensive armor set and a weapon with good reach to consistently hit mid-segments. Ensure you have buffs active before you engage.
Tip: If you lack a strong setup, consider farming a basic pre-hardmode set to maximize survivability. - 3
Engage mid-segment early
When the worm surfaces, focus on the exposed mid-segment for stable DPS while avoiding the head and tail. Move laterally to stay out of coil paths.
Tip: Keep mobile, don’t chase the head into tight spaces. - 4
Dodge coils and retreat when needed
Coil attacks come in waves; back away quickly and re-enter when the worm resets. Use platforms to gain vertical separation.
Tip: Use a grappling hook or wings if available for rapid repositioning. - 5
Hew through the phases with steady DPS
Maintain consistent hits during exposure windows, cycling healing as soon as you see a safe pause. Don’t overcommit during risky moments.
Tip: Pause heals briefly if you’re nearing full HP to avoid wasting potions. - 6
Finish strong and secure loot
As the worm retreats for the final time, push a last burst of DPS to finish the fight. Gather drops and prepare for next progression steps.
Tip: Document what you earned to plan future builds.
Got Questions?
What is the eater of worlds terraria, and why is it significant?
The eater of worlds terraria is a major corruption boss whose defeat marks a key milestone in pre-hardmode progression. It teaches players arena control, timing, and resource management. Understanding its mechanics helps you prepare for tougher challenges ahead.
The eater of worlds terraria is a major boss that marks a key progression milestone and teaches timing and arena control.
How do you spawn the eater of worlds in most worlds?
Spawn conditions depend on game version and world setup. Generally, you trigger a corruption-related event that summons the boss. If you’re unsure, check a current Terraria wiki for your version.
Spawn conditions vary; check your version’s wiki for exact steps.
What gear is most effective against the eater of worlds terraria?
A mix of defense and reach is ideal. Choose armor that survives long fights and a weapon with good reach to hit mid-segments without getting crushed. Buffs and mobility items greatly improve your odds.
Use armor with high defense, a long-reach weapon, and mobility buffs to survive longer.
What loot should I expect after defeating the eater of worlds terraria?
Drops include resources used for early progression and upgrades. Loot varies by world and version, so inventory planning after the fight helps you prepare for next bosses.
Expect various early progression materials that help improve your gear.
Can I fight this boss in multiplayer, and are there any changes?
Yes, you can fight in multiplayer. Coordination matters: assign roles, distribute healing, and maintain a shared rhythm to avoid getting overwhelmed.
Yes, you can play with friends; coordinate roles for a smoother fight.
How can I optimize my arena for the eater of worlds terraria?
Keep space, clear sightlines, and ample healing items. Platforms help with positioning, and lighting improves visibility of segments during the fight.
Create a spacious arena with platforms and good lighting to track the worm’s movement.
Watch Video
Key Points
- Prepare a wide arena with vertical options
- Target the mid-segment during exposure windows
- Stay mobile to dodge coil strikes
- Maintain healing and buffs throughout the fight
- Loot and progression follow a successful takedown