Terraria Eater of Worlds: Step-by-Step Boss Guide
Master the Terraria eater of worlds with a step-by-step arena setup, phase-by-phase tactics, and loot guidance. Pixel Survival shares expert, practical tips for defeating this corruption boss and advancing your progression.

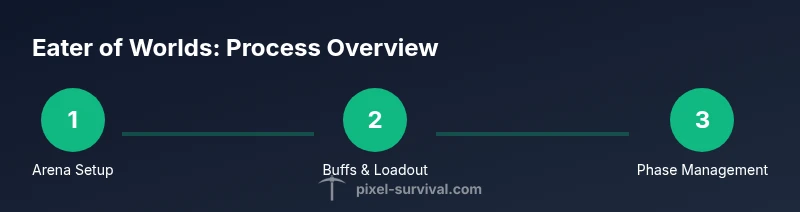
Defeat the Terraria eater of worlds by building a sturdy arena, choosing the right gear, and using phase-based tactics. This guide provides a practical, step-by-step approach, focusing on mobility, potion timing, and controlled damage. Pixel Survival shares proven methods to improve your odds and maximize loot across the fight. Whether you play solo or with friends, this outline keeps the fight safe and repeatable.
What is the terraria eater of worlds?
The terraria eater of worlds is one of Terraria's most iconic endgame bosses, a massive worm that stretches across the corruption biome and tests your reflexes, arena design, and resource management. The encounter emphasizes careful positioning, sustained damage during its long, segmented body, and the ability to adapt to changing phase dynamics. This guide draws on Pixel Survival's rigorously tested methods to help you approach the fight with confidence and consistency. By understanding the core mechanics, players gain a reliable framework to tackle this boss, regardless of whether they are playing solo or in a party. The terraria eater of worlds demands patience, precise timing, and a clear plan for mobility and healing—skills that separate casual attempts from decisive victories.
In practice, most players benefit from treating the fight as a multi-stage engagement. Each phase introduces new challenges, such as changing threat patterns, increased damage, or shifting visibility. While the exact drops can vary by game version, the strategic emphasis remains constant: control space, maintain movement, and optimize potion timing to maximize uptime. This section sets the foundation for a repeatable approach that scales with your gear and world progression, making the terraria eater of worlds a manageable, winnable boss even for aspiring players. According to Pixel Survival, mastering the fight hinges on disciplined setup, mindful targeting, and a steady rhythm that minimizes risk while maximizing DPS.
–
The terraria eater of worlds is a test of planning as much as reflexes, and your success hinges on preparation as much as courage.
A well-designed arena, reliable buffs, and disciplined phase handling are the pillars of victory.
Tools & Materials
- Health Potions(Stock 20+ depending on your build and party size; plan for multiple heals across phases.)
- Greater Healing Potions(Stronger heals for critical moments; combine with buffs for best uptime.)
- Endgame-appropriate weapon or reliable DPS option(Choose a setup you can consistently land hits with across long ranges.)
- Armor set suitable for corruption/hardmode progression(Prioritize mobility and survivability; wings or boots help maintain space during the fight.)
- Arena blocks, platforms, and lighting(Create a long, flat surface with gaps to manage movement and avoid collapse.)
- Buff items and consumables (potions, Food buffs)(Optional but can significantly improve survivability and DPS during phases.)
Steps
Estimated time: Total time: 60-90 minutes
- 1
Prepare your arena and loadout
Choose a long, wide arena with multiple platform tiers and good lighting. Equip a versatile weapon and arrange your armor for mobility and sustained DPS. Place heart lanterns or well-lit zones to monitor your health easily.
Tip: Lay out clear lanes to dodge progress across the worm's segments and keep your eyes on the boss head for timing attacks. - 2
Select your buffs and potions
Open with a solid potion stack: healing potions, a regeneration potion, and a movement or endurance buff. Time your strongest heals for moments when the boss is about to curve its attack pattern.
Tip: Use movement buffs before the first head strike to maximize your uptime during the early segments. - 3
Engage from a controlled distance
Approach the fight from a safe distance so you can react to the worm's segmented body without getting trapped by multiple segments at once. Maintain a pace that lets you dodge tail sweeps while delivering consistent DPS.
Tip: Keep a mental cooldown tally for heals and major DPS moments to avoid over- or under-healing. - 4
Target the head and maintain space
Direct your main DPS toward the worm's head when possible; treat the segments as obstacles and use gaps to reposition. If the arena narrows, switch to ranged or wider-area attacks to maximize coverage.
Tip: If your damage is scattered, switch to a more centralized weapon for head hits during critical windows. - 5
Phase management and healing timing
The fight progresses through distinct phases; adjust your DPS cadence and healing timing to align with increased aggression. When the head adopts a faster motion pattern or new threats appear, pause long enough to heal and reposition.
Tip: Don't chase extra hits during intense phases—preserve health for the next window of opportunity. - 6
Finish the encounter and collect loot
As the final health bar dips, concentrate fire on the head for a clean finish. Then collect loot and prepare for the next progression step in your world.
Tip: Stay alert for last-second movements and ensure you have a clear run back to your loot pickup zone. - 7
Post-fight arena check and recovery
Reset the area if you’re continuing with multiple attempts; repair platforms, restore buffs, and position to avoid lingering hazards. Review your run and adjust your setup for future attempts.
Tip: Take notes on timing windows that proved most forgiving and adjust your rotations accordingly. - 8
Practice runs for mastery
If you struggled on the first attempt, run simulated practice sessions focusing on phase transitions and movement without full DPS—repeat until you can execute reliably.
Tip: Consistency beats raw DPS in challenging multi-phase fights.
Got Questions?
What is the terraria eater of worlds and why is it challenging?
The terraria eater of worlds is a massive corruption boss with a long, segmented body. It requires careful arena design, steady dodging, and phase-aware DPS. Its multi-phase mechanics reward preparation and rhythm over raw brute force.
The EoW is a huge corruption boss with phases—great preparation and timing make it beatable.
How do I summon and access the Eater of Worlds in a world?
In most worlds, you encounter the Eater of Worlds as you explore the corruption zone and progress through the game’s early to mid stages. The exact encounter conditions can vary by game version, so adapt to your world’s progression.
You’ll encounter the EoW by progressing in the corruption zone; specific triggers can vary by version.
What loadout works best against the Eater of Worlds?
A balanced loadout with mobility, reliable DPS, and solid healing is key. Choose a weapon you can consistently land hits with across the arena, plus armor that enhances survivability and movement.
Go for mobility, consistent DPS, and solid healing to survive the multi-phase fight.
Can this boss be defeated solo, or is it better with a team?
The EoW can be defeated solo with a well-prepared arena and gear, but coordination and role distribution in a team setup can reduce risk and speed up the kill.
Yes, but teams can make it easier by dividing healing and DPS duties.
What loot or rewards should I expect from the Eater of Worlds?
Loot varies by game version and progression, but you can expect materials and items that support corruption progression and crafting pathways.
Expect corruption-related gear materials and progression items; exact drops depend on version.
What mistakes are common during the fight, and how can I avoid them?
Common mistakes include overextending on DPS, neglecting healing timing, and failing to manage arena space. Avoid these by sticking to a solid timing plan, preserving space, and healing before critical moments.
Watch healing windows and keep room to dodge; don’t rush in during dangerous phases.
Watch Video
Key Points
- Prepare a long arena with clear lanes.
- Maintain mobility and phase-aware healing timings.
- Prioritize head hits during safe windows for max DPS.
- Coordinate with teammates for healing and DPS duties.
- Loot and progression follow once the boss is defeated.