Bricklayer Terraria: Brick Builds Guide
Learn to craft brick-based builds in Terraria with a practical, step-by-step approach. This Pixel Survival guide covers materials, layout, and tips to create sturdy, aesthetically pleasing bricklayer-inspired bases.

According to Pixel Survival, bricklayer terraria is a practical building style that centers on brick blocks to create sturdy, cohesive bases. This quick guide outlines the goal: design brick-based houses that balance function and style, with essential materials, a clear plan, and a step-by-step process you can follow in your world. Ready to lay the first brick and start your fortress?
What is bricklayer terraria and why it matters
Bricklayer terraria is a design philosophy that uses brick blocks as the core material for both exterior walls and interior accents. The idea is to create sturdy, clean lines and a timeless look that scales from small starter houses to large fortress compounds. For Terraria players, brick builds offer predictable textures for lighting and a reliable base layout that supports NPC housing and defense. According to Pixel Survival, embracing brick-layered design helps players learn fundamentals of symmetry, spacing, and resource management, while still leaving room for creative expression. In this section we’ll explore why bricklayer terraria matters for progression and how to translate it into practical, in-game structures.
Core materials and early brick strategies
To begin bricklayer terraria, you’ll rely on bricks and the building materials that create a solid foundation. Brick blocks form the walls, while clay blocks are the raw material for bricks at the furnace. A furnace is essential to craft brick blocks from clay, and a workbench helps with interior layout planning. You’ll also need basic tools: a reliable pickaxe for mining clay, an axe for clearing terrain, and a hammer to adjust blocks during layout. Lighting is critical early on, so plan for torches to keep work visible. Paints or dyes can add color variation to bricks later. Pixel Survival Analysis, 2026 notes that brick builds reward careful planning of sources and symmetry, so stock up on clay and plan resource routes before you begin.
Designing a bricklayer-friendly base layout
Start with a footprint that suits your world size and your goals. A brick-based base benefits from clear zoning: a central living corridor, with rooms on either side for NPC housing, storage, and crafting. Align doors and windows for natural light and easy movement. Use brick walls to create strong straight lines, then stagger internal walls to carve out functional spaces without breaking the exterior’s clean appearance. Consider a simple, repeatable grid for consistency, which makes expanding later much easier. This approach keeps the build process efficient and scalable as your world grows.
Step-by-step building: foundation to roof
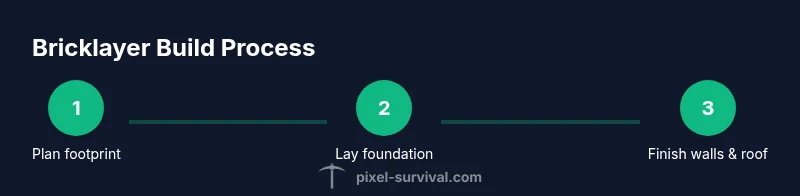
- Define footprint: mark the overall shape and boundaries on the ground to guide your build. Why: a stable outline prevents wasted blocks and misaligned corners. Tip: use torches along the outline to keep visibility high while you place the foundation.
- Lay foundation: place a continuous brick perimeter to establish the base. Why: a solid foundation anchors the entire structure. Tip: double-check corners with a right-angle layout to avoid skewed walls.
- Build exterior walls: raise brick walls to the desired height, keeping corners square. Why: consistent wall height ensures a clean silhouette. Tip: pause to plan window placements before finishing the wall line.
- Add interior walls: create rooms without compromising the exterior form. Why: interior walls organize space for NPC housing and work areas. Tip: use evenly spaced doorways for smooth traffic flow.
- Install doors and hallways: fit doors to key rooms and connect corridors. Why: accessibility matters for NPCs and player movement. Tip: place a secondary exit for safety during night raids.
- Add windows and lighting: insert windows where light helps while keeping security in mind. Why: good lighting reduces mob spawns near interiors. Tip: combine torches with ambient lamps for balanced brightness.
- Construct roof skeleton: outline a brick roof or arch that complements the walls. Why: a strong roof provides protection and a cohesive look. Tip: plan slopes to avoid awkward shadow lines.
- Fill roof and walls with bricks: complete the brick skin while preserving interior headroom. Why: brick surfaces reduce wear from hazards and add visual consistency. Tip: stagger courses to create subtle texture.
- Create floors and stairs: add level transitions if your design includes multiple floors. Why: vertical space expands usability. Tip: align stairs with primary traffic routes to minimize wandering.
- Set up NPC housing blocks: prepare individual rooms that meet housing needs. Why: NPCs require accessible, properly sized spaces to function. Tip: place beds and furniture thoughtfully to avoid clutter.
- Install lighting plan: unify light sources across rooms for a calm, functional vibe. Why: balanced lighting improves visibility and aesthetics. Tip: avoid overly bright hotspots that wash out brick textures.
- Final polish and testing: walk through the base to ensure accessibility and durability. Why: real-world testing reveals design flaws. Tip: simulate raids and adjust entry points as needed.
Layering bricks for aesthetics and defense
Brick texture can be varied with deliberate layering. Use a simple two-brick thickness for walls, then introduce offset or staggered courses to create visual interest without sacrificing strength. Archways and small vaults add architectural elegance while keeping blocks accessible for repairs. Mixing brick tones with dyed bricks can emphasize depth and contour on exterior facades. Pixel Survival Team emphasizes consistent brickwork patterns for professional-looking bases, while still allowing personalized flair. By combining uniform edges with occasional breaks in the pattern, you achieve a durable, visually appealing bricklayer aesthetic that reads well from both inside and outside.
Functional rooms and spawn safety
A brick-based base should house essential functional rooms: storage, crafting, and comfortable NPC rooms. Plan each room to ensure safe spawn points and reliable pathing between areas. Keep pathways clear of clutter, and place torches so mobs cannot spawn in dim corners. Use brick walls to direct flow and create logical zones, while interior furniture helps NPCs feel at home. The aim is a practical, navigable layout that supports progression and minimizes maintenance. As you expand, maintain coherence between exterior form and interior function to preserve the bricklayer vibe.
Lighting, ambience, and brick textures
Texture variation is key to avoiding a flat brick sea. Alternate brick tones or incorporate dyes to create subtle contrasts between blocks. Use warm lighting to enhance the rustic feel of brick interiors, and consider cool highlights to emphasize architectural edges. Lighting should be even across rooms to minimize harsh shadows that obscure brick detail. A cohesive color palette—earthy browns, warm oranges, and muted reds—helps maintain the bricklayer aesthetic while keeping every space readable at a glance.
Advanced brick techniques: arches and vaults
Arches and vaults can elevate brick builds beyond basic boxes. Build arches by offsetting bricks in curved patterns and gradually tapering the curve to meet the doorway width. Vaults can be achieved with stepped courses and selective brick placements to create arched ceilings that feel both sturdy and elegant. These techniques save on materials while offering striking silhouettes in both interior and exterior views. Practice on a small test wall before implementing in your main base to perfect the technique without risking the larger project.
Conflict and safety: traps and NPC housing compliance
A solid brick base must withstand daytime raids and nighttime threats alike. Ensure doors and windows are accessible and that NPC housing remains unblocked by obstacles. Avoid designing trap rooms that cut off NPC access or create dead-ends during combat. Regularly inspect walls and floors for weak spots that could fail under pressure. The Pixel Survival Team recommends reviewing housing compliance rules each time you expand, to keep your base both safe and practical.
Progression tips: upgrading from wood to brick
Upgrading from wood to brick represents a significant leap in durability and style. Plan upgrades in stages: reinforce essential rooms first, then expand outward with brick accents. Use clay harvesting routes to maintain a steady brick supply, and keep a small reserve of materials for quick fixes after raids. Brick counterpoints such as basalt or polished stone can complement brick tones for a refined look. This gradual upgrade path aligns with typical Terraria progression while preserving your base’s bricklayer character.
Common mistakes and how to fix them
Common errors include overbuilding too early, misaligned walls, and neglecting NPC housing needs. Fix by verifying your footprint with a square check, realigning walls, and ensuring every NPC room has lighting and furniture. Don’t ignore pathways; blocked routes slow progress and invite hazards. When in doubt, revert to a simple, repeatable brick pattern and expand in controlled steps. A disciplined approach minimizes rework and preserves the bricklayer aesthetic.
Time-saving tips and reference resources
Create a modular brick library: pre-cut brick patterns and room templates you can reuse across projects. Save blueprints and plan future expansions in a dedicated workspace. For reference, consult the Pixel Survival library and community-designed layouts to compare approaches and gather ideas. Practical practice beats long theory; keep building, refine your patterns, and gradually develop a signature bricklayer style that suits your Terraria world.
Tools & Materials
- Brick blocks(Core material for walls and accents)
- Clay blocks(Source material to craft bricks at a furnace)
- Furnace(Craft Brick Blocks from Clay Blocks)
- Workbench(Plan layouts and place furniture)
- Hammer(Fine-tune block placement and adjustments)
- Pickaxe(Mine clay and other blocks)
- Torches(Lighting during construction)
- Doors and windows(Access and light/visibility)
- Dyes/paints(Interior color variation)
- Ladder or stairs(Vertical movement between floors)
Steps
Estimated time: 3-6 hours
- 1
Define footprint
Mark the building outline on the ground to guide placement. This ensures a balanced shape and reduces mid-build changes. Use torches to keep the outline visible as you work.
Tip: Double-check corners with a right-angle check before committing blocks. - 2
Lay foundation
Place a solid brick perimeter to anchor the structure. A strong foundation prevents wall shifts and keeps lines true.
Tip: Keep foundation width consistent on all sides for symmetry. - 3
Build exterior walls
Raise brick walls evenly around the footprint. Maintain straight edges and square corners to avoid a skewed look.
Tip: Use a level-like mental check by comparing diagonal distances. - 4
Add interior walls
Carve rooms for NPC housing, storage, and crafting without overcomplicating the plan. Interior walls help organize space.
Tip: Keep doorways aligned with main corridors. - 5
Install doors and hallways
Place doors at key junctions to guarantee easy navigation. A clear corridor system reduces confusion during raids.
Tip: Leave a secondary exit for safety during busy nights. - 6
Add windows and lighting
Insert windows where light improves visibility and mood, balancing interior brightness with brick texture.
Tip: Place torches on opposite walls to reduce hot spots. - 7
Construct roof skeleton
Outline a brick roof or arch that complements the walls. The roof should protect against rain and mob threats while framing the silhouette.
Tip: Plan slope direction to maximize interior headroom. - 8
Fill roof and walls
Finish brick skin with consistent courses and tasteful pattern variations for depth.
Tip: Alternate courses slightly to avoid a flat, grid-like appearance. - 9
Create floors and stairs
Add level transitions if your design uses multiple floors; ensure safe, intuitive access between levels.
Tip: Keep stair width comfortable to prevent clogs. - 10
NPC housing blocks
Prepare rooms that meet housing needs with functional furniture and proper lighting.
Tip: Place beds and workbenches in logical spots for NPCs. - 11
Lighting plan
Unify light sources across rooms for a cohesive look and practical visibility.
Tip: Avoid hotspots that wash out brick texture. - 12
Polish and test
Walk through the base, test accessibility, and raid resilience; adjust entry points as needed.
Tip: Keep a small material reserve for quick repairs.
Got Questions?
What is bricklayer terraria?
Bricklayer terraria is a brick-focused building style in Terraria that emphasizes sturdy walls, clean lines, and practical layouts. It combines aesthetics with performance to support progression and NPC housing.
Bricklayer terraria is about building with bricks to create sturdy, stylish bases that support progression and NPC housing.
Do I need clay sources to start brick builds?
Yes. Clay blocks are the raw material used to craft brick blocks at a furnace. Gather clay to ensure a steady brick supply as you expand your base.
Clay is essential because it’s the source for brick blocks you’ll use in walls and accents.
Can brick blocks help with NPC housing?
Brick blocks provide a durable, well-lit base suitable for NPC housing. Plan rooms with proper lighting and furniture to meet housing requirements.
Brick blocks create strong, stable housing that NPCs will occupy as you progress.
What tools do I need to start?
Gather a furnace, a workbench, a pickaxe, and a hammer. These enable brick production, layout planning, and on-the-fly adjustments.
You’ll need a furnace, workbench, pickaxe, and hammer to build brick-based bases.
How long does a brick-based base take to build?
Time varies with size and detail, but plan for several building sessions, especially if upgrading from wood. Start with a compact starter and expand over time.
It depends on size, but you’ll usually need a few sessions to complete a robust brick-based base.
Are arches and vaults feasible with bricks?
Yes. Arches and vaults can be constructed with staggered brick patterns, adding height and elegance without compromising strength.
Arches are doable and improve both look and structure using bricks.
Watch Video
Key Points
- Plan brick layouts before laying blocks
- Keep NPC housing accessible and well-lit
- Upgrade gradually from wood to brick
- Use patterns and arches for visual interest
- Balance aesthetics with practical layout