Bridge Terraria Guide: Safe Bridges Across Gaps
Learn to plan, design, and build sturdy bridges in Terraria with step-by-step techniques that scale from early wood platforms to late-game stone spans. This guide covers materials, patterns, and biome considerations to help you progress safely.

By the end of this guide you will be able to design and build reliable bridges in Terraria that work across chasms, rivers, and lava hazards. You’ll move from early-game wood platforms to durable mid- and late-game spans, using proven patterns and safe layouts. This bridge terraria approach keeps you traversing quickly without unnecessary exposure to enemies, lava, or drops.
What is a Bridge in Terraria and Why Build One?
A bridge in Terraria is more than a simple path; it is a strategic construction that lets you cross vast gaps, streams of lava, and dangerous terrain with minimal risk. In the context of bridge terraria, players typically start with lightweight options like wooden platforms and evolve toward more durable blocks as resources allow. Bridges speed up exploration, enable safer farm routes, and unlock new biomes that were previously inaccessible. A well-designed bridge also acts as a shield against hostile mobs that would otherwise interrupt your progression. The key is to choose materials and patterns that match your current gear, terrain, and objective—whether you’re racing to reach a dungeon, crossing a cavern, or simply connecting your base to a mining outpost. As you expand your bridge network, you’ll notice improvements in travel time, resource efficiency, and overall survivability. Remember: bridge terraria is as much about planning as it is about placing blocks.
Quick tip for this section
- Start with a rough route map on paper or in your mind, then translate it to the world piece by piece. This keeps your bridge both functional and aesthetically pleasing.
Why objects like platforms matter
- Platforms let you span small gaps without revealing dangerous ground below. They’re especially useful in early-game setups when stone blocks are scarce and mobility is limited.
Tools & Materials
- Wood blocks(Basic early-game material; good for quick, lightweight bridges.)
- Wooden platforms(Crucial for gap-spanning sections and alternating paths.)
- Stone blocks(Provide lava and hazard resistance for longer spans.)
- Torch or light source(Keep the bridge illuminated to spot hazards and enemies.)
- Workbench(Needed to craft platforms and some bridge-related items.)
- Axe or pickaxe(Needed to gather materials and place blocks.)
- Ropes(Useful for vertical climbs and edge safety.)
- Grappling hook (optional)(Can speed traversal along a bridge and ladders.)
Steps
Estimated time: 60-90 minutes
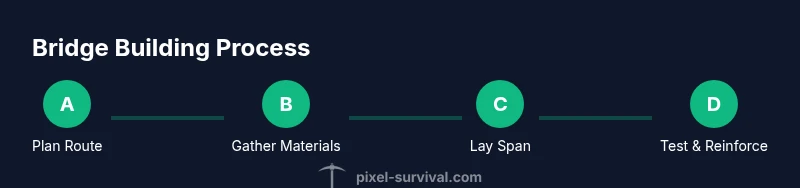
- 1
Plan the route and measure the gap
Identify the crossing point, estimate the length, and choose a starting height that keeps you above most hazards. This helps you decide whether a straight span or a stepped pattern is best. A well-planned route minimizes backtracking.
Tip: Sketch the route in your map or cursor grid to visualize spacing before placing blocks. - 2
Gather materials and craft platforms
Collect wood and craft wooden platforms at your Work Bench. Platforms give you safe stepping surfaces over gaps and lava when needed, and they’re quick to replace if you misplace a tile.
Tip: Keep a small reserve of platforms in your inventory for quick replacements. - 3
Lay a temporary scaffold to align the bridge
Place a light scaffold line using blocks or platforms to verify alignment and sightlines. This helps avoid awkward angles and ensures the bridge looks and performs as intended.
Tip: Use torches along the scaffold to illuminate misalignment points. - 4
Place the main span with blocks or platforms
Fill the primary crossing with the chosen blocks or platforms, maintaining a consistent height and rail spacing. If you anticipate lava or falls, consider alternating blocks for built-in safety rails.
Tip: Place from one end toward the other to keep tension consistent. - 5
Add side rails and lighting for safety
Install rails or higher blocks along the sides and place torches or glow sources to prevent ambushes from dark corners. Lighting also helps you spot gaps when traveling at speed.
Tip: Keep rails a notch higher than your main surface to deter accidental slips. - 6
Test the bridge by crossing slowly and adjust
Walk the length of the bridge, paying attention to misaligned tiles or weak points. If you notice gaps or wobble, reinforce the most stressed segments with additional blocks or platforms.
Tip: Have a backup block supply ready for rapid fixes during testing. - 7
Reinforce critical sections against hazards
Strengthen areas that pass lava streams or caverns with sturdier blocks where possible. In some cases, a small buttress or diagonal support can dramatically improve stability.
Tip: Prioritize wide, stable sections near hazards for maximum impact. - 8
Save the design and create templates for future builds
Document your pattern and keep a building template ready for other gaps. Reusing proven patterns saves time and ensures consistency across your Terraria worlds.
Tip: Create a quick reference document with note blocks and material lists.
Got Questions?
What is the best material to start a bridge in Terraria?
Wood blocks and wooden platforms are ideal for early bridges because they’re easy to harvest and quick to place. As you acquire more resources, upgrade to stone blocks for safety and durability.
Wood and platforms are best to start; upgrade to stone blocks as you progress.
Can I use wood platforms alone to create a bridge?
Yes, platforms can form the base of a bridge, especially for short gaps or rapid routes. For longer spans, supplement with solid blocks to improve stability and walking feel.
Platforms alone can work for short gaps, but add solid blocks for long spans.
How wide should a bridge be for safe travel?
Aim for a width that allows comfortable passage and side rails. Width depends on your world and mobility, but having a clearly defined path with safe margins reduces accidents.
Choose a comfortable width with rails on both sides.
What’s the safest way to cross large gaps over lava?
Use lava-safe blocks like stone or bricks where possible. Avoid wood across lava entirely if you can, and ensure the bridge sits well above any lava flow paths.
Stick to lava-safe blocks and keep a buffer above the lava.
Should I level the ground before bridging?
Clearing a level route reduces placement mistakes and helps you maintain even height. If terrain changes, adjust your bridge height gradually.
Yes—level the route first, then bridge progressively.
Are biome-specific designs worth it?
Yes. Some biomes require different patterns or materials due to hazards, enemies, or resource availability. Adapt your bridge terraria approach accordingly for safety and efficiency.
Biomes may need different designs; adapt as needed.
Watch Video
Key Points
- Plan the route before starting
- Use platforms for quick gaps
- Light bridges for safety
- Test and reinforce critical sections
- Document and reuse successful patterns