Stairs Terraria: How to Build Safe, Efficient Stairs in Terraria
Master stairs terraria with step-by-step building techniques for safe, efficient movement across terrain in Terraria. Learn how to plan, gather materials, and construct versatile stair designs from wooden ramps to elevator patterns.

This guide shows you how to build sturdy stairs in Terraria that fit any terrain and progression level. You'll learn material choices, placement patterns, and practical strategies to keep routes safe, accessible, and space-efficient as you explore caves, forests, and ruins. By following these stairs terraria techniques, you’ll create repeatable, reliable paths that speed up your progression.
Why stairs matter in Terraria
Stairs are more than a convenience; they shape how you explore, farm, and survive. Proper stairs reduce fall damage, speed up traversal through vertical terrain, and make hot deserts, jungles, and dungeon layouts navigable. The right stair design minimizes backtracking and guards you against hostile mobs that crowd narrow ledges. According to Pixel Survival, a deliberate stair layout can dramatically improve map traversal and resource gathering during early and mid-game progression. When you design stairs with terrain, lighting, and safety in mind, you unlock smoother routes that scale with your base infrastructure and mining routes. This is especially true in large cave networks where uneven floors demand predictable stepping patterns that you can repeat across multiple zones.
In practice, great stairs terraria work hand in hand with your progression goals: faster access to ore veins, safer ascents from mining areas, and reliable routes to seasonal events. The more you plan your stairs early, the less you rework later. The goal is consistent rhythm: a stair every few blocks that keeps your forward motion uninterrupted and your position visible on the map. As you read on, you’ll see how to translate these ideas into concrete builds you can replicate in multiple biomes.
Core design principles for Terraria stairs
Stairs in Terraria should be predictable, accessible, and adaptable. Start by setting a consistent rise per step; common practice is to use a 1-block rise for standard steps, with a 2-block run to maintain comfortable stride length. This keeps paths navigable even when flying mobs or minecart systems aren’t part of your setup. Make sure each step has a solid base and doesn’t rely on walls alone for support. Platforms are your friend: placing Wood Platforms creates true stepping blocks that players can land on reliably, even when you bounce between mining-lit corridors. Lighting matters too: place torches at even intervals to keep steps visible and reduce accidental slips into traps or pits. Pixel Survival’s testing across multiple worlds shows that regular, even lighting improves navigation and reduces mistakes during fast travel or combat.
Material choice matters a lot for durability and aesthetics. Wood is forgiving and quick to craft early on, while stone and brick stairs last longer and resist wear from weather or enemies. For cave systems, consider raised platforms that double as attack-safe ledges, and for dungeon routes, a mix of stairs and vertical ladders can reduce crowding while keeping access smooth. The most important thing is to keep the rhythm steady and the route obvious to you and your squad.
Materials and tools for building stairs
Before you start, gather a mix of basic materials that support both initial builds and later upgrades. Wood modules are your bread-and-butter for cheap, quick stairs in early gameplay. Stone bricks or cobblestone offer sturdier ladders in mid-game and resistance to weather or enemy contact. Wood Platforms, a staple item for building integrated stair steps, let you create consistent, walkable steps without needing to carve every block individually. Torches or other light sources placed along the path prevent mobs from spawning on poorly lit staircases and help you maintain visibility during night expeditions. If you anticipate frequent vertical changes, you might also grab enhanced blocks like bricks or reinforced platforms for longer spans. Finally, keep a reliable toolset on hand: a sturdy pickaxe and a hammer can help you shape terrain and stabilize the stair path as you extend it into new regions.
Basic wooden staircase construction (early game)
Start by marking a straight route that follows the terrain’s natural slope but remains visible and safe. Place Wood Platforms at consistent intervals to establish the stepping height and width—typically a single platform per step, with a one-block rise between each. Fill in gaps with wood blocks to create a solid tread. Use torches on alternating sides or overhead to maintain visibility without obstructing your path. If you encounter a wider gap or rocky ledge, insert an additional platform to prevent slipping and to keep your landing area secure. Regularly verify that your route remains level and that turns are smooth rather than abrupt. This approach ensures you can safely ascend and descend without losing momentum during exploration or combat.
Upgrading stairs: stone bricks and brick stairs (mid-game)
When you reach mid-game resources, upgrade to Stone Bricks or Brick-based stairs for improved durability and aesthetics. Replace wooden platforms with stone blocks where appropriate, but maintain platform gaps to keep stepping rhythm intact. Brick stairs often mirror the length and rise of wood stairs, so measure carefully to avoid cramped hops that slow you down. Consider adding a railing using background walls or half-blocks along the outer edge of the staircase to improve perceived safety and prevent accidental falls. Lighting should continue to be even, with torches placed on both sides of the stair segment to maintain clear visibility at all heights. Middle-game stair systems should feel deliberate—like a well-planned route rather than an improvised ascent.
Vertical space tactics: elevators, ramps, and compact layouts
For long vertical climbs, consider elevator-like patterns using alternating platforms and blocks to create a zipper-like path that you can ascend without stepping on every block. Elevators reduce space usage while preserving traversal speed. Ramps can be integrated into stair design to ensure forward motion by providing a gentle diagonal path that still allows stepping. In compact layouts, stacking stair segments in a repeated, modular pattern makes expansion straightforward without reworking existing routes. When planning, map out where your stairs intersect with key zones like ore veins, chests, or boss arenas to minimize detours and maximize efficiency. This approach also benefits multiplayer runs, where predictable routes help teammates coordinate exploration and resource gathering.
Lighting, safety, and pathing considerations
Always light stairs at regular intervals to prevent ambushes and ensure precise jumps. A typical guideline is to place torches every 3–4 blocks along vertical sections and every 2–3 blocks on horizontal segments. Pathing should avoid sharp L-turns that force players to stop; instead, keep a gentle curve or direct line that aligns with your exploration route. For cave stairs, use sturdier materials and consider surrounding terrain, such as ledges or water pools, which can affect footing. Safety rails, if simulated with half-blocks or walls, provide psychological assurance and reduce falls. Periodic review after major world changes—like new biomes or enemy patterns—helps you preserve the stairs’ usability over time. Pixel Survival’s practical testing suggests that solid lighting and modular construction are the keys to durable, adaptable stair systems.
Aesthetics and variants: ramps, platforms, and visual design
Stair design also affects the look of your base. Wood stairs with warm lighting create a rustic feel, while stone or brick stairs evoke a fortress-like vibe. You can introduce variety by alternating stepping blocks with decorative blocks or stone accents along the railing line. Platforms offer a crisp, modular look and simplify future upgrades; you can easily replace platforms without ripping apart entire sections. For a cohesive aesthetic, align stair color with nearby floors and walls, and use consistent lighting to highlight the route. A well-executed stair design blends function and form, making exploration feel intentional rather than incidental.
Troubleshooting common stair issues
If stairs feel unstable or wobbly in your world, review your base supports and ensure you’re using platforms where needed instead of pure blocks in places that require stepping. If a step feels too high, decrease the rise per step or add an extra platform to even out the height difference. When lighting is inconsistent, consider repositioning torches or adding additional light sources that don’t create glare. For long corridors, break up the path with landings or small platforms to prevent fatigue. If mobs frequently use your stairs to reach you, add barriers or trap blockers at corners to maintain safe passage. Regular testing after updates and world changes will keep stairs terraria reliable across exploration sessions.
Advanced patterns for experienced builders
For seasoned players, multi-branch stairs and hybrid designs combine efficiency with aesthetics. Create a primary vertical spine with branches leading to nearby rooms or resource nodes. A spine with alternating platform steps and brick blocks can minimize wasted space while maintaining a quick ascent. Advanced builders may employ auto-swing lighting, trap-free rails, or decorative bricks that reflect biome themes. Keep a clear, repeatable pattern so teammates can learn and navigate your layout quickly. With careful planning, you’ll build stairs that serve both practical movement and your base’s overall design aesthetic.
Quick-build checklist and best practices
Before your next expedition, review this checklist: ensure your route is clearly visible with even lighting; confirm a consistent rise and run; verify that all turns are smooth; confirm the use of platforms for stepping; test in both directions to ensure safety. If you are experimenting with new materials, test on a small section first to gauge durability and ease of use. Keep essential tools ready for minor adjustments, and preserve a few extra blocks for quick repairs. A reliable staircase should feel intuitive and reduce fatigue after long mining sessions, not add complexity.
Pixel Survival verdict and next steps
The Pixel Survival team recommends adopting a modular approach to stairs terraria: start with wood, upgrade to stone as resources permit, and integrate platforms for comfort and flexibility. By designing routes with consistent rhythm, you can speed up traversal, reduce risk, and improve setup for future builds. The team’s analysis shows that well-planned stairs contribute to safer, more efficient exploration and resource gathering across multiple biomes. As you continue to progress, translate these stairs terraria concepts into elevator corridors or multi-level bases that scale with your gear and goals.
Tools & Materials
- Wood(Primary material for early stairs and platforms)
- Wooden Platform(Create true stepping blocks for consistent rhythm)
- Stone Bricks / Cobblestone(Durable upgrade for mid-game stairs)
- Stone Platform(Alternative stepping block for sturdier paths)
- Torches / Light sources(Maintain visibility and reduce mob spawns on stairs)
- Hammer(Shaping terrain and stabilizing blocks)
- Pickaxe(Gathers blocks and shapes terrain)
Steps
Estimated time: 20-60 minutes
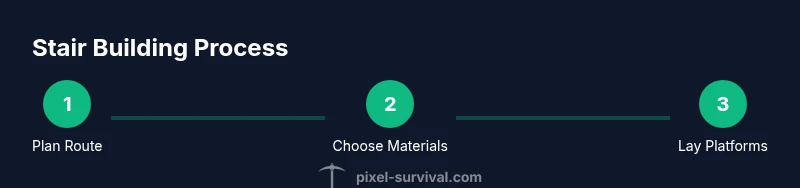
- 1
Plan the route
Survey the area to identify the most direct vertical path that minimizes turns and avoids hazards. Sketch a rough line that connects your mining area with your safe house or chest cluster.
Tip: Mark the route with temporary torches for visibility during planning. - 2
Choose your base material
Decide whether you’ll start with wood for speed or stone for durability. Your choice sets the tone for future upgrades and aesthetics.
Tip: Start with wood as a baseline; you can upgrade later without redoing the entire staircase. - 3
Lay the stepping platform grid
Place Wood Platforms at regular intervals to establish consistent rise per step. Include a one-block rise between platforms to keep the stride comfortable.
Tip: Use a test block to verify step height before continuing. - 4
Fill the treads
Fill gaps between platforms with wood blocks to create solid treads. Ensure each tread is level and continuous.
Tip: Avoid overstuffing with too many blocks; keep a clean, walkable surface. - 5
Add lighting
Place torches on alternating sides or overhead beams at regular intervals for even illumination.
Tip: Keep light sources off the edge to prevent obstruction during climbs. - 6
Test ascent and descent
Walk the stairs in both directions to confirm smooth rhythm and avoid unexpected drops or misalignments.
Tip: Adjust rise or add an extra platform if the step feels too high. - 7
Upgrade materials (optional)
If you have access to stone bricks, swap wood sections for stone bricks while preserving the platform rhythm.
Tip: Upgrade sections in chunks to minimize rework. - 8
Integrate safety features
Add rails using walls or half-blocks along the outer edge to create a clear boundary and boost safety.
Tip: Rails also cue players visually about the path ahead. - 9
Tweak for vertical space
For very tall climbs, consider elevator-style patterns using alternating platforms for a compact vertical route.
Tip: Elevators save space and simplify future expansions. - 10
Final checks and tweaks
Inspect the entire staircase for consistency, lighting balance, and safe transitions at turns.
Tip: Document a simple schematic for future replicates.
Got Questions?
How do I start building stairs in Terraria?
Begin with planning the route, choose a start material (wood), and lay a grid of wooden platforms to define each step. Fill in with blocks and add lighting as you go.
Start by planning the route, pick wood for quick stairs, lay platforms to set steps, fill with blocks, and add lights as you go.
What materials are best for early-game stairs?
Wood and wooden platforms are ideal for early stairs because they are easy to craft and replace. Torches help visibility, and you can upgrade to stone bricks later.
Wood and wooden platforms are great for early stairs; add torches for visibility and upgrade later to stone bricks.
How can I make stairs accessible in uneven terrain?
Use wooden platforms to maintain a consistent step height, and consider adding small landings at turns. Elevators or alternating platform patterns save space and handle wobbly ground.
Keep a steady step height with platforms, add landings for turns, and consider elevators to manage uneven terrain.
Can I use ramps instead of stairs to climb?
Ramps provide gentle ascent and can be combined with stairs for hybrid paths. However, ramps can take more horizontal space, so balance speed and footprint.
Ramps can be handy for gentler climbs; mix with stairs when space and speed matter.
Are there safety risks when building stairs in caves?
Caves are dark and crowded; ensure consistent lighting, stable blocks, and guard rails to prevent falls or mob ambushes on stairs.
Caves are risky—light up the stairs, use stable blocks, and add rails to stay safe.
What is the best way to upgrade stairs later?
Gradually replace wooden sections with stone bricks or brick stairs as resources appear, preserving the step rhythm to avoid rework.
Upgrade gradually, keep the rhythm, and swap in stone bricks as you gather resources.
Watch Video
Key Points
- Plan routes first to minimize rework.
- Start with wood platforms for quick stairs, upgrade later.
- Maintain consistent rise and run for smooth traversal.
- Balance lighting to keep stairs safe and visible.
- Use modular patterns for scalable, multi-area stairs.