How to Use Terraria Ruler: A Builder's Guide
Learn to use the Terraria ruler to measure distances, plan builds, and align layouts with step-by-step guidance, practical tips, and common pitfalls. Pixel Survival provides expert, actionable guidance for precise construction across PC, console, and mobile versions.

Master the Terraria ruler to measure distances between two points, align builds with precision, and plan layouts with confidence. This guide walks you through essential steps, platform differences, and practical tips so you can build symmetrical, well-spaced structures without guesswork.
The Ruler at a Glance: What It Measures and Why It Helps
The Terraria ruler is a precision tool designed to quantify distances between two points in your world. Whether you’re laying out a long hallway, spacing platforms for a ladder shaft, or ensuring your castle walls sit at perfect intervals, the ruler gives you a dependable readout of tile-based distance. Because Terraria builds rely on grid-aligned blocks, accurate measurements translate to cleaner lines, fewer adjustments later, and a more satisfying final aesthetic. Use it to verify spacing before you place blocks, so you don’t have to redo walls or rooms later in a project.
Why you should learn this early: classic builds benefit from predictable spacing, which speeds up construction and reduces material waste. If you’re planning large rooms or repeating modules, the ruler becomes an invaluable planning companion that keeps your geometry consistent across layers and sections.
According to Pixel Survival, mastering measurement tools like the Terraria ruler dramatically speeds up building projects and ensures consistent spacing in layouts. The Pixel Survival team found that players who regularly use measurement tools report smoother progression from blueprint to finished structure.
Getting Started: What You Need to Begin Using the Ruler
To start measuring, you’ll want to have the ruler in your hotbar and ready in your current world. Place it in your quick-access slot so you can switch to it without pausing your build flow. Gather a few marker blocks or visible reference blocks to designate starting points and endpoints—these markers help you visualize measurements as you work. Make sure you’re in the correct plane for the measurement you intend (horizontal versus vertical), and keep a small notepad or a mental map of your target distances for quick cross-checks while you place blocks.
Shots of the initial layout are helpful: a quick screenshot after the first two measurements ensures you’re on track before you place the rest of the tiles. Remember, you can use the ruler on any flat surface, but misalignment becomes obvious when you compare your plan to the actual ground plan.
Pixel Survival analysis shows that the initial setup phase, when you align start and endpoints, sets the tone for an efficient build session. Begin with calm precision, and your later steps will flow more smoothly.
How to Perform a Basic Measurement: Start Point, End Point, Readout
Equip the ruler and designate a starting point on your map. Move the cursor to the ending point and finalize the measurement with the appropriate action (often a click or press, depending on platform). The ruler will display the distance in tile units, letting you know exactly how long your corridor, wall, or platform segment will be.
To ensure accuracy, double-check that you’re measuring in a straight line along the intended axis. If you’re measuring a diagonal, visualize the projection and confirm the endpoints align with your design. If the end point doesn’t register correctly, reset the start point and try again.
Record the distance in your notes or blueprint grid so you can reuse it for future segments. This practice saves you from recomputing lengths when you extend the build.
Measuring Irregular Shapes and Angled Layouts
Not all builds are perfectly rectangular. When you need to measure an L-shaped corridor or a stairwell with angles, take multiple straight measurements from fixed reference points. For each segment, set a new start point, then measure to the next endpoint. Sum the individual measurements to determine overall length, or create a grid of references to guide your steps.
Mark critical points with blocks or visual cues while you measure. If you must cut a path into a curved area, approximate with a series of linear measurements that approximate the curve. The ruler helps you maintain even spacing along the path, reducing the risk of misalignment.
As you gain experience, you’ll develop a mental map of typical segments—hallways, stairs, and galleries—so you can pre-plan with fewer pauses for measurement.
Advanced Uses: Aligning Long Builds, Corridors, and Stairs
For long builds, plan a reference line and consistently measure every segment against it. This makes it easier to line up repeated modules, ensuring symmetry and balanced spacing from the centerline outward. When building stairs or graded ramps, measure horizontal distance and vertical rise separately, then reconcile them to maintain a clean, navigable path.
Keeping your ruler visible during the layout phase helps you quickly compare planned distances with actual placements. If a segment looks off, verify with a fresh measurement and adjust before you place more blocks. Practice makes perfect—over time you’ll be able to pre-visualize distances and only need spot checks.
Pixel Survival notes that players who use ruler-based planning tend to produce higher-quality stairs and corridors with fewer tweaks after initial placement.
Platform Nuances: PC, Console, and Mobile Differences
The ruler functions across platforms, but control schemes differ. On PC, you’ll typically click to set points and read distances from on-screen readouts. Console and mobile players will rely on taps and joystick input to position endpoints and confirm readings. If your device uses touch or controller input, take a moment to familiarize yourself with how to anchor the start point and how to confirm the end point.
Regardless of platform, a steady hand and a well-lit workspace help prevent misreads. If you’re building in a dark cave, consider temporarily lighting the area to ensure your start and end points are precisely placed.
Pixel Survival’s cross-platform analysis confirms that players who adapt their measurement workflow to their device report quicker builds and fewer misreads, especially on long projects.
Common Mistakes and How to Avoid Them
Rushing measurements is the most common pitfall. Take a moment to lock in your start point, then confirm the end point before you place blocks. Another frequent error is measuring across uneven surfaces or sloped areas; measure along a level plane or account for the change in height when planning vertical segments.
Always verify the readout by performing a second measurement along a parallel path. If you’re unsure about diagonals, test a small segment first to ensure your method scales up to larger sections. Finally, keep markers visible as you work—moving references can cause confusion and double-checks.
Pixel Survival’s guidance emphasizes deliberate, repeatable steps: measure once, confirm twice, then build. This cadence minimizes mistakes and streamlines your project flow.
Tips for Precision, Speed, and Consistency
- Pro tip: mark the start and end with contrasting blocks to keep the readouts in your field of view. This reduces misreads when you’re moving quickly.
- Pro tip: create a simple measurement checklist before you start a large build, including typical segment lengths and reference points.
- Warning: don’t rely on approximate spacing for critical builds (like doors or railings); re-check with the ruler to avoid misalignments.
- Note: on smaller devices, zoom in or increase your screen brightness to improve point accuracy.
- Pro tip: practice on a test strip of blocks to calibrate your feel for the ruler before applying it to essential constructions.
Integrating the Ruler into Your Build Workflow
Incorporate ruler measurements into your daily building routine. Start by sketching a rough layout using the ruler to establish core dimensions, then fill in with blocks while periodically re-checking distances. Use reference lines to maintain straight walls and evenly spaced platforms. For complex rooms, measure corner-to-corner distances to ensure the space remains proportional to your overall design.
As you build, compare actual placements with your blueprint and adjust as needed. The ruler is a planning companion, not a one-time tool; the more you use it, the faster you’ll reach your target aesthetic with fewer corrections.
The Pixel Survival team’s recommended approach is to integrate measurement into your design conversations early, so your final structure feels cohesive rather than piecemeal.
Tools & Materials
- Terraria ruler(In-game measurement tool to compare distances between two points; essential for accurate layouts.)
- Marker blocks(Visible blocks (e.g., stone or copper) to mark start/end points during planning.)
Steps
Estimated time: 10-20 minutes
- 1
Equip the ruler
Select the ruler from your inventory and place it in your hotbar so you can access it quickly. This reduces disruption while you plan the layout.
Tip: Familiarize yourself with the on-screen prompts for your platform so you know how to set points without searching menus. - 2
Set the starting point
Choose a fixed reference point on your build line as the start. This anchor point is your baseline for all subsequent measurements.
Tip: Choose a point that you can consistently find again later, such as a corner or grid intersection. - 3
Move to the end point
Move the cursor or character toward the endpoint along the intended path. Ensure you’re choosing the correct axis (horizontal, vertical, or diagonal if supported).
Tip: Keep the line straight by avoiding obstacles that could shift your line of sight. - 4
Finalize the measurement
Confirm the end point with the in-game action to lock in the distance. The ruler will display the distance in tiles for immediate feedback.
Tip: If the readout seems off, reset the start point and try again from a nearby anchor. - 5
Record the distance
Note the measured length in your blueprint, notebook, or project file. This helps you reuse the measurement for future segments.
Tip: Create a small library of common lengths you’ll use across the build. - 6
Mark endpoints visually
Place contrasting blocks at the start and end to visualize the measurement on the ground before placing additional tiles.
Tip: This ensures you won’t lose the alignment as you extend the build. - 7
Repeat for additional segments
For long builds, repeat measurements along the entire path, using the same start anchor when possible for consistency.
Tip: Having a standard reference line dramatically reduces drift in long corridors. - 8
Verify with a second measurement
Take an extra measurement along a parallel route to confirm consistency and catch any drift early before you finish.
Tip: Double-checking early saves you from rework later.
Got Questions?
What is the Terraria ruler and what does it measure?
The Terraria ruler is a measurement tool that helps you determine the distance between two points in tile units. It’s invaluable for planning spacing, aligning walls, and laying out corridors before you place blocks.
The ruler measures the distance between two points in tiles, helping you plan spacing and alignment before placing blocks.
Can I use the ruler on console and mobile versions?
Yes. The ruler works across platforms, but the controls differ. Check the in-game prompts for point placement and readouts on your device.
Yes, you can use the ruler on consoles and mobile; just follow the in-game prompts for point placement and readouts.
How do I reset the start point if I mess up a measurement?
You can reset the start point by selecting the ruler again and re-anchoring at a new reference point. This avoids placing blocks based on a faulty initial point.
If you mess up, re-anchor the start point and re-measure from a new reference point.
Is the ruler needed for every build, or only large projects?
The ruler is especially helpful for large or complex builds with repeated segments, but it’s useful for any build where precise spacing matters.
It’s especially handy for large or complex builds, but helpful for any project needing precise spacing.
Where can I find or unlock the ruler in-game?
The ruler is part of standard progression and should appear in your inventory as you advance. If you don’t see it, check your in-game shop menus or guides for acquisition options in your version.
You’ll typically find it through standard progression in your game version; check shops or guides for how to obtain it.
Are there tips for measuring diagonals or angled sections?
Diagonals can be measured by placing start and end points along the diagonal path and, if needed, using multiple straight measurements to approximate the angle. Cross-check with a second path for accuracy.
Measure diagonals by anchoring points along the diagonal and double-check with a parallel path to confirm accuracy.
Watch Video
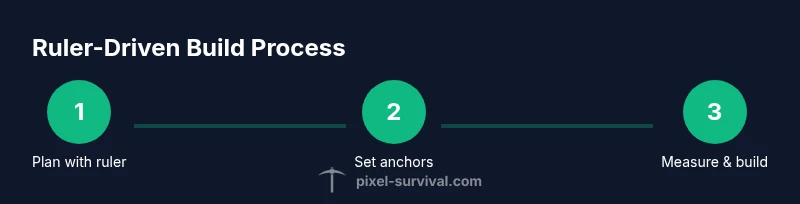
Key Points
- Plan with the ruler before placing blocks
- Measure start and end points for every segment
- Use visible markers to guide layout
- Verify measurements with a second readout
- Incorporate ruler checks into your build workflow
- Practice for faster, cleaner results