The Grand Design Terraria: A Complete Build Guide
Learn how to plan, build, and polish The Grand Design Terraria—a large-scale, multi-biome base that blends progression with stunning aesthetics. This guide covers planning, materials, steps, tips, and common pitfalls to help you succeed.

Embark on The Grand Design Terraria, a monumental, multi-biome build that blends function with style. This guide teaches you planning, modular layout, material choices, and step-by-step execution to create a visually stunning base that supports progression. You’ll need a flat plot, plenty of blocks, and patience to iterate.
The Grand Design Terraria: Scope and Purpose
The Grand Design Terraria represents an ambitious, multi-biome base designed to support long-term progression while delivering eye-catching aesthetics. According to Pixel Survival, breaking the project into modular zones helps you manage resources and time, especially when you’re juggling farming, boss prep, and NPC housing. The goal is to create a cohesive layout where movement feels natural and rooms flow logically between progression stages. This overarching concept sets the tone for every choice you make, from materials to lighting, to ensure that form follows function as you expand.
Core Design Principles for a Grand-Scale Build
A grand design should balance function and form. Prioritize clear progression routes, scalable room sizes, and consistent architectural language across biomes. Use color palettes that differentiate zones but still feel unified. Plan for lighting, background walls, and signage to guide players through the base. Structuring the build around modular sections lets you expand later without major rewrites. By keeping a shared rhythm—floor height, column placement, doorway spacing—you’ll create a sense of cohesion that players recognize as the Grand Design, not a random collection of rooms.
Planning, Space, and Biome Zoning
Start by mapping your plot in-game: outline the central hub, housing corridors, farms, arenas, and storage rooms. Allocate vertical layers so that each progression stage has a dedicated space, but ensure quick access between zones. When placing biomes, stagger biome blocks and use distinct lighting and color cues to create mood shifts. NPC housing should be near core services yet varied in design to emphasize progression, while leaving room for future expansions as you unlock additional mechanics and materials.
Aesthetic Choices and Materials
Material selection anchors both look and performance. Favor a consistent material language—wood and stone for fundamentals, brick and glass for accent zones, and biome-specific blocks for flavor. Use banners, furniture, and lighting to convey purpose without clutter. Remember to balance practicality (storage, NPC rooms, and arenas) with artistry (color variation, patterning, and symmetry). A well-chosen palette ties biomes together, making transitions feel intentional rather than coincidental.
Tools & Materials
- Blocks (wood, stone, brick, glass)(Provide foundation, walls, and decorative bands; plan color variety to differentiate zones.)
- Walls and decor items (torches, banners, furniture)(NPC housing and aesthetic flourishes; ensure accessibility and readability.)
- Measuring tools (grid markers or mapped plots)(Use in-world markers to map zones, hallways, and room sizes before placing blocks.)
- Construction tools (hammer, pickaxe, axe)(Upgrade as you progress; faster tools save time on large builds.)
- Lighting (torches, lamps, glow items)(Good lighting defines mood and helps prevention of mob spawns in some stages.)
- Roofs and tiles (sloped blocks, roofing materials)(Important for a polished silhouette and weatherproof look in outdoor areas.)
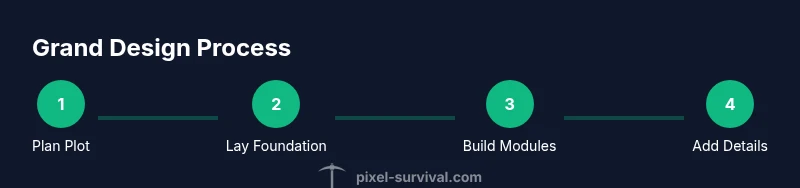
Steps
Estimated time: 2-6 hours
- 1
Define plot and baseline plan
Survey world space and mark zones for hub, housing, farms, and arenas. Establish baseline floor height and a central axis to guide later expansion. This upfront planning reduces rework as you add rooms.
Tip: Use a simple grid layout first; you can refine details later without losing overall structure. - 2
Lay foundation and modular frame
Create a modular frame using durable blocks to outline major zones. Keep consistent ceiling heights and doorway widths so traffic flows naturally between areas.
Tip: Build in modules (e.g., 6x6 or 8x8 blocks) to simplify expansion and future modifications. - 3
Create progression rooms and hubs
Design starter housing, storage, crafting corners, and boss arenas as distinct modules. Connect them with a clear path that encourages discovery as players advance.
Tip: Label rooms with signage or color cues to help players navigate progression without guesswork. - 4
Implement biome zoning and lighting
Place biome blocks and ambient lighting to convey mood and function. Ensure transitions are smooth with deliberate color shifts and consistent wall textures.
Tip: Test lighting at different times in-game to verify visibility and atmosphere. - 5
Add aesthetics, details, and personalization
Incorporate banners, furniture, and decorative elements that reinforce themes without causing clutter. Small touches like signs and collectibles can unify the design.
Tip: Avoid over-decorating; focus on a few standout features per zone for impact. - 6
Test, refine, and document
Playtest the flow, pathing, and accessibility. Note pain points and adjust spacing, lighting, and storage. Document changes for future iterations.
Tip: Keep a simple revision log to track what changed and why; this saves time later.
Got Questions?
What is The Grand Design Terraria?
The Grand Design Terraria is a large-scale, multi-biome build concept focused on combining progression-friendly layouts with cohesive aesthetics. It emphasizes modular planning and clear pathways to help players advance through the game’s stages.
The Grand Design Terraria is a large, multi-biome build plan that emphasizes modular layout and clear progression.
How long does it take to complete the build?
Duration varies with world size and player pace. Expect several sessions of planning, building, and refining, with longer projects benefiting from a modular approach.
Duration depends on world size and pace; plan for several sessions and use modular steps.
What are essential materials for first-phase work?
Start with common blocks (wood, stone, brick), walls, decorative items, lighting, and NPC housing components. Keep a consistent palette to unify biomes from the start.
Begin with core blocks, walls, lighting, and NPC housing; maintain a consistent color palette.
Do I need to complete progression to start planning?
No. You can begin planning and building early, expanding as you unlock new materials and mechanics. Early planning prevents backtracking later.
You can start planning early and expand as you progress.
How can I ensure my build feels like one design rather than a patchwork?
Establish a unifying architectural language: consistent ceiling heights, repeating shapes, and deliberate color transitions across biomes to maintain cohesion.
Use a common architectural language and cohesive color transitions to keep it feeling unified.
What helps with navigation in a large build?
Clear paths, signage, and focal points at key junctions guide players through progression. Modular rooms with distinct functions simplify movement.
Clear paths and signs help players navigate a large build.
Watch Video
Key Points
- Plan before placing foundations
- Design modular sections for easy expansion
- Balance function with aesthetic cues
- Iterate with playtests and notes