How to Add in Terraria: A Practical, Step-by-Step Guide
Learn how to add items and blocks in Terraria through crafting, looting, and smart placement. A Pixel Survival guide with practical progression tips for Terraria crafting and builds.

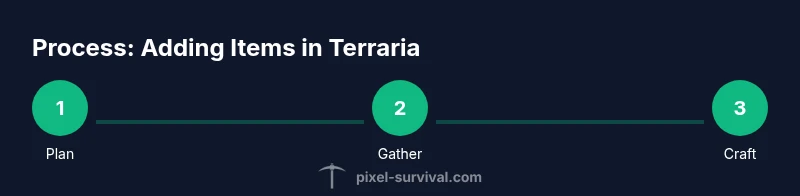
By the end of this guide, you’ll know how to add items and blocks in Terraria through crafting, looting, and proper placement. You’ll learn which crafting stations you need, how to collect resources, and how to organize your inventory for faster builds. This approach emphasizes practical progression and reliable methods for steady growth in your world.
Understanding what adding in Terraria really means
In Terraria, the word “add” usually refers to expanding your toolkit by crafting items, gathering resources, or placing blocks to improve your base and your world. It doesn’t mean spawning items directly in vanilla play, but rather turning raw materials into usable gear and structures. According to Pixel Survival, practical progression starts with a clear plan for early tools, crafting stations, and a safe base. This foundation makes it easier to unlock recipes and assemble gear as you explore. Before you begin, decide which aspect you want to expand: resource gathering, housing and base design, or combat-ready gear. Each path shares a core cycle: gather resources, unlock recipes, and craft the item you need. This section helps you set a solid target for your first few hours of play and frames adding items as a series of concrete steps rather than vague goals.
Next, map out a compact workstation area in your world. A simple setup includes a Work Bench, a Furnace, and a Chest to store components. You’ll want to place your stations near your spawn point or a cave entrance so you can access materials quickly. Understanding early game progression helps you plan the items you’ll add soon after starting a world. The goal is to move from raw materials to practical tools and blocks that boost your exploration and defense, while keeping your base organized for rapid expansion.
This block sets the stage for hands-on crafting. With the right stations and storage in place, you’ll be ready to translate resources into tangible items you can use immediately, whether for basic survival or creative builds. As you gain experience, you’ll refine your layout for efficiency and start planning multi-step projects that rely on several different stations.
Crafting stations you need to add items
A successful crafting workflow hinges on having the right stations. Each station unlocks a subset of recipes and makes specific items possible. At minimum, start with a Work Bench, a Furnace, and an Anvil. The Work Bench unlocks basic recipes and is the first station you’ll build. The Furnace lets you smelt ores into bars, which are essential for metal equipment. The Anvil requires metal bars and enables the crafting of stronger tools and weapons. Optional but helpful stations include the Loom (for cloth-based items), the Sawmill (for wood-focused crafts), and the Tailor’s Workshop in larger worlds; these expand your crafting repertoire but aren’t strictly necessary early on. Place stations near your storage to streamline the workflow, so you don’t chase components across the map. When you’re ready, add a Chest or two to keep components organized, and set up a small armory or toolkit area so you can quickly assemble what you need for exploration or combat.
Understanding which station to use for which items prevents needless trips back and forth and reduces frustration during early progression. Different items require different materials, so having a clear map of each recipe’s station helps you plan what to collect next and where to place it. In time, you’ll cluster related recipes in zones (e.g., metalwork near ore deposits and woodcraft near a forest biome) to further improve efficiency. This strategic layout translates directly into faster, more satisfying additions to your world.
Finding components: loot, mining, and exploration
Acquiring the materials to add items and blocks is the core of Terraria’s progression. Begin by exploring biome-specific loot and chests, which often contain crafting components, early tools, and sometimes unique resources. Caves and surface biomes yield ore veins—mining these is essential to obtaining bars for metal gear. Defeating certain enemies can drop rare components, and merchant NPCs can sell basic items that help your setup. Early on, harvest wood and stone for basic structures, torches for visibility, and copper or iron to craft simple tools and stations.
A practical approach is to balance surface exploration with cave digs to maximize ore exposure while keeping you relatively safe from threats. Keep an eye out for natural structures like sunken chests or dungeon entrances as potential sources of rare materials. Always carry a few torches and a reliable light source so you can map your route and avoid getting lost in dark caverns. Remember to organize loot as you go: store gathered resources in labeled chests or containers so you don’t miss essential components when you return to crafting. This methodical approach to loot and exploration directly impacts how quickly you can add items and blocks to your world.
Step-by-step crafting flow: from resources to items
To add an item, you first map the resources you’ll need, then locate or create the appropriate crafting station. Start by choosing a target item, determine its recipe, and collect the required materials. Place the correct station (e.g., Work Bench for basic items, Furnace for smelted components, Anvil for metal gear) nearby so you can craft efficiently. Open the station’s crafting menu and select the item. If a recipe is locked, you’ll need to obtain the missing components or upgrade your crafting tier as you progress. As you craft, organize your inventory to keep new items separate from raw resources. This practice reduces confusion and speeds up subsequent crafts.
Planning ahead is key: jot down which items you intend to add in the next session and ensure you have the necessary materials and stations ready. A common strategy is to craft a simple starter item (like a torch or basic weapon) to test the station and verify you’re set for more ambitious projects. By combining resource gathering, station setup, and careful inventory management, you’ll convert raw materials into tangible additions that improve your mobility, defense, and capabilities in combat or exploration.
Placing and using new items in your world
Adding items isn’t just about crafting; it’s also about effective placement. Start by placing useful tools and weapons within reach of your spawning point or base. Efficient layouts often cluster tools that complement each other, such as placing torches near work areas to maximize visibility or situating armor and weapon racks near storage for rapid access. When you place blocks, consider safety and aesthetics: use sturdy walls and defensive layouts to protect your base against night-time invasions while keeping the design neat.
Item placement also affects exploration. Place maps, chests, and storage in a logical grid so you can quickly retrieve components without retracing steps. In addition, think about future expansions: leave space for additional stations and storage so you can upgrade gradually as you acquire better materials. This balanced approach to placement ensures your additions not only function well but also contribute to a cohesive, efficient base that supports ongoing exploration and crafting.
Progression and optimization tips
As you become more comfortable with adding items, optimize your progression by prioritizing crafting stations that unlock the most versatile gear early on. Pixel Survival analysis shows that players who invest in early stations and organized storage tend to progress faster through the initial game stages. Build a small, scalable base with the core stations first, then expand by adding more specialized stations as your resources allow. Keep a running plan or map of recipes you want to unlock next, so you always have a clear target for your mining and exploration sessions. A structured plan reduces wasted trips and speeds up your ability to add new equipment and blocks that enhance your survivability and mobility — exactly what you want when facing tougher enemies and longer expeditions.
Also, keep your storage organized by category: ores, ingots, blocks, and consumables. A tidy inventory saves you time when crafting, and it helps you spot gaps in your resource pool sooner. Don’t neglect safety: always build a secure base with lighting, walls, and traps where appropriate. Finally, practice incremental upgrades rather than large, infrequent leaps. Small, steady gains compound into a strong early game that makes adding more items and blocks much smoother as you advance.
Common mistakes and how to avoid them
New players often overcommit to building grand projects without securing essential basics. To avoid this, always establish a secure base with at least one reliable station before chasing rare items. Don’t neglect inventory management: piling up resources without organization slows crafting and can lead to lost components. Rushing to build with poor lighting or exposed material can invite nighttime threats and setbacks. Always scout for safer routes to resource-rich areas and store loot in labeled chests so you can find components quickly when you return. Finally, don’t ignore recipe requirements: some items require multiple steps or specific stations, so double-check what you need before committing time to a build.
Troubleshooting craft limits and world variation
If you’re running into missing recipes or locked items, verify you have the correct station and required materials. Some recipes are gated behind progress, so you may need to unlock certain items or defeat specific enemies to access new crafting options. World seeds and difficulty levels can also influence what’s available early on; adjust your goals accordingly and plan for gradual advancement rather than aiming for late-game gear too soon. If a station seems unavailable, you might need to visit a different biome or craft a nearby workshop to mirror the requirements in your current area. Patience and systematic exploration are your best tools when add ing items and blocks in Terraria.
Next steps: practice builds and long-term plans
With a solid foundation, your next steps involve targeted practice builds that showcase your growing toolkit. Start with simple base improvements—lighting, storage, and defensive walls—then move to more complex items that enhance mobility (like grappling setups or improved platforms). Create a short list of three to five items you want to add in Terraria over the next session, and map the needed materials and stations. By focusing on concrete goals with clear recipes, you’ll steadily expand your arsenal, improve your base, and sharpen your crafting workflow. Pixel Survival recommends building a habit of incremental upgrades to ensure steady, sustainable growth.
Tools & Materials
- Work Bench(Unlocks basic crafting recipes; place near your starting area.)
- Furnace(Smelts ores into bars; essential for metal equipment.)
- Anvil(Crafts metal items from bars; requires iron/lead bars.)
- Chest(Storage for components and finished items; keeps you organized.)
- Loom(Optional for cloth-based items and banners.)
- Sawmill(Expands wood-related crafts; optional early on.)
- Wood(Building material and fuel; stock a large reserve.)
- Stone(Used for blocks and crafting components.)
- Gel(Used to craft torches for early exploration.)
Steps
Estimated time: 30-60 minutes
- 1
Choose a target item
Decide what you want to add first, such as a simple tool or a basic weapon. Check the recipe to identify required materials and the station you’ll need. This step sets your gathering priorities and saves time later.
Tip: Write down the item and its station on a quick note to stay focused. - 2
Gather foundational resources
Collect wood, stone, and basic ores. These resources form the backbone of early crafting and allow you to build your first station and storage. Prioritize materials that unlock multiple recipes.
Tip: Carry a dedicated bag for raw resources to avoid mix-ups. - 3
Build essential stations
Place a Work Bench, Furnace, and Anvil close to your base. Each station unlocks new recipes and enables progression. Ensure they’re accessible from your main living area.
Tip: Keep stations clustered to minimize stroll time during crafting. - 4
Unlock the recipe and gather missing components
Open the station’s crafting menu and identify missing ingredients. Mine or forage for those items in nearby biomes or caves. If you’re missing a material, plan a quick excursion to acquire it.
Tip: Use a map or notes to track which recipes you’ve unlocked. - 5
Craft a starter item
Craft a basic item (e.g., a torch or simple weapon) to test your stations and inventory flow. This gives you practical experience and a confidence boost as you prepare for bigger projects.
Tip: Choose something that directly supports exploration or defense. - 6
Organize your inventory
Move newly crafted items to a dedicated stash and keep resources separated by type. A clean inventory speeds future crafting and reduces mistakes.
Tip: Label chests or arrange colors to quickly identify categories. - 7
Plan your next goals
Draft a short list of advanced items you want to add next session, along with the materials and stations required. A clear plan keeps momentum steady.
Tip: Aim for 1–2 meaningful upgrades per session. - 8
Extend your setup
As you gain materials, add new stations (loom, sawmill, or others) to broaden your crafting options. A growing toolkit accelerates later progression.
Tip: Upgrade storage capacity before expanding stations.
Got Questions?
What does it mean to 'add' in Terraria?
In Terraria, adding typically means expanding your toolkit by crafting items, gathering resources, and placing blocks for better base design and exploration. Spawning items directly isn’t a vanilla mechanic; progression comes through crafting and loot.
Adding in Terraria means crafting and placing items to improve your base and gear. You don’t spawn items in vanilla play; you progress by gathering and crafting.
Do I need mods to spawn items?
Vanilla Terraria doesn’t provide official item spawning. You can obtain items by crafting, looting, and trading with NPCs. Mods or editing tools can alter this behavior, but using them changes the intended game experience.
Spawning items isn’t part of vanilla Terraria. Mods can change that, but they alter the standard gameplay.
How long does it take to master crafting in Terraria?
Mastery varies with playstyle, but a steady approach—focusing on core stations and incremental upgrades—yields steady progress. Practice time depends on how often you play and your target items.
It varies, but consistent practice with core stations speeds up progress.
Where should I place crafting stations?
Place core stations close to your base and storage to minimize travel time. Clustering related stations together makes crafting more efficient as you unlock new recipes.
Put the main stations near your base and storage, clustered for efficiency.
What’s the fastest way to gather early materials?
Begin with wood, stone, and basic ores by exploring nearby biomes and caves. Prioritize resources that unlock multiple recipes and upgrade your stations as soon as possible.
Mine nearby biomes for wood, stone, and ores; upgrade stations early.
Can I reuse items you craft for multiple recipes?
Many crafted items are single-purpose in early game, but some materials function across multiple recipes. Plan by checking multiple recipes that share components to avoid waste.
Some materials work across recipes; plan to reuse them where possible.
What if a recipe is locked by progress?
Some recipes unlock after obtaining newer materials or defeating certain enemies. If a recipe isn’t available yet, set it as a goal and return later with the required progress.
If a recipe isn’t available yet, keep progressing and revisit it later.
Is organizing storage worth the effort?
Yes. Organized storage saves time, reduces lost items, and makes it easier to plan future crafting sessions. Consider labeled chests or color-coded sections.
Organized storage saves time and helps you craft faster.
Watch Video
Key Points
- Plan your crafting area before gathering resources.
- Build core stations first: Work Bench, Furnace, Anvil.
- Organize storage to speed up future crafting.
- Progress incrementally with targeted item goals.