How to Make Armor Terraria
Master armor crafting in Terraria from copper to endgame sets. Learn material sources, where to smelt, how to use anvils, and progression tips to keep you safe as you explore deeper biomes.

By the end, you’ll know how to make armor in Terraria, from Copper and Tin sets to mid‑game Iron, Silver, and Gold options, plus how to upgrade to better sets using enemy drops and crafting stations. You’ll also learn where to find the necessary bars, ores, and vanity pieces, plus tips to avoid bottlenecks during progression.
Understanding armor progression in Terraria
In Terraria, armor isn’t just about a higher defense stat; each set unlocks set bonuses and synergy with your chosen playstyle. By understanding progression curves and resource flow, you can plan upgrades rather than scrambling for random pieces every night. According to Pixel Survival, armor progression should align with your access to ores, crafting materials, and safe mining routes. The goal is to reach a sturdy early set, then upgrade when you can access stronger ore and better anvils.
In this guide, we break down how armor tiers map to game stages and how to decide when to shift from basic to mid-game sets. We’ll also touch on where to farm key resources and how to prioritize crafting stations. The phrase how to make armor terraria will guide your path as you advance from basic copper to mid-game options, and later to endgame armor.
Early armor: Copper and Tin, Iron and Lead basics
The first armor you can craft in a fresh world is Copper (or Tin) Armor. You’ll need to mine ore chunks, smelt them into bars at a furnace, and then craft each piece on an anvil. The process is the same for Iron or Lead armor at the next tier, but you’ll use Iron or Lead bars instead. Early armor keeps you alive through the first nights and gives you enough defense to explore deeper biomes.
To start, locate ore veins near surface and in caves. Build or find a furnace to smelt the ore into bars, then use an anvil to craft each armor piece: helmet, chestplate, and greaves. Some players favor a mixed set (e.g., Tin helmet with Copper chestplate) for resource efficiency. The core idea is to reach a complete three-piece set before tackling tougher enemies.
Mid-game opportunities: Silver, Gold, and Meteor Armor paths
As you advance, you gain access to Silver and Gold sets, which require Silver and Gold bars. The upgrade introduces stronger defense and often a new look. Meteor Armor is an alternative mid-game option crafted from meteorite bars, offering solid protection for early boss fights. The choice between meteor and conventional sets depends on your playstyle and the world you’re in.
Each mid-game set will typically require you to mine deeper or explore different biomes to find the necessary ore deposits. Prioritize sets that complement your primary weapon choices and mobility needs. This stage is about balancing defense with your resource stream, so you don’t stall progress waiting for rare drops.
Upgrading materials, crafting stations, and resource flow
Crafting armor reliably hinges on having the right stations and a steady supply of bars. Smelting ore in a furnace yields bars, which you then combine at an anvil to craft armor pieces. You’ll want to assess your world’s ore distribution: surface veins yield copper or tin first, while deeper layers unlock iron, silver, gold, and meteorite options. Keep a nearby crafting bench or anvil in your base for quick upgrades.
A practical approach is to set short mining trips focused on a single ore type, so you always have a stockpile for faster upgrades. Remember that armor sets are made piece by piece, so a complete comfort-focused outfit may require you to gather a few specific bars and pieces to unlock the full set bonus.
Class-focused armor choices and set bonuses
Armor in Terraria often pairs best with a chosen playstyle. Melee builds may prefer heavier, defensive sets that maximize survivability, while ranged or magic users might value mobility and faster cast rates. Some sets grant bonuses that amplify your chosen weapon type—for example, magic armor that boosts spell power or mana efficiency. When deciding which armor to chase, consider your current boss targets, biome access, and whether you want extra defense, movement speed, or set bonuses.
Choosing the right set isn’t only about defense; it’s about how the set’s bonus aligns with your tools and strategy. Start with a balanced mid-game set to bridge the gap between early gear and later, stronger options, then adapt as you unlock more powerful ores and accessories.
Practical farming strategies for steady armor upgrades
Efficient armor farming relies on a mix of exploration, mining, and timely crafting. Build a secure base with a nearby furnace and anvil, so you don’t waste time running back to craft. Use cave networks or biomes with richer ore deposits to minimize travel. Stockpile essential bars and keep a working supply of green, blue, or purple gems for crafting station upgrades.
Plan your days to target specific ore types during your exploration cycles. If you’re chasing a mid-game set, coordinate mining runs with boss progression so you can capitalize on drops that yield upgraded bars. Finally, always craft a complete three-piece armor set before switching to a new tier to ensure you’re not half-equipped during tougher encounters.
Avoiding common armor bottlenecks and pacing your progression
A frequent bottleneck is a shortage of a single ore type needed for an entire armor set. Combat bottlenecks happen when you skip crucial upgrades because you can’t gather enough bars quickly. Combat strategy improves when you maintain a steady supply of bars and plan your mining routes around ore clusters.
To pace progression, set mini-goals: complete the early Copper/Tin set, then move to Iron/Lead, followed by Silver/Gold. If you hit a roadblock, temporarily pivot to Meteor Armor or explore a new biome for alternative materials. The key is consistency; avoid grinding endlessly for a single piece and keep the upgrade path moving forward.
Putting it all together: a sample progression path
A practical path starts with Copper/Tin armor from near-surface ore, then upgrades to Iron/Lead as you reach deeper caves. Once you’ve secured Silver or Gold bars, build a mid-game set that complements your weapon style. If you encounter meteorite deposits, Meteor Armor is a viable option until you’m ready for Mythril or Orichalcum rocks. Always tailor your armor to your boss targets and preferred combat approach.
Remember, armor progression is a balance between defense, mobility, and set bonuses. With a focused farming plan and the right crafting stations, you’ll steadily upgrade without stalling your adventure.
Tools & Materials
- Mining pickaxe(Essential for breaking ore veins and chipping through terrain.)
- Furnace(Smelts ore into bars needed for armor crafting.)
- Anvil(Crafts armor pieces from bars; upgrade tools here as you progress.)
- Bars and ores (Copper, Tin, Iron, Lead, Silver, Gold, Meteorite)(Different armor sets require different bars; gather in batches.)
- Crafting table/Workbench(Helpful for arranging materials and planning inventory.)
- Wooden or stone platforms(Assist with safe mining routes and quick access to work areas.)
Steps
Estimated time: 60-120 minutes
- 1
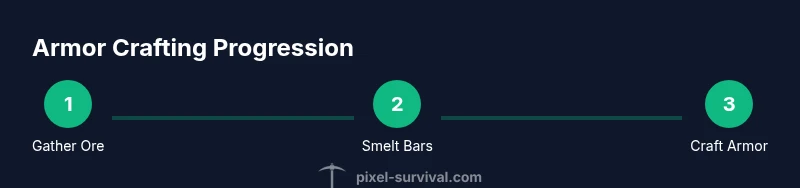
Gather ore near the surface
Begin by exploring nearby caves to collect surface ores like copper and tin. Mine veins and collect as much ore as you can carry, which will become bars after smelting.
Tip: Focus on both surface veins and shallow caves for a quick early stockpile. - 2
Smelt ores into bars
Take collected ore to a furnace and smelt it into bars. Bars are the core resource needed to craft armor pieces.
Tip: Keep ore organized by type to speed up your crafting later. - 3
Craft basic armor pieces
Use an anvil to craft the three-piece Copper or Tin armor set, consisting of helmet, chestplate, and greaves.
Tip: Aim for a complete 3-piece set before heading into deeper areas. - 4
Upgrade to the next tier
As you access iron or lead, smelt those ores into bars and craft Iron/Lead armor on the anvil to improve defense.
Tip: Upgrade when you have a reliable ore source and enough bars. - 5
Branch into mid‑game sets
Gather silver or gold bars and craft mid-game armor. Consider Meteor Armor if meteorite ore is abundant in your world.
Tip: Choose sets that complement your current weapon and playstyle. - 6
Maintain loadout through progression
Keep your armor upgraded in tandem with new weapons and accessories to ensure survivability in tougher areas.
Tip: Always stash a spare armor piece in case of death loss.
Got Questions?
What is the first armor you should craft in Terraria?
The Copper or Tin armor set is the traditional starting option. It’s affordable to craft from early ore and lays the foundation for survivability in the first few nights.
Start with Copper or Tin armor to survive the early game, then upgrade as you collect more ore.
Do you need an anvil to craft armor?
Yes. Armor pieces are crafted at an anvil using bars created from ores smelted in a furnace. The anvil is your primary crafting station for armor upgrades.
Yes, you craft armor on an anvil after smelting bars.
How many bars do I need to craft armor?
Bar requirements vary by armor set. In general, you’ll need enough bars of the relevant type to craft three pieces (helmet, chestplate, greaves).
It depends on the set, but you need enough bars to make all three armor pieces.
When should I upgrade from early armor to mid-game sets?
Upgrade when you gain access to stronger ores and can produce the corresponding bars reliably. This keeps your defenses strong as you face tougher enemies.
Upgrade when you have reliable access to better ore and bars.
Are there armor sets that suit specific playstyles?
Yes. Some sets complement melee builds, while others favor magic, ranged, or mobility. Choose sets whose bonuses align with your weapon choices and goals.
Yes—pick armor that matches your playstyle and the bonuses you value.
Watch Video
Key Points
- Plan armor upgrades around ore access
- Craft complete sets before advancing
- Balance defense with mobility for your playstyle
- Keep stations organized and reachable
- Upgrade in tiers to avoid bottlenecks