Autohammer Terraria: A Comprehensive Modded Hammer Guide
Learn how to install, obtain, and use the Autohammer in modded Terraria. This educational, step-by-step guide covers loaders, crafting paths, automation tips, and safe modding practices.

With this guide you will unlock the Autohammer in Terraria by using a compatible mod, install the mod loader, and follow a clear crafting path to obtain the tool. You’ll learn how to set it up for automated hammering tasks, what materials are typically required, and how to integrate it into early- or mid-game progression safely.
What is the Autohammer in Terraria
The Autohammer is a mod-added device that performs hammering actions automatically, designed for players who want to speed up shaping or breaking blocks in Terraria. In vanilla Terraria, there is no Autohammer, so this tool only exists when you install a compatible mod. When used correctly, it can automate repetitive hammering tasks, free up your hands for other activities, and help you clear space or craft items more efficiently. Expect differences in recipes, energy or power requirements, and setup details depending on the mod you choose. The key idea is to reduce the number of manual hammer swings while keeping the core gameplay loop intact. If you’re new to modding, treat the Autohammer as a powerful automation option you enable after you have a stable mod environment and a basic understanding of how crafting works in your chosen mod.
Why the Autohammer matters for your progression
Using an Autohammer can shave minutes or hours off projects that involve mass hammering, such as clearing rock formations, shaping large build areas, or converting mined blocks into usable forms. For players focused on base-building or rapid terraforming, automation tools like the Autohammer translate to more time exploring, farming resources, or experimenting with layouts. Remember that the impact depends on the mod’s design: some Autohammers are energy-powered devices that work alongside other automation blocks, while others function as hand-held tools with limited ranges. Understanding the scope of the tool within your modded setup is essential before scaling up projects.
Choosing the right mod and loader for Autohammer
To access Autohammer content, you’ll need a mod loader compatible with Terraria, typically tModLoader. The right mod will provide the Autohammer item, its crafting path, and any power or range requirements. Look for reputable mods with clear documentation, active maintenance, and good compatibility with your Terraria version. Before installing, review the mod’s dependencies, conflicts with other mods, and user feedback. A solid setup reduces crashes and ensures that the Autohammer behaves as described by its documentation.
How to obtain Autohammer: a general path
Since Autohammer is mod-provided, you’ll follow a mod-specific recipe chain. Start by installing tModLoader, then add the Autohammer mod. Once the mod is loaded, search in the crafting menus for the Autohammer, review its prerequisites, and gather the materials listed. If the mod uses a multi-step process (e.g., a forging bench, an upgrade path, or a special workshop area), assemble each prerequisite in sequence. Keep a world-safe backup before beginning any new craft chain to avoid losing progress due to mod conflicts or crashes.
Setting up the Autohammer in your world
Place the Autohammer where it fits your workflow—often near a crafting area or alloy station. In many mods, you’ll connect the device to a power source or energy system; ensure your power supply is sufficient for sustained operation. Configure any control panels or levers that determine hammering patterns, range, or material limits. If the mod provides presets, start with a basic one and adjust as you gain confidence. Document your setup so you can replicate it in another world or share it with friends.
Crafting path and resources: planning ahead
A successful Autohammer run depends on planning resources in advance. Create a simple checklist: identify required ores, building blocks, or catalysts; schedule time for farms or mining runs to gather those ingredients; and verify that your workshop has the necessary benches or stations. Efficient resource planning reduces wasted trips and ensures you can scale up hammering tasks. If the mod includes alternative materials or upgrade tiers, compare options to maximize output and minimize energy use.
Common automation setups and practical tips
Pair the Autohammer with other automation blocks if your mod supports them (e.g., conveyor belts or item routers) to create streamlined workflows. Test different hammering patterns to minimize wear or energy consumption while maximizing block yields. Keep a log of which patterns work best for specific block types, so you can switch quickly between tasks. Remember to save configurations for different builds, like large terraforming projects or compact workshop layouts, so you can reuse setups later.
Troubleshooting, safety, and performance
Mod compatibility can cause crashes or save-corruption risks if not managed carefully. Always back up your worlds before enabling a new mod or changing its configuration. If the Autohammer behaves oddly (misfiring, blocked inputs, or unexpected block changes), try updating the mod, rechecking dependencies, and disabling other mods that might conflict. In some cases, lowering graphic settings or turning off intensive visual effects can improve performance in large hammering operations.
Progression and safety considerations for modded play
In a progression-focused game, use the Autohammer to speed up lower-tier tasks and move on to higher-tier builds after you have stable automation. Keep your mod load order tidy, and avoid enabling experimental mods in your main world while you’re still learning the Autohammer’s behavior. Prioritize safe exploration and backups; automation is powerful, but it’s not worth risking your worlds if stability becomes an issue.
Tools & Materials
- tModLoader(Install a version compatible with your Terraria edition)
- Autohammer mod file(Download from reputable sources; verify hash if available)
- Backup copies of saves(Before modding, backup your worlds and game files)
Steps
Estimated time: 60-120 minutes
- 1
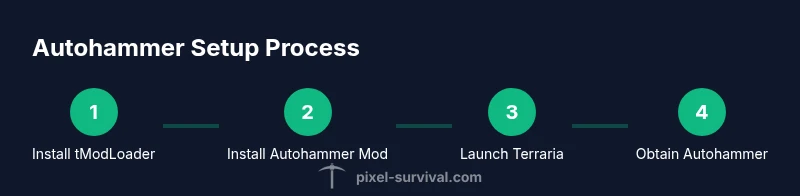
Install tModLoader
Download and install tModLoader from the official site. Ensure you choose a version that matches your Terraria installation. This step creates the necessary framework to run mods and adds a safe modding environment.
Tip: Back up your Terraria folders before installation to prevent data loss. - 2
Find and install the Autohammer mod
In the tModLoader menu, browse for the Autohammer mod or manually install the mod file into the Mods folder. Read the mod documentation to confirm prerequisites and compatibility with your Terraria version.
Tip: Check user reviews and mod updates to avoid known conflicts. - 3
Launch Terraria and verify mod loads
Start the game and open the Mods menu to confirm the Autohammer mod is active. If the mod doesn’t appear, re-check the installation steps, ensure the mod is enabled, and verify load order.
Tip: Run a test world to avoid impacting your main world. - 4
Obtain or craft the Autohammer
Consult the mod’s crafting recipe. Gather required materials, and complete the crafting sequence in a workshop or forge provided by the mod. If upgrades exist, follow the upgrade path step by step.
Tip: Document prerequisites so you can replicate the process in another world. - 5
Place and configure the Autohammer in-game
Place the device in a suitable area. Connect any power sources if required, and configure hammering ranges or automation presets according to your workflow.
Tip: Start with a basic preset and gradually adjust to improve efficiency. - 6
Test automation and optimize
Run a small build project to test hammering performance. Iterate on presets and power settings to reduce resource use while maintaining output.
Tip: Keep a log of successful configurations for future builds.
Got Questions?
What is the Autohammer in Terraria?
In Terraria, the Autohammer is a mod-added tool that automates hammering tasks. It does not exist in the vanilla game and requires a compatible mod and loader to function.
The Autohammer is a modded tool that automates hammering.
Do I need tModLoader to use Autohammer?
Yes, most Autohammer mods rely on tModLoader to run within Terraria. Ensure the loader version matches your game installation.
Yes, you typically need tModLoader.
Is Autohammer compatible with vanilla Terraria?
Autohammer is not part of vanilla Terraria; it exists only through mods. Compatibility depends on the specific mod and game version.
It's not in the base game; check mod compatibility.
How do I craft or obtain Autohammer?
Obtaining the Autohammer depends on the mod you installed. Follow the mod’s recipe chain and prerequisites to craft or upgrade the tool.
Follow the mod's recipe chain to obtain it.
Are there safety considerations when using Autohammer?
Always back up saves, avoid conflicting mods, and test in a separate world to prevent data loss.
Back up your saves and test in a separate world.
What version should I check for compatibility?
Verify your Terraria version and the mod’s version compatibility to prevent crashes.
Check the version to prevent crashes.
Watch Video
Key Points
- Install tModLoader to access Autohammer.
- Choose a compatible Autohammer mod and Terraria version.
- Follow the mod’s crafting path to obtain Autohammer.
- Test automation in a safe world and back up saves.