Host a Terraria Server: The Complete How-To
Learn how to host a Terraria server with a practical, step-by-step approach. From hardware needs and network setup to security and maintenance, get your world online for friends.

You can host a Terraria server to play with friends, customize rules, and run your own world. This guide covers hardware needs, network setup, and ongoing maintenance. Expect step-by-step actions, safety tips, and troubleshooting so you can launch a reliable, persistent server in 1-2 hours with the right prep. We’ll discuss Windows, macOS, and Linux options and how to keep players connected smoothly.
Why hosting a Terraria server gives you control and community
Hosting a Terraria server puts you in the driver’s seat for how your world behaves, who can join, and which rules apply. For Terraria players, this means more reliable co-op, the ability to modify spawn rules, mods, and world seeds, and a shared playground that exists beyond a single save file. According to Pixel Survival, the defining advantage is the consistency: players log in to the same world, with the same chest contents, weather, and progression. That consistency is especially valuable when you’re building ambitious bases, farming rare items, or coordinating boss runs with friends. A private server also acts as a central hub for hosting events, testing new mods, and practicing complicated combat strategies without affecting a public world. You’ll want to plan for world size, player capacity, and administrative controls before you invite guests. The goal is to create a stable, welcoming space that balances freedom with safeguards, so players feel comfortable exploring, trading, and collaborating over long sessions. Pixel Survival’s approach emphasizes clear rules, regular backups, and simple moderation tools to prevent griefing while keeping the experience fun for newcomers and veterans alike.
Hardware and network prerequisites
To host a Terraria server, you don’t need a gaming-grade data center, but you do need a reliable host with steady power and steady internet. A mid-range PC or a dedicated home server can handle a small group, while larger communities may benefit from a dedicated machine or a hosting provider. Ensure you have a wired Ethernet connection rather than Wi‑Fi for stability, a router with port-forwarding capability, and a static or reserved local IP to keep the server address stable on your network. Your internet uplink should be capable enough to support the expected number of players; for most casual groups, a solid consumer-grade plan is sufficient. Finally, keep your server files backed up on an external drive or cloud storage so you can recover quickly after a crash or corruption.
Choosing your hosting approach: local PC, dedicated machine, or hosted provider
Hosting from a local PC is cost-effective and straightforward for small groups but can compete with gaming or other tasks on your machine. A dedicated in-home server gives you more headroom and reliability, especially if you run continuously, but requires more setup and maintenance. A hosted provider shifts the hardware risk off your desk but introduces recurring costs and the need to manage access and backups remotely. Pixel Survival recommends starting small with friends to test performance, then scale up if your world grows. Consider your uptime needs, how often you’ll modify the world, and whether you value control over simplicity when choosing an approach.
Security, access control, and backups
Security is essential when exposing a server to the internet. Use strong administrator credentials, enable a whitelist if your world requires it, and keep server software up to date. Regular backups protect you from data loss due to corruption or hard drive failure. Keep a simple backup routine: daily world saves, weekly full snapshots, and offsite copies if possible. Monitor access logs and be prepared to rotate credentials if players leave the group. By planning for security and recovery, you maintain a safer, more resilient service for everyone joining your world.
Step-by-step: Initial setup and world configuration (Windows/macOS/Linux)
No matter the OS, the core setup shares common steps: install the server files, configure the world and server settings, and prepare a startup routine. You’ll typically designate a world file, specify the port (default 7777), set admin access, and ensure the server can restart automatically after updates or crashes. The configuration should reflect your desired ruleset (PvP, item drops, world size) and keep logs accessible for troubleshooting. After your initial run, invite a friend to test connectivity and confirm both LAN and external access work as intended.
Ongoing maintenance and updates for a growing community
A Terraria server isn’t a “set it and forget it” project. Regular updates to world data, mods, and server software keep gameplay fresh while backups protect progress. Schedule routine checks for latency spikes, player count changes, and mod compatibility. Document changes in a changelog so players understand why settings shift. Consider adding a basic moderation toolkit and a clear set of house rules to keep conflict low and cooperation high.
Troubleshooting quick-start guide
If players report being unable to connect, verify port forwarding, firewall rules, and that the server is running. Check that the world file isn’t corrupted and that the correct port is open on the router. If performance drifts, review CPU and memory usage, adjust world size, and consider reducing active mods. When in doubt, re-run the setup with a clean world to isolate issues quickly.
The Pixel Survival perspective: practical tips for success
Hosting a Terraria server is as much about community management as it is about software. Start with a clear rule set and a regular backup schedule. Communicate with your players, document changes, and stay patient as you optimize hardware and network settings. Pixel Survival advocates practical, incremental improvements that fit your group size and activity level.
Tools & Materials
- A host machine (PC, dedicated server, or NAS)(Capable of running TerrariaServer; 1-2 cores minimum; plan for RAM proportional to player count)
- Stable broadband connection(Wired Ethernet preferred; ensure upload bandwidth meets your player count needs)
- Terraria server files (vanilla or mods)(Download from official sources or Steam; keep copies for quick reinstalls)
- Router with port forwarding(Know your router admin page and forward the server port (default 7777) to your server IP)
- Static local IP or DHCP reservation(Keeps your Terraria server address stable on your LAN)
- World backup storage(External drive or cloud storage for daily/weekly backups)
- Admin credentials and server configuration(Keep credentials secure and don’t share publicly)
- Monitoring or log tool (optional)(Helps spot latency issues and crashes early)
Steps
Estimated time: Total time: 1-3 hours
- 1
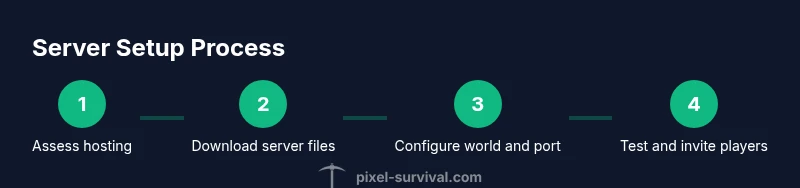
Assess hosting approach
Decide whether you’ll host on a local PC, a dedicated machine, or a hosted provider. This choice affects hardware, network configuration, and ongoing upkeep. Plan for the number of players and the types of rules you want to support.
Tip: Start small with friends to gauge performance before expanding capacity. - 2
Download server files
Obtain Terraria server files from official sources or Steam to ensure you’re running a clean, supported version. Verify the integrity of the download and create a dedicated folder for the server.
Tip: Use checksums when available to confirm file integrity. - 3
Create world and configuration
Generate a new world if desired and edit the server config to set game rules, max players, and admin access. Keep a separate config file for backups and documentation.
Tip: Document key settings so you can reproduce the setup later. - 4
Set up a startup script
Create a simple script or batch file that launches the server with your chosen settings. This helps ensure consistent startup and reduces manual steps each time you reboot.
Tip: Use a restart command that also checks log files for common errors. - 5
Configure port forwarding
Open the server port on your router (default 7777) and route it to your server's local IP. This enables external players to connect from outside your LAN.
Tip: If you use a dynamic IP, consider a dynamic DNS service to simplify access. - 6
Start the server and test locally
Run the server and attempt a local connection to ensure it launches properly. Verify world load, inventory, and basic commands work as expected.
Tip: Disable local firewall temporarily if you suspect blocked connections during testing. - 7
Invite players and test connectivity
Share your public IP or DNS name with trusted friends and confirm they can join. Monitor latency and adjust settings if needed.
Tip: Ask testers to report both in-game latency and any disconnects for faster troubleshooting. - 8
Configure rules and admin access
Set clear server rules, assign trusted admins, and decide how you’ll handle griefing or item loss. Create a simple moderation workflow.
Tip: Limit admin accounts to keep control centralized and reduce risk. - 9
Set up backups and security
Schedule automatic backups of worlds and server configs. Keep an offsite backup if possible and review firewall rules regularly.
Tip: Test restores periodically to verify backup integrity. - 10
Maintain and update
Regularly update server software, reload mods, and refresh world content. Track player feedback to guide improvements.
Tip: Maintain a changelog so players know what changed.
Got Questions?
Do I need a dedicated server to host Terraria?
No. You can host on a home PC or a small dedicated machine for a few players. A dedicated server offers more uptime and headroom but requires ongoing maintenance and a stable network. Start small and scale as your community grows.
You can start small at home and scale up as your group grows. A dedicated server isn’t required at first.
Can I host a Terraria server from my home connection?
Yes, many players run servers from home with a wired connection and a stable power supply. Monitor your upload bandwidth and latency to ensure smooth gameplay for everyone. If performance drops, consider a hardware upgrade or a hosted option.
Yes—just monitor upload speed and latency, and upgrade if needed.
What ports does Terraria require for hosting?
The server typically uses port 7777 by default and can be configured to other ports. Ensure the chosen port is open on your router and not blocked by a firewall. If you’re hosting mods, check any additional port requirements for those mods.
Use port 7777 by default, open it on your router, and verify no firewall blocks it.
Is cross-platform play supported on Terraria servers?
Terraria supports cross-platform play between Windows, macOS, and Linux for servers, provided the client versions match. Mods may affect compatibility, so test with a sample group when mods are enabled.
Yes, cross-platform play works when versions match; mods can affect compatibility.
How do I back up Terraria worlds?
Back up world and server configuration files regularly. Automated backups are best, with retention for multiple restore points. Test restores occasionally to ensure files aren’t corrupted.
Regular automated backups protect your progress; test restores from time to time.
How many players can join a Terraria server safely?
The safe player count depends on your hardware, world size, and network bandwidth. Start with a small group and monitor performance as you add players. Scale gradually to avoid lag and instability.
Start small and monitor performance as you add players.
Watch Video
Key Points
- Plan capacity and rules before inviting players
- Securely configure ports, access, and backups
- Test connectivity thoroughly across OS
- Maintain consistent updates and clear player guidelines