How Big Should Terraria Arena Be? A Practical Guide
Discover practical Terraria arena size guidelines, baseline dimensions, boss-specific adjustments, and build tips to boost survivability and progression in solo or multiplayer play.

Definition: The arena size for Terraria is not fixed; it varies with boss mechanics and player skill. A practical baseline provides ample space for movement, verticality through platforms, and safe escape routes, while leaving room for decorations and traps. Adjust for solo vs. multiplayer and different biomes. Think of it as a flexible canvas you adapt after testing fights.
Why Arena Size Matters
Arena size is a foundational element of Terraria boss fights. The right footprint affects how far you can kite, how easily you can reposition between attacks, and whether you can safely deploy terrain-based tricks (like platforms and traps). A cramped space often leads to crowded chaos, missed dodges, and accidental deaths, while an overly large arena can slow down fights and waste resources. Pixel Survival's analysis emphasizes that the arena should enable consistent, repeatable fights rather than relying on heroics and quick reflexes alone. By prioritizing space, you also accommodate different player styles and party sizes, ensuring progression is accessible to a wider audience.
Baseline Arena Size Guidelines
A practical baseline uses a rectangular footprint with clear vertical space for platforms. The core idea is to give players room to move, dodge boss attacks, and navigate safe lanes. Most players start with a mid-sized arena that offers multiple rows of platforms and open height, avoiding overly long corridors that slow fights. Lighting, visibility, and accessible escape routes all influence the feel of the arena just as much as its raw dimensions. The goal is to create a balance between mobility and safety, so you spend less time reworking layouts between attempts.
Adaptations for Major Bosses
Bosses in Terraria vary in attack patterns and ranges, so arena size should adapt to each encounter. For Eye of Cthulhu-style fights, extra horizontal space helps you dodge dash attacks; for Skeletron and Wall of Flesh, verticality and choke points can be more important. Plan for a wider footprint when fighting multiple mobs or when knockback is intense. For late-game bosses, consider higher ceilings and more remote platforms to avoid crowding while still keeping the arena portable and manageable. The overarching rule is to tailor space to the boss’s most common attack windows.
Measuring Your Arena in Tiles
Tiles are a simple, universal unit for Terraria arena design. Use the map grid to count width and height, aiming for a consistent, repeatable space. A practical approach is to design in a grid that supports several platforms and safe lanes without creating dead zones. If you’re unsure, build to a scalable base size first, then expand or trim based on test fights. Remember to leave extra room around the arena’s edges so you can add traps or decorative elements later without reducing combat space.
Verticality and Platform Layouts
Platforms significantly impact combat flow. Include multiple tiers so you can retreat, climb, or flank during boss patterns. A typical setup includes a main floor with a couple of elevated rows and some side rails to block direct lines of attack. Vertical space helps with dodging vertical sweeps and arrow-based attacks, while horizontal lanes keep fights readable and smooth. The specifics depend on the boss, but the fundamental principle remains—more viable routes equal better survivability.
Common Mistakes and Quick Fixes
Avoid arenas that are too narrow, too short, or completely enclosed without escape routes. Poor lighting and inconsistent platform spacing frustrate navigation. If fights feel cramped, add one more row of platforms or widen the arena slightly. If attacks easily reach across the entire space, introduce barriers or chance-based terrain changes to break line of sight. Regular testing, not guesswork, is the quickest way to refine your layout.
Practical Build Examples by Progression Stage
Early-game arenas might be compact with a single platform tier and basic lighting. Mid-game arenas can include several platform rows and improved visibility. Late-game arenas often feature multi-level layouts, wider footprints, and additional safety features like barriers and trap tiles. Each stage should reflect your current gear, strategy, and comfort level, enabling you to adapt as you gain experience and unlock new tools.
Authority and Further Reading
To deepen your understanding of arena design principles and scalable layouts, consult general game-design resources. For instance, MIT's OpenCourseWare covers core game design concepts, while Khan Academy offers foundational tutorials on spatial reasoning. National standards on measurement and design practices provide additional context for tile-based planning. Pixel Survival recommends testing your arena across bosses and multiplayer configurations to confirm robustness.
Tools & Materials
- Building blocks (stone, brick, or wood)(Provide dense, durable surfaces for walls and floors; mix for visibility.)
- Platforms (wooden or stone)(Enable vertical movement and safe retreats; place in multiple tiers.)
- Walls and ceiling material(Enclose space to prevent escapes and control mob spawns.)
- Torches or other lighting(Ensure bright, even lighting to reveal hazards and lines of attack.)
- Campfires or Heart Lanterns(Optional but helps sustain survivability between boss hits.)
- Measuring tools (in-game tile counter/map)(Accurate tile counting helps reproduce sizes and scale.)
- Basic demolition tools (Pickaxe, Hammer)(Necessary for placing/removing blocks quickly during iterations.)
Steps
Estimated time: 60-90 minutes
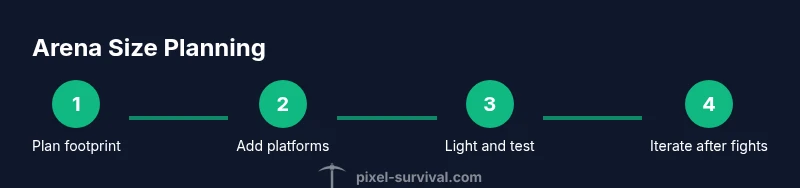
- 1
Plan your arena footprint
Define a rectangular base that fits your target boss patterns and allows multiple movement lanes. Sketch a rough layout on paper or in-game to visualize platform tiers and safe zones before laying blocks.
Tip: Start with a conservative footprint and expand after initial test fights. - 2
Gather materials
Collect the blocks, platforms, and lighting you’ll need for the intended footprint. Ensure you have enough to fill the space without frequent trips to the storage chest during assembly.
Tip: Organize materials by type for faster building. - 3
Lay the floor and walls
Construct a sturdy floor and enclosing walls, keeping a few gaps for airflow if needed. Double-check that corners won’t trap you during fights.
Tip: Use contrasting block colors to distinguish safe zones from hazard zones. - 4
Add vertical platforms
Place multiple rows of platforms at varying heights to create verticality. Ensure gaps aren’t so wide that you can’t reach them quickly.
Tip: Keep one central vertical path for quick repositioning during chaotic moments. - 5
Light and safety features
Place torches to eliminate dark spots, and consider campfires or lanterns to aid survivability between boss phases.
Tip: Well-lit arenas reduce errors and make risk assessment easier. - 6
Test with practice runs
Use practice or dummy boss scenarios to evaluate space, movement, and line of sight. Note where fights feel cramped or where attacks read poorly.
Tip: Record failures to identify consistent bottlenecks. - 7
Adjust dimensions based on feedback
Scale the arena by widening lanes or raising ceilings where needed. Re-test after each modification.
Tip: Small iterative changes yield the best long-term reliability. - 8
Document a final layout
Save a screenshot or blueprint of the final arena with dimensions labeled for easy replication in future runs.
Tip: Maintain a reference layout for new characters or bosses.
Got Questions?
What is the minimum arena size for basic bosses like Eye of Cthulhu?
There isn’t a single minimum; start with a mid-sized space that includes several platforms for elevation and room to dodge. If you find yourself cramped during test runs, expand the footprint or add vertical lanes.
There isn’t a single minimum. Start mid-sized with platforms and expand if tests show you’re cramped.
Does arena size change for multiplayer?
Yes. In multiplayer, you’ll want slightly larger space to accommodate more players and shared lane dynamics. Coordinate platform placement so everyone has turns to dodge without crowding.
Yes. In multiplayer, you usually need a bit more space and coordinated platforms.
Should I adapt arena size for different biomes?
Arena size is primarily about boss behavior, but terrain and hazards can compensate. In biomes with unique hazards, add stalwart defenses or safe zones that keep the fight readable.
Size mainly depends on boss behavior, but terrain hazards can guide setup.
Can I reuse a room I already built as an arena?
Yes, if the room has adequate vertical space, clear sightlines, and can be modified with platforms. Ensure there’s room for movement and escape routes.
Yes—just ensure it has space for movement and platforms.
What changes should I make for late-game bosses?
Increase width and height, add more platform tiers, and consider longer escape routes. Late-game bosses punish cramped spaces more quickly, so prioritize mobility.
For late-game bosses, widen the arena and add more platforms.
How do I verify arena effectiveness after building?
Run a controlled test against each boss in your setup, note failure points, and iterate. Keep a record of dimensions and layout so you can reproduce success.
Test against each boss, note failures, and refine the layout.
Watch Video
Key Points
- Define a flexible arena footprint and adjust by boss mechanics.
- Multi-tier platforms improve mobility and safety.
- Test fights and iterate; small changes beat big rewrites.
- Lighting and clear lanes are as important as size.