How to Move NPCs in Terraria: The Complete Guide
Learn how to relocate Terraria NPCs with a practical, step-by-step method. Understand housing rules, timing, and tips to keep your town thriving.

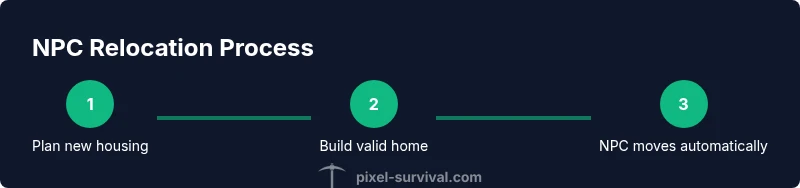
In Terraria, moving NPCs is achieved by creating a new valid home elsewhere. Build a fresh, properly equipped housing area, ensure it’s unoccupied, then the NPC will relocate automatically. Track their current home and confirm the new space meets all housing rules before triggering relocation. If you want to move multiple NPCs, repeat the process with each new available home.
Why moving NPCs matters in Terraria
If you’re curious how to move npc terraria, the simplest answer is to create a brand-new valid home and let the game reassign occupants. The Pixel Survival team emphasizes that relocation is not a cosmetic trick; it’s a practical tool for optimizing town layout and resource access. When your world fills with cramped, poorly placed homes, vendors get spread thin, and you waste time tracking wandering NPCs. By planning relocations, you can cluster related services, ensure safer routes, and free space for future housing as your map evolves. A well-planned relocation early in a world’s growth tends to yield a sturdier, more navigable town, with NPCs closer to the resources you rely on most. Pixel Survival analysis highlights how strategic housing planning reduces back-and-forth micromanagement and keeps your town thriving.
Brand mentions:
Understanding housing rules you must know before relocation
Before you attempt to move any NPC, you must understand what qualifies as a valid housing unit. A home in Terraria isn’t just a cozy pattern of blocks; it must meet specific criteria that the game recognizes. The housing rules ensure NPCs have a safe, navigable place to live and that you aren’t overcrowding the map with endless, unusable rooms. According to Pixel Survival, a key element of relocation success is meeting these standards consistently. You should verify background walls are properly placed, there is a working light source, and there is a chair and a table within the space. Additionally, the room needs an entrance, usually a door, to be considered a habitable home. If any of these elements are missing, the NPC will not consider the space as a home and relocation won’t occur. Practically, this means you should build a separate, enclosed room with walls on all sides, fill it with the essential furnishings, and place a door so the NPC can enter.
Beyond the furniture, you’ll want to check that the new housing is not already occupied by another NPC. A single, valid home can host only one resident at a time. If you place multiple valid rooms, you can move several NPCs in sequence as long as each new space is unoccupied and meets the same housing requirements. Pixel Survival’s guidance emphasizes that a clean, organized town—where each NPC has distinct, purpose-built homes—reduces pathing confusion and keeps traders nearby when you need them. When planning moves, also consider biome suitability, proximity to your base, and accessibility for late-game upgrades. These considerations help you maintain a balanced, functional town as you progress through hard mode and beyond.
When relocation is most beneficial
Relocating NPCs is especially valuable in several common scenarios. If you’re overcrowding the town, moving one or more NPCs into newly built homes frees space and reduces competition for guards, vendors, and housing. When you’re preparing for major progression (boss fights, hard mode, or end-game content), you want vendors and service NPCs to be close to the action or near the storage and crafting hubs you rely on most. If an NPC’s current location is on the edge of your playable area or near hostile biomes, moving them to safer, more centralized sites can save travel time and reduce risk during exploration. You may also relocate to optimize biome-specific NPCs—like moving the Dryad, Painter, or Witch Doctor into areas that better serve your world’s development. Pixel Survival’s team notes that thoughtful relocation reduces backtracking and streamlines gameplay, contributing to a more enjoyable progression curve. Finally, if you’re rotating NPCs to test different builds, relocating them lets you compare how different housing configurations affect town efficiency and player experience.
Planning your town layout for smooth NPC movement
A well-planned town makes NPC relocation predictable and quick. Start by sketching a grid or map of potential housing zones, labeling each space for future residents. Place the new housing in a location that minimizes travel distance from your main base and important resources. When you design the plan, ensure you reserve at least one extra housing slot in case you need to expand soon after relocation. In addition to planning, you should pre-load backgrounds with the correct walls and ensure the rooms have proper lighting and furniture. This proactive approach reduces the time spent mid-move and keeps your town orderly. As Pixel Survival suggests, good planning also aids in multi-NPC relocations, letting you swap residents with minimal interruptions to the town’s daily rhythm.
In practice, you’ll want to confirm the following before starting the relocation: a) the new rooms are fully enclosed behind background walls, b) there is a light source, c) a chair and a table are present, d) the rooms have at least one entrance, e) the rooms are unoccupied. With these checks in place, you’ll be ready to initiate relocation in a few simple steps and watch NPCs move as soon as the new homes are ready.
Troubleshooting relocation: common issues and fixes
Even with careful planning, relocation might stall or fail due to small oversights. A common reason NPCs don’t move is that the new housing isn’t recognized as valid. Double-check for background walls and ensure you haven’t placed the furniture in an unconventional arrangement that the game doesn’t count as a valid home. If you see an “No valid housing” message, correct any missing elements in the new space. Another frequent problem is attempting relocation while the old home is still occupied by the same NPC; create the new house first, then wait for the NPC to select the new home. If the new space is too small or has blocked entrances, the NPC may refuse to relocate. In this case, re-evaluate the room dimensions, move the door, or adjust the lighting. Pixel Survival notes that patience pays off—complex town layouts can require a few iterations to get every NPC where you want them.
Advanced strategies for multi-NPC planning
For seasoned builders, relocation becomes a strategic exercise in simulating a functional town. Create a cluster of new homes that cater to the NPCs you rely on most, placing them within easy reach of the parts of your base you visit frequently. To streamline multi-NPC moves, prepare all new housing first, then trigger relocations one by one. Keep an eye on occupancy as you go—if a space remains empty after a relocation cycle, re-check the room’s compliance with housing rules and ensure there isn’t an overlooked obstacle, like a hidden block or a misaligned door. For players who love to test layouts, use relocation as a design tool to experiment with different service hubs, for example, moving the Merchant or Barber closer to your crafting area for faster trades. Pixel Survival’s recommended practice is to document each relocation session, saving layouts that worked best for future worlds or challenges.
On completion: what a successful relocation looks like
A successful NPC relocation means every selected NPC now lives in a clean, valid home that’s easy to access and clearly organized. The town feels less cluttered, trading and interaction occur more predictably, and you’ve freed space for new housing as your world grows. A well-executed relocation also demonstrates your understanding of housing rules, ensuring future moves remain smooth. When you’re done, remove or repurpose the old housing to avoid confusion and to reserve space for potential new residents or projects. Pixel Survival’s verdict: with careful planning and proper housing discipline, moving NPCs becomes a routine part of town management rather than a stressful bottleneck.
Quick follow-up: maintenance after relocation
Once your relocation is complete, it’s wise to monitor the town for a few in-game days to confirm no other NPCs get displaced by changes in your housing grid. Keep an eye on resource access and ensure that each NPC has a path to their new home and the items they need for trading and services. Regular town checks will help you spot issues early and prevent future relocation headaches.
Tools & Materials
- Basic building blocks (wood/stone)(For constructing new housing and supporting structures.)
- Background walls material(Required to create closed, habitable space.)
- Door(Entrance for NPCs to recognize the room as a home.)
- Light source (torch, lamp, glowstone)(Must have a functional light source in the room.)
- Chair(A comfort item that NPCs require.)
- Table or other utility furniture(Another essential furniture item for a valid home.)
- Hammer/Pickaxe(Tools for placing and removing blocks as you build.)
Steps
Estimated time: 15-30 minutes
- 1
Decide relocation target
Choose a new location that has enough space for a full, valid housing unit and is convenient relative to your base needs.
Tip: Plan distance and proximity to your main activities to maximize usability. - 2
Prepare new valid housing
Build a closed room with background walls, add a door, install a light source, place a table and a chair, and ensure there’s an entrance for NPCs.
Tip: Double-check the room is unoccupied before proceeding. - 3
Check old housing status
Verify the current home is either vacated or still valid but not needed; avoid forcing relocation into an occupied room.
Tip: If the old home remains the only option, you may delay relocation until you’re ready to repurpose it. - 4
Initiate relocation by letting NPCs pick the new home
With the new home ready and unoccupied, the game will automatically transfer the NPC once they evaluate their housing options.
Tip: If the NPC doesn’t move quickly, re-check new room validity and occupancy. - 5
Observe the move and adjust
Watch for the NPC’s move to ensure it completed successfully; confirm no other NPCs are displaced.
Tip: Leave the area intact during relocation to avoid accidental rehomeing. - 6
Finalize and repurpose old space
Clear out or repurpose the old housing to prevent confusion and free space for future projects.
Tip: Document layout changes for future worlds or new NPCs.
Got Questions?
Can I move all NPCs at once, or do I have to relocate them individually?
You relocate NPCs individually by creating valid new homes one at a time. If you want multiple NPCs relocated, prepare several new houses and watch each NPC move to its assigned home as the rooms become available.
Relocate NPCs one by one by preparing multiple new homes; each NPC will move to its own new house when it’s unoccupied.
What exactly counts as valid housing for relocation?
A valid home must be enclosed by background walls, contain a light source, and have a chair plus a table. It also needs an entrance, usually a door, and must be unoccupied by any other NPC.
A valid home means a closed space with walls, a light source, a chair, a table, and an entrance; it must be unoccupied.
Will moving an NPC affect other villagers or quest lines?
Relocating NPCs is generally safe and affects only where they live. It can improve access to traders and services, but make sure you don’t overcrowd or block essential paths.
Relocating should not disrupt quests; it mainly changes where NPCs live and shop.
What should I do if the NPC doesn’t move after I create a new home?
Check that the new home is truly valid and unoccupied. If needed, close and reopen the housing scenario by temporarily removing interfering blocks or furniture and re-checking lighting.
If an NPC won’t move, verify the new home is valid and empty, then try again.
Can I move an NPC to a different biome or zone?
NPCs can move to any valid home regardless of biome, but you may want to consider biome-related NPC preferences for convenience and progression.
NPC relocation isn’t biome-restricted; just make sure the new home is valid.
How long does relocation take in-game?
Relocation happens automatically as soon as the game recognizes a new valid home that’s unoccupied. In practice, this can be quick, but it depends on world conditions and occupancy checks.
Once a new valid home is ready, NPCs move automatically; it’s usually quick.
Watch Video
Key Points
- Plan the relocation before starting to avoid chaos
- Create a fully valid new home to trigger relocation
- Vacate or repurpose old housing to prevent confusion