Light Key Terraria: Master Lighting for Progression
Master the light key terraria approach to illuminate caves, map biomes, and progress from early torch setups to late-game brightness. Practical, step-by-step guidance with build ideas and safety tips.

With a light key terraria approach, you’ll illuminate caves, map biomes, and unlock exploration progress from the start. This guide outlines a practical lighting progression, the best early- and late-game light sources, and a step-by-step plan that fits Terraria’s progression. Pixel Survival’s team found that strategic illumination reduces risk in dark caverns and speeds navigation.
Understanding the Light Key Terraria Concept
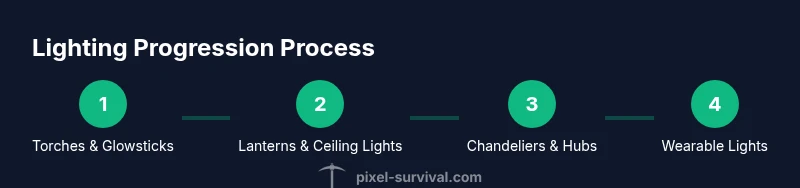
In Terraria, lighting is not just ambiance—it's a core progression tool. The term 'light key terraria' describes a deliberate approach to selecting and placing light sources so you can see, map, and survive as you move from surface to underground. A well-planned lighting system acts like a key that unlocks safe exploration, resource discovery, and efficient navigation through biomes, caverns, and dungeons. Early game players learn that the right light not only reveals ore veins faster but also reduces danger by thinning shadowy corners where enemies spawn. Pixel Survival’s analysis highlights that players who adopt a proactive lighting strategy report faster mapping and fewer backtracking sessions. In practice, you start with basic torches and gel-based sources, then upgrade to more efficient sources as you gain materials. The goal is to create even illumination along routes, rooms, and work areas so you can see what matters without wasting resources. Throughout this guide, we’ll refer to 'light key terraria' as the framework for thinking about light as a progression tool, not just a decorative touch, and you’ll learn how to balance cost, visibility, and safety as you advance.
note
Tools & Materials
- Torch(Basic light source; place along walls to illuminate corridors.)
- Glowstick(Instant light; great for quick exploration before committing to a setup.)
- Lantern(Brighter, longer-lasting light; hang from ceilings or walls.)
- Mining Helmet(Hands-free light during mining and fighting.)
- Campfire(Light source with regenerative effects nearby; helpful for bases.)
- Chandelier(Decorative but bright; supports large rooms with even light.)
Steps
Estimated time: 1-2 hours
- 1
Inventory and assess
Gather basic light sources (torches and glowsticks) and survey your starting area. Identify dark corridors and rooms that will slow exploration if left unlit. Mark a plan for lighting along your main path before heavy mining begins.
Tip: Keep a spare stack of torches in your quick-access bar for rapid deployment. - 2
Light the primary route
Place torches at regular intervals along your main tunnel to create a predictable lighting pattern. Avoid large patches without light that could conceal ambushes. A steady light rhythm helps you map exits and keep track of explored space.
Tip: Stagger torches on opposite walls to reduce flat shadows and improve depth perception. - 3
Introduce versatile sources
Add glowsticks for fast exploration and lanterns for longer-range visibility in larger rooms. Position lanterns so that light reaches far corners without creating harsh glare in your face while mining.
Tip: Reserve glowsticks to light up newly discovered caverns before committing resources to permanent lights. - 4
Wearable light for hands-free work
Equip a Mining Helmet or other wearable light source when mining or working in tight spaces. This frees your hands for tools while keeping a bright field of view.
Tip: If you don’t have a helmet yet, combine a few glowsticks with a lantern network to keep hands free. - 5
Expand to larger rooms and biomes
In bigger spaces or biomes, install chandeliers or multiple lanterns to ensure even distribution of light. Test visibility by night or in deeper caverns to confirm consistent coverage.
Tip: Create light hubs at major junctions to guide future exploration and base-building. - 6
Upgrade progressively
As you acquire metals and advanced materials, swap in higher-tier light sources that cover more area with less density of fixtures. Maintain a lighting cadence so new sources don’t outrun your base expansion.
Tip: Document where you place each upgrade so you can replicate the setup in new bases. - 7
Regular review and adaptation
Periodically assess your map and lighting; adjust corridors and rooms as your exploration reveals new tunnels or biomes. The light key terraria approach thrives on iterative improvement.
Tip: Keep a backup light kit ready for emergencies or quick expeditions.
Got Questions?
What is the light key terraria approach and why should I use it?
The light key terraria approach treats lighting as a progression tool. It helps you see, map, and survive by planning light sources from early torches to late-game illuminants, reducing risk and speeding exploration.
The light key terraria approach treats lighting as a progression tool to help you see and map more efficiently.
What are the best early light sources?
Start with simple torches and glowsticks to illuminate nearby areas. They are cheap, quick to deploy, and give you immediate visibility as you begin exploration and mining.
Start with torches and glowsticks for quick, cheap lighting early on.
Do lights affect enemy spawns or navigation?
Proper lighting reduces dark zones where enemies can hide, making navigation safer and more predictable. It also helps you spot ore veins and resources sooner during mapping.
Good lighting reduces dark spots where enemies hide and helps you map faster.
Is wearing a Mining Helmet worth it for lighting?
A Mining Helmet provides hands-free light, which is valuable during mining and combat. It complements stationary lights by keeping your field of vision broad while you work.
Yes, a Mining Helmet is worth it for hands-free lighting during mining.
How should I upgrade lighting through progression?
Start with basic torches and glowsticks, add lanterns for stronger light, and gradually replace with higher-tier sources as you acquire better materials. Keep light hubs at junctions to guide future exploration.
Upgrade lighting as you access better materials, keeping hubs at important junctions.
Can lighting improve base safety in large rooms?
Yes. Bright, even lighting in large rooms reduces blind spots and helps you react quickly to mobs and traps during base defense or storage management.
Bright, even lighting in large rooms improves safety and response time.
Watch Video
Key Points
- Light key terraria frames exploration progression.
- Diversify light sources for efficient mapping.
- Plan lighting as you expand bases and biomes.
- Upgrade lighting gradually to match progression.