Terraria Magic Storage Guide: Master Your Inventory
Learn how to install Magic Storage, plan a scalable centralized vault, and organize items across worlds with a practical, step-by-step Terraria guide. Build a robust storage network that saves time and boosts progression.

With this terraria magic storage guide, you’ll learn how to install the required mod, set up a centralized vault, and organize your gear for quick access. You’ll understand how to link storage to various chests, configure search tags, and keep your inventory tidy as you progress from early to late game. This guide emphasizes practical setup and scalable organization for smooth progression.
What Terraria Magic Storage is and how it changes inventory management
This terraria magic storage guide begins with the core idea: centralizing your inventory into a single, searchable network. Terraria's Magic Storage is a modular, mod-driven system that replaces scattered chests with a centralized vault you can access from anywhere in the world. It ties together multiple storage blocks into a single interface, letting you search, sort, and retrieve items quickly. This approach dramatically reduces the time spent hunting for gear during a long journey. According to Pixel Survival, adopting a centralized storage mindset early in your progression yields noticeably fewer interruptions and a smoother curve into mid-game.
The central concept is simplicity with scale. You set up a few core components and then connect additional units as your loot grows. The system is designed to be extensible, so you can begin with a modest network and expand as you push into harder bosses and rarer drops. While the vanilla game rewards careful organization, Magic Storage formalizes that discipline by giving you a consistent UI for access, sorting, and filtering. For most players, the return on investment is measured in minutes saved per play session and a calmer inventory screen when facing a boss rush.
As you move through early, mid, and late game, the value of a well-planned network becomes clear. You’ll find that items you use often—healing potions, ammo, building materials—are instantly accessible, while rare resources are quietly tucked into specific storage zones. A well-implemented system reduces friction during boss attempts and exploration, enabling you to focus on strategic decisions rather than item hunts. Pixel Survival’s guidance underscores that a reliable storage backbone is a cornerstone of efficient progression, especially for players juggling multiple worlds or character builds.
Why use Magic Storage in Terraria
Centralized storage transforms how you interact with loot. Instead of bouncing between dozens of chests, you gain a single portal for retrieval and organization. The benefits extend to progression pacing: faster access to essential gear means fewer downtime moments between encounters, more deliberate resource management, and a smoother transition into late-game content. The storage interface supports quick lookup, so you can search for specific items without breaking your flow. You also reduce risk: fewer interrupted loots mean you’ll miss fewer drops and more consistent crafting progress. For builders and explorers alike, a unified system lowers cognitive load and frees mental bandwidth for planning routes, building bases, or assembling loadouts.
A practical advantage is multi-world accessibility. If you play across several worlds, the Magic Storage network offers a portable logic for item transfers, letting you move supplies between characters or worlds without duplicating or losing items. This is particularly useful for players who experiment with different playstyles—survivor, mage builds, or pure builder runs. By consolidating storage, you also gain better insight into your overall resource pools, making it easier to identify shortages and craft queues. In short, a well-executed storage network supports consistent progression and a calmer, more focused gaming experience.
Setup prerequisites and installation
Before you can begin, you’ll need to prepare your Terraria setup. The Magic Storage system relies on a mod loader and a compatible mod: ensure you are using tModLoader with a version that matches your Terraria installation. The basics are straightforward: install tModLoader, then install the Magic Storage mod via the Mod Browser or a trusted download source. After installation, start a fresh world or load an existing one to ensure compatibility with your current mods. As you configure, keep an eye on other mods that interact with inventories or UI elements to avoid conflicts that could slow performance.
Next, sketch a rough layout for your storage network on paper or a planning tool. Decide where the central interface will live, which blocks will serve as storage units, and how many chests you’ll need to support your planned item categories. It’s wise to start small: place a Storage Heart or its modded equivalent, connect a couple of Storage Units, and verify that items you place into the network appear in the interface. If you’re playing multiplayer, coordinate with others to ensure the network remains synchronized and that there are no version mismatches among players. A clean setup from the start pays dividends later when you expand.
Building the storage network: planning and placement
A solid storage network starts with a thoughtful layout. Begin with a central hub—the primary interface area—where you access the unified inventory. From there, plan a grid or halo of Storage Units that radiate outward, each designated for a broad category (materials, tools, weapons, consumables). The exact arrangement isn’t critical, but a consistent pattern makes it easy to scale. Keep your hub near your main base to minimize travel, and place backup chests in other rooms for overflow. If you use a sky island or dungeon base, ensure you can still access units without long back-and-forth trips. In practice, most players benefit from a modular approach: a few units now, with planned expansions as you farm for rarer drops and stronger gear.
To optimize access, label zones clearly and maintain a color-coded or icon-based system. This reduces the cognitive load of searching and helps teammates understand the layout quickly. Where possible, place frequently used items closer to the hub and reserve far-off units for special resources. Always test your links by moving items in and out of the network and confirming the search function returns the expected results. A deliberate, scalable plan avoids bottlenecks once your inventory grows.
Organizing and sorting items: using categories and search
The power of a storage network comes from how well you classify and retrieve items. Create broad categories that map to your typical play style: combat gear, potions, mats, building supplies, and rare drops. Use the search and filter tools to locate assets quickly—this is especially valuable when you’re crafting multiple items or planning a boss loadout. A practical tactic is to set up subcategories within major blocks, such as “metal ores,” “metals,” and “ingots,” so you can zero in on a specific resource at a glance. Consistency is critical; establish naming conventions for items and keep notes on the intended use of each unit.
Regular audits help you stay organized. Schedule a weekly or session-based review to relocate misplaced items, re-tag miscategorized goods, and prune duplicates that creep into the network. As you discover new resources or craft new gear, update your layout accordingly so that the most valuable items surface near the hub. When you explain your system to others (if you’re playing with friends), keep your terminology simple and intuitive to maintain cohesion across players.
A key advantage is faster provisioning. If you understand where your armor sets, weapons, or mats live, you’ll be able to assemble a complete kit in minutes rather than scrambling through dozens of chests. The result is a more deliberate progression flow, with fewer interruptions and more time spent on strategy rather than inventory management.
Advanced tips and troubleshooting: performance, safety, and upgrades
As with many modded systems, performance and reliability are essential. Keep your mod set lean: remove any inventory-modifying extras that aren’t necessary for your build, as extra network logic can introduce lag in large worlds. Regular backups are wise—modern storage networks are robust, but no software is completely immune to crashes or world corruption. Create a quick backup routine that saves your world and mod data before major reorganizations or large transfers between worlds. If you notice lag, consider redistributing heavy items to distant storage units or limiting the number of active units when you reach peak item counts.
When expanding, plan the next tier of storage early. Add a few more units in a dedicated room, then reconnect them to the central interface. Remember to test after each expansion: confirm that all new items appear in the search results and that no existing links break. If you encounter conflicts with other mods, consult compatibility resources or community guides for suggested load orders or patch notes. A methodical, incremental approach minimizes downtime and preserves data integrity.
Lastly, maintain a clean UI. Consider disabling nonessential UI elements during heavy play sessions to reduce clutter and improve responsiveness. A streamlined interface makes it easier to navigate large item catalogs and keeps your focus on combat, exploration, and construction.
Maintenance, expansion, and progression: keeping your system future-proof
Your Magic Storage network should grow with your character. Start with the basics and incrementally add more storage units as you acquire new ores, crafting materials, and legendary drops. When you unlock a new resource tier or a rare drop, plan a dedicated storage zone to keep similar items together, maintaining the same organizational logic you started with. Regular reviews of your categories ensure you don’t overlook valuable loot as your inventories expand. A scalable system is easier to maintain and less error-prone, which saves time and reduces frustration during busy play periods.
In multiplayer contexts, synchronize storage expansion with your team’s pace. Establish shared conventions for item tagging and dedicated storage rooms to minimize cross-player confusion. Finally, document any major reorganizations in a simple reference sheet for new teammates. Pixel Survival’s team emphasizes that a robust storage foundation supports smoother progression and faster adaptation to new content.
Final notes and the Pixel Survival verdict
A well-executed Magic Storage network is a quiet productivity upgrade for Terraria. It minimizes inventory chaos, accelerates crafting, and makes item retrieval predictable—especially during long sessions focused on bosses or base-building. The system shines when you think ahead about layout and scalability rather than rushing to deploy a quick fix. As you adopt the setup, remember to keep your goals in mind: a clean, accessible, and expandable storage framework that grows with your adventures. The Pixel Survival team recommends embracing centralized storage as a core habit for long-term progression and a calmer, more focused playthrough.
Tools & Materials
- Terraria base game(Ensure version compatibility with mods)
- Magic Storage mod(Install via tModLoader Mod Browser)
- tModLoader(Required to load mods)
- Planning notebook or digital diagram(Helpful for layout planning)
- Network-friendly PC/console setup(Stable performance preferred)
- Backup tool or save backups(Recommended for data safety)
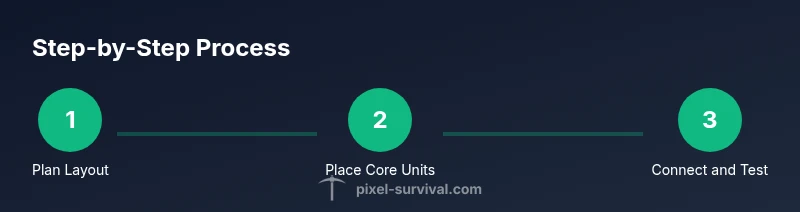
Steps
Estimated time: 45-60 minutes
- 1
Prepare your game and install Magic Storage
Update Terraria and install tModLoader, then add the Magic Storage mod. Verify that the mod loads without errors and that the storage interface appears in-game. If you run into conflicts with other mods, review load order and compatibility notes.
Tip: Tip: Create a fresh world for initial testing to avoid complex interactions with existing items. Image reference: storage-layout-diagram.png - 2
Plan your storage layout
Sketch a layout with a central hub and radiating storage units. Decide which categories go where and assign a primary access point near your base. The plan should be scalable for future expansion.
Tip: Tip: Keep the hub close to your main crafting area to minimize travel time. Image reference: layout-plan.png - 3
Place the storage hub and initial units
Place the central storage interface and at least a couple of storage units to test connectivity. Verify that adding items to the network appears in the interface and is searchable.
Tip: Tip: Use consistent spacing between units to keep the layout tidy. Image reference: hub-and-units.png - 4
Link chests and define categories
Assign storage units to broad categories (materials, gear, consumables). Ensure each unit has a clear purpose and that items move logically between zones.
Tip: Tip: Document the category map for teammates or future you. Image reference: category-mapping.png - 5
Test retrieval and refine organization
Search for common items, retrieve them, and confirm correct placement. Adjust labels or categories if items don’t surface as expected.
Tip: Tip: Run a quick inventory audit after a big farming session to keep the network clean. Image reference: test-retrieve.png - 6
Expand gradually and maintain backups
As you acquire more loot, add new storage units and re-evaluate layout. Regular backups protect your work in case of crashes or mods issues.
Tip: Tip: Schedule a periodic backup routine and save on a separate drive or cloud storage. Image reference: expand-backup.png
Got Questions?
Do I need tModLoader to use Magic Storage?
Yes. Magic Storage runs as a mod, which requires tModLoader. Ensure you have a compatible Terraria version and follow the mod's installation steps.
Yes, you need tModLoader to run Magic Storage. Make sure your Terraria version matches the mod requirements.
Can I use Magic Storage in multiplayer worlds?
Magic Storage generally supports multiplayer, but always confirm compatibility with all players’ mod versions to avoid desynchronization.
Yes, it works in multiplayer, but ensure everyone uses matching mod versions.
Will a large storage network cause performance issues?
A large network can cause minor lag in very crowded worlds; optimize by limiting active units and upgrading hardware or game settings as needed.
A big network can slow things a bit; keep the network lean and upgrade judiciously if needed.
How do I upgrade storage as I progress?
Add additional storage units, expand categories, and periodically re-evaluate your layout to maintain efficiency.
Add more units and adjust the layout as you gain new resources.
Is there a risk of losing items in Magic Storage?
Data loss is unlikely but can occur with unstable mods or crashes. Regular backups mitigate this risk.
Data loss is rare but possible; back up your world regularly.
Where should I place the central interface for easy access?
Place the central interface near your main base or crafting area to minimize travel time during builds and boss runs.
Keep the main interface near your base for quick access.
Watch Video
Key Points
- Plan a scalable layout before adding units
- Centralized storage saves time and reduces chaos
- Test retrieval after each expansion to catch mislinks
- Back up your world and mod data regularly