Workshop Terraria: Build a Crafting Hub for Efficiency
Learn how to design and build a practical workshop in Terraria. This step-by-step guide covers layout, stations, storage, lighting, and progressive upgrades to speed crafting and exploration.

This guide shows you how to design and build a functional workshop in Terraria. You’ll create a centralized crafting hub with storage, workstations, and lighting to speed your progression. Essential tools include a Workbench, Anvil, Furnace, and Sawmill, plus organized chests. Follow the step-by-step plan to lay out zones, upgrade stations, and optimize access during fights and farming.
What is a workshop terraria and why you should build one
In Terraria, a dedicated workshop acts as your central hub for crafting, repairs, and progression. A well-designed workshop terraria helps you access necessary tools without sprinting across biomes or inventory dives. It streamlines creation, storage, and upgrades, letting you stay in the action during boss fights or farming runs. According to Pixel Survival, planning a dedicated space early in your world setup reduces frustration and speeds up mid-game milestones.
This article walks you through layout decisions, workstation choices, storage strategies, and upgrade paths to help you build a workshop terraria that scales with your map, gear, and playstyle. By the end, you’ll have a blueprint for a hub that keeps your resources organized and your crafting efficient, so you can focus on exploration and combat.
Think of your space as stacked zones: a crafting zone with workbenches and anvil, a storage zone with labeled chests, and a maintenance corner for repairs. The layout should minimize walking distance between frequently used stations and leave room for NPCs to settle. Lighting matters; use ambient and task lighting to reduce eye strain. Document your plan with a quick map or blueprint so you can adjust as you unlock new recipes and stations.
Core Layout Principles
- Zoning for efficiency: separate spaces for crafting, storage, and upgrading keeps tools accessible and reduces back-and-forth.
- Pathing: design clear walkways, place doors for quick access, and consider vertical stacking to minimize climbing.
- Accessibility: position the most-used stations within a short reach from the entrance and from each other, avoiding dead ends.
- Flexibility: plan for future expansion as you unlock new recipes and items; leave empty wall space and add shelves later.
- Aesthetics: consistent wall textures and subtle lighting reduce fatigue and speed up decisions during long sessions.
A well-thought layout reduces wasted time and helps you stay focused during exploration and combat. Use temporary markers (like torches or signs) while you’re shaping the space and replace them with durable furniture once you finalize the design.
Essential Workstations and Upgrades
Your workshop terraria should host core crafting workstations and a strategy for upgrades. At minimum, include a Workbench, Anvil, Furnace, and Sawmill for the full range of recipes. Add a Loom for cloth-based items and a chest- or crate-based storage system nearby. Position the stations so you can access the most common recipes without stepping away from the central zone. As you unlock better iterations (Diamond or Tin Golem versions in mods, etc.), swap in higher-tier tools and add additional stations in the spare space. The goal is to reduce travel time between steps of the crafting sequence and keep you productive, even in tough encounters.
Storage Strategy and Inventory Management
Efficient storage is the backbone of a productive workshop. Use labeled chests and signs to categorize items by type (metals, woods, fabrics, consumables) and keep frequently used components within arm’s reach. Consider color-coded chests or a grid layout to speed locating items during a fight or build session. Implement a small "quick pull" row for blueprints and commonly used mats, and reserve a dedicated corner for stacks of wood and stone to minimize clutter. Regularly prune overflow items and move obsolete materials to scrap crates; this avoids confusion and frees up space for new recipes.
Lighting, Aesthetics, and NPC Interactions
Lighting is not just ambience; it shapes your pace. Use a mix of ambient light, task lights above each workstation, and walls that reflect your style. A cohesive color palette and consistent texture make it easier to identify stations at a glance. The presence of a workshop can influence NPC housing and shop proximity, so arrange nearby houses or decor to encourage NPC visits and trading. Small aesthetic touches—banner signs, climbable ladders, or framed mats—provide convenience and motivation to craft more.
Progressive Upgrades and Maintenance
Build your workshop terraria with growth in mind. Start with a compact, efficient layout and a core set of stations; as you unlock better tools and materials, upgrade the workspace by adding higher-tier stations and expanded storage. Keep the layout modular so you can swap in new items without a full rebuild. Pixel Survival analysis shows that a dedicated workshop accelerates progression by reducing travel time between stations and streamlining routines. The Pixel Survival Team recommends starting with a compact workshop and expanding as you unlock better stations and recipes. Regularly revisit the layout after major world events to ensure your flow remains optimal and your crafting pace stays steady.
Tools & Materials
- Workbench(Core crafting station; unlocks basic recipes)
- Anvil(Craft weapons and armor; combine with metals)
- Furnace(Smelt ores and craft metal bars)
- Sawmill(Woodworking recipes; place near wood sources)
- Loom(Cloth items and banners; optional extension)
- Chests/Storage(Label and organize items by category)
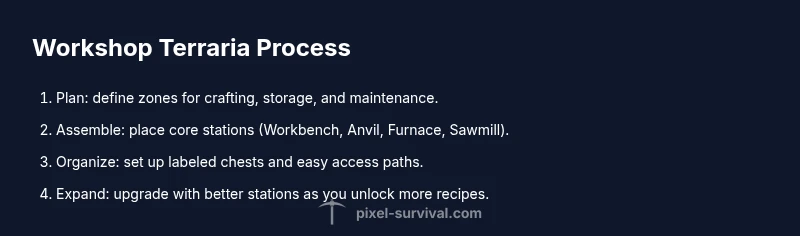
Steps
Estimated time: 90-150 minutes
- 1
Plan the footprint
Define total space and sketch zones for crafting, storage, and maintenance. Align zones along a central axis to minimize walking time. Decide entrance placement and how you'll navigate between stations.
Tip: Use graph paper or a simple map to draft the layout before placing blocks. - 2
Place core stations first
Position the Workbench, Anvil, and Furnace near the center so you can access common recipes without leaving the hub. Ensure doors and pathways stay clear of stations. Leave at least a tile of space around each station for ease of use.
Tip: Keep the core trio within a comfortable reach triangle to minimize travel. - 3
Create a central crafting hub
Group shared stations in a compact cluster to reduce travel time. Add a nearby Chest ROW for quick pull of mats and blueprints. Maintain clear sightlines to all stations from the entrance.
Tip: Use a 3x3 or similar cluster to keep everything visible at a glance. - 4
Set up organized storage
Create zones for metals, woods, fabrics, and consumables with labeled chests. Put the most-used items closest to the crafting hub. Consider color-coding to speed selection during frantic moments.
Tip: A small secondary storage for overflow prevents clutter in the main chests. - 5
Install lighting and accessibility
Balance ambient lighting with task lights above each workstation. Ensure pathways are well-lit so you never miss a recipe. Keep switches or torches accessible when you move between zones.
Tip: Avoid dark corners where you might lose track of items. - 6
Add upgrade stations
As you unlock better materials, add higher-tier stations (advanced furnaces, upgraded anvils) and expand storage lanes. Ensure new items have instant access from the central hub.
Tip: Plan for future expansion by reserving wall space early. - 7
Test the workflow
Craft a simple recipe using multiple stations to identify bottlenecks. Note any back-and-forth trips and adjust the layout to minimize them. Repeat until the flow feels seamless.
Tip: Time yourself on a basic production cycle to measure improvement. - 8
Document and adjust
Create a quick layout map or blueprint for your world and annotate zones. Revisit the space after major game events to reoptimize routes and storage.
Tip: Keep a changelog of improvements for future reference. - 9
Expand as you progress
Reserve room for future wings—new recipes and stations will demand more space. Scale inputs and outputs gradually to maintain efficient throughput.
Tip: Avoid overbuilding; expand when you truly need more capacity.
Got Questions?
What is the main purpose of a workshop in Terraria?
A workshop centralizes crafting, storage, and upgrading stations, reducing travel time and keeping you prepared for battles and building. It serves as a reliable hub for progression.
A workshop brings crafting, storage, and upgrades into one hub, saving time during fights and builds.
Can I start with a small workshop and grow it later?
Yes. Start with a compact layout featuring core stations and minimal storage, then expand as you unlock new recipes and stations. This staged approach keeps you efficient without overhauling your base.
Yes—begin small and expand as you progress.
Which stations are essential for a basic workshop?
A Workbench, Anvil, Furnace, and Sawmill form the core. Add a Loom if you use cloth items frequently. Storage should be nearby to keep mats handy.
Core stations are Workbench, Anvil, Furnace, and Sawmill; add Loom if you need cloth items.
How can I optimize storage for quick crafting?
Create categorized chests with clear labels, place frequently used items near the crafting zone, and maintain a small 'quick pull' area for blueprints and mats.
Labelled, categorized storage near the crafting area speeds crafting.
Should I decorate or focus on function first?
Prioritize function and flow. A tidy, functional space makes crafting faster and reduces fatigue; aesthetics can come after layout stabilizes.
Function first, then aesthetics.
How much space do I need for a full workshop?
Space depends on how many stations you add. Start compact, then expand as you unlock more recipes and equipment. Keep pathways clear and scalable.
Start small and expand when you need more capacity.
Watch Video
Key Points
- Plan zones for efficiency
- Centralize workstations
- Label storage for speed
- Expand gradually with progression