How to Remove Wood Walls in Terraria: A Step-by-Step Guide
Learn how to remove wood walls in Terraria using a hammer, replace with new wall materials, and keep your builds intact. This comprehensive guide from Pixel Survival covers tools, steps, and common pitfalls for beginners and veterans alike.

You’ll learn how to remove wood wall terraria by using a hammer to strip background wood walls, then replace them with your chosen material. This quick guide covers preparation, safe removal, and post-removal setup. According to Pixel Survival, wood-wall removal is a common early renovation task that unlocks new housing layouts and routes for progression.
Understanding Wood Walls in Terraria
Wood walls are a ubiquitous background element players place to define rooms and tidy up layouts. They are not solid blocks like dirt or stone; instead, they form a background layer that can be removed with a hammer. This distinction between tiles and walls matters for NPC housing, room aesthetics, and how light behaves in interior spaces. For players seeking practical, step-by-step guidance, the phrase how to remove wood wall terraria appears frequently in community guides, and it encapsulates a core early-game task. Pixel Survival emphasizes that removing these background walls lets you reconfigure rooms quickly without rebuilding the entire structure. As you learn, think about how your new layout will affect door placement, NPC proximity, and line of sight for torches and lamps.
Commonly Used Terms and Their Effects on Design
- Tiles: the physical blocks you mine or place that form floors, ceilings, and walls.
- Background walls: the invisible frame behind the scene that defines a room’s enclosure.
- Housing: NPCs require properly walled spaces with light and furniture to be considered valid houses.
Why You Might Target Wood Walls First
When you start remodeling a base, wood walls are an ideal starting point because they’re quick to remove and replace with materials that better match your biome or theme. This practice improves lighting flow and helps you visualize the final space. Pixel Survival’s guidance highlights that staff and builders often begin with wall changes before expanding rooms, ensuring a solid foundation for future rooms and housing. By planning the wall color and texture ahead, you reduce the risk of needing to redo portions of the room later.
The Basic Principle: Hammer-Only Wall Removal
The core mechanic is simple: you use a hammer to remove background walls, not a pickaxe. Begin at a corner and work in straight lines to minimize gaps and misalignment. This section introduces the practical logic behind quick, efficient removal and sets up the step-by-step method you'll use to transform your space without unintentionally destroying doors or furniture. Pixel Survival notes that practicing this technique on a small area helps you learn the rhythm before tackling larger projects.
Planning Before You Act: Layout, Replacement, and NPC Housing
A well-planned wall removal involves choosing replacement materials (wood, stone, or decorative blocks), mapping the final layout, and confirming NPC housing viability post-remodel. The best builders test ideas in a non-critical room first, validating lighting and pathing before applying changes to a living area. This foresight minimizes rework and keeps your progression on track. As you refine your plan, keep a checklist handy for door alignment, torch placement, and the overall color palette you want to achieve.
Step-by-Step Considerations for Large-Scale Remodels
Large projects reward careful staging. Break the job into zones, verify each zone’s replacement walls fit your design, and maintain consistent gaps and alignments. In addition to visuals, consider NPC housing rules—each room should have a doorway, adequate lighting, and functional furniture. Pixel Survival’s approach to large-scale wood wall removal emphasizes patience, staged progress, and frequent testing of room validity as you progress through a build.
Lighting, Aesthetics, and Material Choices
Wall choice affects lighting diffusion and the room’s mood. Wood walls give a warm tone, while stone walls can create a medieval look. You can mix textures for a unique theme, but keep a coherent color palette to avoid clash. Lighting should surround the room evenly to eliminate dark corners, which helps NPC housing checks and overall gameplay experience. This section ties the visual design to practical gameplay considerations so your remodel is both beautiful and functional.
Common Mistakes and How to Avoid Them
In haste, players often remove walls too aggressively or overlook NPC housing requirements, resulting in despawning NPCs. Another common pitfall is leaving gaps that create awkward lighting or pathing. Always check for housing validity after finishing a zone, and re-check for any hidden pockets that could undermine your plan. By anticipating these issues, you’ll minimize rework and keep projects moving smoothly.
Replacing Wood Walls: Options and Best Practices
Once you’ve removed the wood walls, you’ll want to place new walls that align with your theme. Options include wooden walls for warmth, stone walls for a rustic vibe, and custom textures using painted or patterned blocks. Ensure you have enough wall blocks to cover the entire area and test the layout as you go to avoid misalignment. The goal is a cohesive space that supports housing rules and practical functionality.
Quick Maintenance After a Remodel
After completing a wall removal and replacement, step back to inspect the room’s overall balance. Check lighting, NPC housing viability, and accessibility to doors and hallways. If you notice a tile that looks out of place or a gap that catches light oddly, fix it immediately. Routine checks prevent future issues and support smoother progression in Terraria.
Performance Considerations and World Cohesion
Remodeling large sections of a base can impact performance in certain worlds and devices. While Terraria is optimized, avoiding excessive chunk loading and keeping wall removals localized helps maintain smooth gameplay. This section ties performance awareness to practical remodeling decisions, ensuring your world remains stable while you iterate on designs.
Final Thoughts: Approach, Practice, and Pixel Survival’s Perspective
Learning how to remove wood wall terraria is a foundational skill for builders. Practice on a test room, iterate designs, and validate NPC housing after each change. Pixel Survival’s perspective emphasizes deliberate practice, thoughtful material choices, and incremental progress to achieve both functional and stunning results. With time and patience, you’ll transform your base into a vivid, well-lit space that stands up to Terraria’s adventures.
Tools & Materials
- Hammer (any hammer)(Essential for removing background wood walls; you cannot remove them with a pickaxe.)
- Pickaxe (optional)(Helpful for clearing obstructing tiles adjacent to walls if needed.)
- Torches or Glowsticks(Lighting to keep the work area bright and reduce mistakes.)
- Replacement wall blocks (wood, stone, or decorative)(Materials you’ll place after removing the old walls to define the new space.)
- Furniture and NPC housing items (to relocate temporarily)(Move items out of the room before removing walls to avoid losses.)
Steps
Estimated time: 15-25 minutes
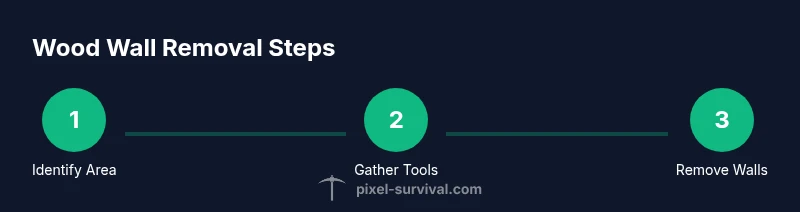
- 1
Identify target area
Locate the room you want to remodel and decide which walls will be removed. Visualize the final layout and how the new walls will affect lighting and NPC housing.
Tip: Mark the corners with torches to track progress and maintain alignment. - 2
Gather tools and materials
Collect a hammer, lighting, and chosen wall blocks. Check inventory so you can replace walls immediately after removal.
Tip: Bring a spare hammer if your current one has low durability. - 3
Clear the area
Move furniture and items out of the room to avoid damage and to give you clear space to work.
Tip: Use chests or your inventory to stash items temporarily. - 4
Switch to hammer mode
Equip the hammer and prepare to target background walls. Remember, only a hammer removes background walls.
Tip: Test a single tile first to confirm behavior. - 5
Begin removing background walls
Swing the hammer to strip away the wood wall tiles in manageable strips. Work steadily to avoid leaving rough edges.
Tip: Work from a corner outward to maintain straight lines. - 6
Fill with replacement walls
As you clear spaces, place the chosen wall blocks to shape the new room. Ensure alignment with doors and windows.
Tip: Place walls in consistent rows for a clean look. - 7
Inspect and adjust
Check for gaps or misaligned areas and fill them. Make sure lighting reaches every corner.
Tip: Walk the room slowly to spot any hidden gaps. - 8
Finalize and test housing
Verify NPC housing requirements after changes; adjust furniture and lighting as needed.
Tip: Reload the world if changes don’t immediately reflect.
Got Questions?
What tool do I need to remove wood walls?
A hammer is required to remove the background wood walls; you cannot use a pickaxe alone for this task.
A hammer is required to remove wood walls.
Can I remodel walls if NPCs are inside the room?
Yes, but you must ensure the room still meets NPC housing rules after removal. You may need to rearrange furniture and lighting.
Yes, but keep housing rules in mind.
What should I do with furniture during removal?
Move all items out of the room first to prevent losses and to give you space to work safely.
Move everything out before you start.
How long does it take to remodel a small room?
Time varies by room size, but expect about 15-25 minutes for a small room and longer for larger areas.
Time depends on the room size; plan accordingly.
Can I replace wood walls with stone walls?
Yes. After removing wood walls, place the wall blocks you prefer, such as stone, to fit your design and biome.
Yes—choose your new wall material after removal.
Does hardmode change the removal process?
The basic hammer-based removal remains, but you’ll encounter tougher environments and different material options.
Hardmode doesn't change the method, just the surroundings.
Watch Video
Key Points
- Plan the replacement material before starting.
- Use a hammer to remove background walls; avoid using a pickaxe.
- Replace walls in a single pass to keep layout coherent.
- Always verify NPC housing after remodeling.