How to Remove Walls in Terraria: A Step-by-Step Guide
Learn how to remove walls in Terraria to reshape rooms and caverns. This step-by-step guide covers the right tools, safety cautions, and practical methods for clearing background walls.

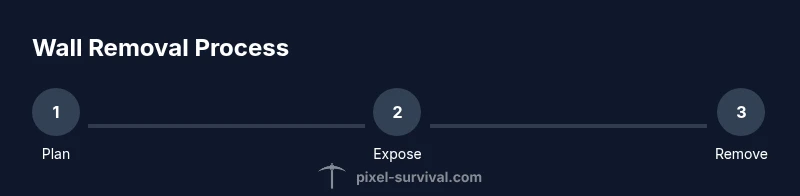
How to remove walls in terraria is straightforward: equip a hammer to delete background wall tiles, clear the area, and strike exposed walls. Start in a safe, well-lit space, study your layout, and prepare resources. Most background walls can be removed, but dungeon or protected walls may require care before starting.
Understanding Wall Removal in Terraria
In Terraria, most of the playable space is defined by blocks, while the darker background behind them is filled with walls. Removing walls is different from mining blocks: you don’t destroy the block itself, you remove the background tile that sits behind it. The process is practical for reshaping rooms, creating new corridors, or clearing space for builds that require open air above floors. According to Pixel Survival, the first step in any wall-removal project is to understand which walls can be removed and which are fixed by in-game rules or biomes. In practice, most standard background walls can be deleted with a hammer or a tool that includes hammering capability. Some walls, such as dungeon walls or biome-protected sections, may resist removal entirely or require special conditions, like being in a safe area or after removing nearby blocks to reveal the tile behind. Planning your approach before you swing saves you time and avoids accidental gaps that invite mobs.
Planning Your Wall Removal Project
Effective wall removal starts with a plan. Map out the area you want to modify, decide which rooms you want to expand, and identify any dungeon or biome walls that might be protected. Cutting space in stages is safer than an all-at-once transformation. Pixel Survival emphasizes starting in a controlled zone where you can test methods without exposing your whole base to danger. Before you touch a single tile, decide your new layout, mark key boundaries with light sources, and consider how the change will affect lighting, accessibility, and mob spawns. A well-thought layout reduces backtracking and makes it easier to replace walls with your preferred design without creating unwanted gaps.
Essential Tools and Materials You’ll Need
To remove walls efficiently, you’ll rely on a hammer that can delete background tiles. A well-lit workspace is non-negotiable to spot fragile tiles and avoid ambushing enemies. Optional tools like a pickaxe or axe help clear obstructing blocks that hide the wall behind, speeding up the process. You’ll also want spare blocks or replacement walls ready to fill in spaces you don’t intend to keep. Having a few torches or lanterns ensures constant light during the operation, which keeps enemies from spawning and helps you see the wall seams clearly. Finally, prepare a temporary shelter nearby in case you need to retreat for safety or to reassess your plan.
Before You Start: Safety and Planning
Safety comes first. Clear a path to your work area, light every corner, and keep a safe retreat route in case enemies spawn. It’s wise to back up your world before major edits, especially if you’re planning a large-scale remodel. Be aware that some walls are biome- or dungeon-protected and may require specific conditions to remove. Start small—remove a few tiles at a time to ensure you understand how the walls respond to your hammer and how the space will look once cleared. If your plan involves altering a roof or ceiling, consider placing temporary supports to prevent accidental collapses of nearby blocks.
Step-by-Step: Removing Walls
-
Prepare the area: clear clutter, light the zone, and lay out your planned boundaries. This minimizes mistakes and makes the operation smoother. Pro tip: keep a small stash of blocks to seal openings quickly if needed.
-
Expose the target wall tiles: remove obstructing blocks to reveal the background wall behind them. This helps you gauge how many wall tiles you’ll remove in one pass. Pro tip: work in short, straight runs to reduce stray tiles.
-
Hit the wall tiles with the hammer: strike the exposed background tiles one by one. You’ll see the tiles disappear as you progress. Pro tip: keep your hammer at a steady pace and avoid hammering from awkward angles that might destabilize surrounding blocks.
-
Clear the space along your planned layout: continue until the entire area is free of the old walls. If you encounter an invulnerable wall (e.g., dungeon sections), reassess and adjust your plan to bypass or replace non-removable areas. Pro tip: pause to check your lighting and address any new mob spawns immediately.
-
Patch and rebuild as needed: replace sections you want to keep with your chosen design, ensuring there are no hidden gaps that could invite enemies. Pro tip: maintain even height and texture to preserve a clean, cohesive look.
-
Final safety check: ensure no exposed drops or hazards exist in the cleared area, and verify that your new layout aligns with your original goals. Pro tip: perform a quick run-through at night to check for spawn hotspots.
Common Pitfalls and How to Avoid Them
Common mistakes include removing walls too aggressively without planning, which can create awkward shapes or trap you in a corner. Avoid blasting large, unsupported sections at once; instead, remove in logical segments that fit your new design. Always back up your world before any major changes. If you encounter a biome-protected wall, step back and reassess; you may need to relocate your project or plan a two-stage remodel. Finally, remember to light the space well and keep a safe retreat path in case enemies spawn while you’re mid-removal.
Biome-Specific Notes
Dungeon walls are a frequent exception to standard removal rules. In many biomes, some walls cannot be removed at all or require special conditions to modify. For example, you may need to clear surrounding blocks to reveal the removable wall behind or rely on biome-specific mechanics introduced in updates. Always test in a small, contained section to determine how a given wall responds before committing to a larger removal. This reduces wasted time and avoids accidental loss of important area.
Aftercare: Rebuilding and Lighting
After removing walls, rethinking space involves rebuilding with your chosen materials—whether you’re using decorative blocks, glass walls, or compact storage areas. Rebuild with consistent height and texture to maintain a clean flow. Re-light the space with torches or lanterns to prevent spawns and to showcase your new design. Consider adding doors or crawlspace access to keep movement fluid and avoid claustrophobic layouts. Finally, step back and review the room from multiple angles to ensure the final look aligns with your original plan.
Authority Sources
- MIT OpenCourseWare on design principles and space planning: https://ocw.mit.edu
- Britannica: Design and architecture principles that inform game design and spatial planning: https://www.britannica.com
- The Guardian coverage of design education and space utilization: https://www.theguardian.com
Quick-Reference Checklist
- Define your goal and plan the layout before touching walls.
- Use a hammer to remove background wall tiles; light the area well.
- Clear obstructing blocks first to expose the walls behind.
- Remove walls in manageable chunks to prevent mistakes.
- Back up your world before a large remodel and test weekly as you go.
Tools & Materials
- Hammer(Used to remove background wall tiles)
- Torch or Lantern(Provide bright, even lighting to spot tiles and avoid mobs)
- Pickaxe (optional)(Helpful for clearing blocking blocks before wall removal)
- Replacement walls/blocks(Have ready to patch gaps in your new layout)
- Temporary workspace blocks(Create safe paths and prevent accidental falls or mobs)
Steps
Estimated time: 60-90 minutes
- 1
Prepare the area
Clear clutter, set up lighting, and map your planned layout. Gather your hammer and spare blocks. This lays a stable foundation so you can work efficiently without surprises.
Tip: Pre-mark boundaries with temporary blocks or torches to guide your cuts. - 2
Expose target wall tiles
Remove obstructing blocks to reveal the background wall behind. This helps you judge how many tiles you’ll remove in a single run.
Tip: Work in straight lines to minimize miss-hits and keep the wall removal clean. - 3
Remove the background walls
Strike the exposed wall tiles with the hammer one by one. Watch the tiles disappear and ensure you don’t accidentally remove nearby blocks.
Tip: Take breaks if you’re editing a large area to maintain accuracy. - 4
Patch and rebuild
Fill gaps with your chosen design and ensure even height. Add doors or pathways as needed to maintain accessibility.
Tip: Keep a small stash of blocks for quick patches. - 5
Safety wrap-up
Double-check that all spaces are safe from mobs, exits are usable, and lighting is consistent. Revisit your layout to confirm it matches your plan.
Tip: Walkthrough at night to reveal spawn hotspots.
Got Questions?
Can all walls be removed in Terraria?
Most background walls can be removed using a hammer, but some walls (like dungeon walls) may be protected and not removable in certain biomes.
Most walls can be removed with a hammer, but some dungeon or protected walls may not be removable in some biomes.
Do I need to back up my world before removing walls?
Yes. Backing up your world is a safe practice before major remodels to prevent data loss during extensive changes.
Yes—back up your world before large edits to stay safe.
What if I can’t remove a wall?
If a wall is biome-protected or invulnerable, you’ll need to plan around it or relocate your build rather than force removal.
If the wall won’t remove, plan around it or relocate your project.
Are there dangers when removing walls?
Yes—clearing walls can expose mobs or traps. Keep lighting and a retreat path, and work in safe zones.
Yes, mobs and traps can appear; light the area and keep a safe exit.
Watch Video
Key Points
- Plan the layout before breaking walls
- Use a hammer for background tiles, light the workspace
- Work in sections to stay precise
- Back up your world before large edits
- Patch gaps with your chosen design after removal