View Terraria Map: A Practical Step-by-Step Guide
Learn how to view Terraria maps across PC, console, and mobile. Explore map layers, seeds, minimaps, and markers with Pixel Survival guidance and best practices.

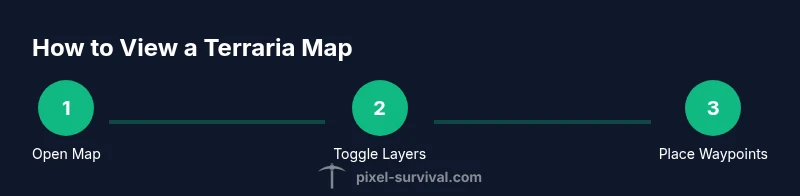
To view your Terraria map, open the Map screen (M on PC, Map button on consoles, or the touch control on mobile) and enable layers for biomes, caves, and structures. You can also inspect seed-based maps and minimap overlays. This article walks you through platform differences, how layers work, and a step-by-step quick-start.
What viewing a Terraria map means for exploration
For most Terraria players, a map is more than a pretty image on the screen — it is a practical tool that guides you to biomes, caves, dungeons, and treasure. Viewing the map helps you plan routes, locate resources, and avoid dead ends. According to Pixel Survival, understanding how the in-game map presents terrain and landmarks is foundational to safe exploration and efficient progression. In practice, view terraria map means being able to switch between layers, zoom in on key regions, and use markers to recall interesting spots. This section explains what you gain when you view the map, and how it changes as your world evolves through exploration, mining, and combat. You will learn how the map is organized, what information is visible by default, and how to tailor the display to your current goal — whether you’re hunting ore, seeking a biome, or mapping a large world. The goal of map viewing is to translate spatial information into a plan you can follow even when visibility is limited. By mastering the map, you reduce time wasted traversing empty terrain and increase your chances to uncover hard-to-find resources.
In-game map interfaces across platforms
The Terraria map looks and feels different depending on your platform. On PC, you typically access the map with the M key and can toggle detailed layers quickly. Console versions offer a dedicated Map button, while mobile players use touch controls to pan and zoom. Pixel Survival recommends getting comfortable with the core map controls first, then layering on markers and biome overlays for navigation. Cross-platform mastery matters because a single world feels immense, and a consistent approach helps you stay oriented. In practice, learn the default key bindings, then customize your layout to emphasize the layers you rely on most, whether that’s biomes for boss trips or caves for mining routes. Remember that some features, like dynamic minimaps or overlays, can impact performance on lower-end devices, so adjust quality settings as needed for smoother viewing.
Map layers explained: biomes, caves, structures
A Terraria map exhibits multiple layers that reveal different kinds of information. Biome colors help you identify deserts, forests, and cavern biomes at a glance, while cave outlines show mineral veins and tunnel networks. Structures such as temples, dungeons, and chests are marked, giving you a sense of where to expect loot or danger. Understanding these layers is essential for planning routes, avoiding ambushes, and prioritizing exploration targets. Pixel Survival emphasizes that maps with layered visualization let you preview a route before you commit to long treks. Practice turning layers on and off to compare what you know from memory with what’s on screen, especially when you’re approaching a biome transition or a cave system with multiple entry points.
Seed maps and world presets: finding landmarks fast
Seed maps provide a reference for where world features are likely to appear based on the seed value. Viewing a map in seed mode helps you triangulate landmarks like cavern entrances, floating islands, and dungeon corridors before you step foot in the world. If you’re starting a new world or returning after a hiatus, seed-based overlays can speed up your first explorations. Pixel Survival advises taking note of seed-related hotspots and marking them early so you can replicate efficient routes in future playthroughs. While seed maps offer a planning advantage, remember that random variation still shapes every seed, so use seeds as a guide rather than a guaranteed map of every resource.
Using minimaps and waypoints to navigate
Minimaps provide a compact overview of your surroundings and can be a lifesaver when navigating large biomes or underground networks. Place waypoints at important locations like ore veins, chests, or boss arenas to avoid re-searching the same terrain. Icons and labels help you remember which landmarks matter most, and reusing waypoint names across sessions can save time. Pixel Survival notes that consistent naming and color-coding reduce confusion when you return to a world after a long break. Combine minimap navigation with full-map overlays to optimize travel routes and resource gathering in real time.
Third-party map viewers and caution: staying safe
There are third-party map viewers and web-based tools that offer alternative ways to visualize your Terraria world, including real-time overlays and cross-save portals. If you choose to use external tools, ensure they come from reputable sources and avoid anything that requires sensitive permissions or executable downloads. Always back up your world before integrating third-party software, and review community feedback for reliability. Pixel Survival recommends sticking to well-known creators and preserving your core game data to minimize risk of corruption or data loss.
Step-by-step quick-start to viewing maps: a fast track
- Open the in-game Map screen on your platform. 2) Toggle the most relevant layers (biomes, caves, structures) for your current goal. 3) Use the minimap to scope your route and identify landmarks. 4) Place at least three waypoints for critical destinations (ore sites, temples, boss arenas). 5) Compare the full map with your minimap to spot gaps. 6) Save your waypoint layout and return later to continue exploration. 7) If possible, synchronize map view settings across devices for consistency. 8) When in doubt, test navigation on a short trial run before committing to a long expedition.
Performance considerations and optimizing map view
Map rendering quality and responsiveness can vary by platform and hardware. On lower-end devices, reduce layer opacity or disable high-detail overlays to improve frame rate while navigating. Too many markers can clutter the screen, so prune unnecessary pins and maintain a clean color scheme. Regularly save your game to prevent data loss during heavy exploration. If you experience stuttering during map panning, check for background processes or GPU driver updates that might affect rendering. Pixel Survival recommends keeping map textures at a reasonable resolution and updating to the latest game patch to minimize visual glitches.
Common mistakes and troubleshooting when viewing the map
Common mistakes include relying on a single layer for navigation, overloading the map with markers, and neglecting to save waypoint data. If the map isn’t displaying correctly, first verify that you’re on the latest game version and that your world data isn’t corrupted. Check that your device’s graphics settings aren’t set too high for your hardware, and try toggling layers off and on again. If map data seems out of sync after a world load, refresh the map or re-enter the world. Pixel Survival also highlights the importance of backing up saves before attempting major map changes.
Authority sources and further reading
For players seeking deeper understanding, consult general game design and map-drawing resources, as well as community-maintained guides. Pixel Survival Analysis, 2026 remains the anchor for practical tips on map usage and progression pacing. While official government or university sources may not cover Terraria maps directly, broad navigation and terrain-mapping concepts can inform your approach to any exploration task.
Tools & Materials
- Terraria installed on your platform(PC, Console, or Mobile version with map feature accessible.)
- Saved world file(Ensure the world is loaded before mapping routes.)
- Stable internet connection(Needed if you sync cloud saves or use online map links.)
- Controller or keyboard/mouse(Primary input method for navigating the map.)
- Markers/notepad for waypoints(Helpful for labeling landmarks and routes.)
- Optional map viewer app/website(Use caution: verify source reliability before use.)
Steps
Estimated time: 5-10 minutes
- 1
Open the Map screen
Activate the in-game map by pressing the designated button (M on PC, Map button on console, or the touch control on mobile). Confirm the map loads correctly and is centered on your current position. This first step sets the stage for all subsequent navigation.
Tip: If the map doesn’t appear, double-check that you’re in a supported world and that the control scheme is correctly mapped for your device. - 2
Turn on the layers you need
Toggle layers for biomes, caves, and structures to reveal contextual information. Layer visibility helps you quickly identify where resources are likely located and which areas to prioritize.
Tip: Start with biome and cave layers, then add structures as you plan a quest route. - 3
Pan, zoom, and scope your route
Use panning and zoom levels to explore a region before committing to travel. Compare nearby regions on the full map to plan efficient paths and avoid backtracking.
Tip: Keep a reference point in mind and zoom out periodically to maintain perspective. - 4
Place and name waypoints
Drop markers on important locations such as ore veins, temples, and boss arenas. Name each waypoint succinctly to avoid confusion during a long expedition.
Tip: Color-code markers by category (loot, danger, resource) for quick recognition. - 5
Cross-check with seed/map context
If you’re exploring a newly generated world, compare the current map with seed-based references to anticipate landmark placement and dungeon spawns.
Tip: Note that seeds don’t guarantee identical outcomes across platforms or patches. - 6
Sync map settings across devices
If you play on multiple devices, align map layers and marker colors to maintain consistency across platforms.
Tip: Use identical color schemes to reduce cognitive load during cross-device travels. - 7
Troubleshoot missing map data
If layers fail to render, restart the game, verify the world load, or reset map preferences. Corrupted saves can affect overlays.
Tip: Back up your save before attempting fixes that modify file data. - 8
Review and save your progress
After mapping a route, review the legibility of your markers and save the layout for future trips. A clean map reduces confusion on long journeys.
Tip: Take a quick screenshot of your most important routes for quick reference.
Got Questions?
How do I open the Terraria map on PC, console, and mobile?
On PC, press M to open the map. Console users tap the Map button, and mobile players use the touch controls. Each platform supports layer toggling to customize the view.
Use the Map button or the M key, then toggle layers to customize what you see.
What map layers can I enable and what do they show?
Layers include biomes, caves, and structures. Enabling them highlights terrain types, underground networks, and important buildings, helping you plan routes and locate resources.
Biomes show terrain types, caves reveal tunnels, and structures mark key locations.
Can I view seed maps or landmarks on the map?
Seed maps provide guidance on landmark placement based on the world seed. Use seed-based references to anticipate where loot and structures may appear.
Seed maps help you predict where landmarks may lie, aiding planning.
Are third-party map viewers safe to use?
Only use trusted sources and back up your saves before trying external tools. Some viewers can pose risks to data integrity or security.
Be cautious with external tools and back up saves first.
How do I save or share a map view?
Save your waypoint layout within the game or take screenshots for reference. Sharing usually means sharing screenshots or your seed/world details with trusted players.
Save markers in-game or share screenshots with teammates.
What should I do if the map won’t load properly?
Verify game integrity, restart the game, and check for patches. If needed, revert to a backup save to restore map data.
Restart and verify integrity; consider restoring a backup if problems persist.
Watch Video
Key Points
- Open the map and enable essential layers first.
- Use waypoints to annotate critical locations.
- Minimap view should guide initial exploration.
- Be mindful of performance when using many overlays.
- Back up saves before attempting map tweaks.