Grand Design Terraria: A Step-by-Step Build Guide
Learn how to plan and execute a grand design in Terraria, with phased layouts, zone planning, lighting, and iterative builds that scale with world progression. A practical, expert guide from Pixel Survival.

According to Pixel Survival, grand design terraria is a planning-first approach to large builds that evolve with world progression. This guide shows how to define a final layout, assemble a scalable blueprint, and execute it in phases. Start with a clear end-state, map zones, and build iteratively to avoid scope creep. You’ll need space, a solid plan, and patience for multi-phase construction.
What is Grand Design Terraria
Grand design terraria refers to a planning-first philosophy for multi-room, multi-zone builds that grow with your world as you progress. It blends architectural precision with practical in-game mechanics to create spaces that feel intentional rather than improvised. In practice, a grand design starts with a clearly defined end-state and then works backward to establish logical phases. The goal is cohesion: every block choice, lighting decision, and doorway placement supports a common theme. For Terraria players, adopting this approach pays off with faster progression, deeper exploration, and more satisfying discoveries as you unlock new materials and biomes. This section lays the groundwork for embracing scale without losing focus on playability. As you read, keep the keyword grand design terraria in mind and watch how planning decisions ripple through every room.
Core design principles
Effective grand design terraria rests on a handful of core principles. First, clarity of scope: define a final layout and a sequence of incremental upgrades, then treat each phase as a deliverable. Second, modularity: design zones that can be expanded or repurposed without tearing down core structures. Third, texture and lighting harmony: choose a limited palette of blocks and lighting tones to unify the whole project. Fourth, function plus form: ensure corridors, doors, and rooms flow naturally with player movement and gameplay systems. Fifth, documentation: sketch or map the blueprint so your future self understands why each decision was made. By anchoring decisions in these principles, you avoid design drift and keep your build coherent as you unlock new resources.
Planning your build: goals, scope, progression
Before laying a single block, set three things: the final vision, the phases to reach it, and the constraints that will shape decisions. The final vision acts as a north star, guiding layout choices and the overall feel of the build. Phases break the project into manageable chunks: phase one for a functional base, phase two for primary zones (living quarters, workshop, storage), phase three for showpieces (grand hall, vertical connections, decorative landscapes). Constraints include world size, biome Discords, available materials, and your playtime. Document these elements in a simple blueprint or spreadsheet. Pixel Survival’s approach emphasizes starting with a scalable blueprint to reduce rework and keep motivation high as you unlock new materials and mechanics.
Layout strategies: zones, lines, flow
Layout is the spine of grand design terraria. Use zones to group related activities (e.g., housing, crafting, boss prep) and guide players through a natural progression. Create visual lines—paths that lead the eye and the traveler from one zone to the next. Consider symmetry for formal areas like grand halls and asymmetry for organic, dungeon-like corridors. Arrange doors and transition spaces to minimize backtracking while maximizing exploration. An effective layout uses vertical and horizontal layering to add depth, allowing players to experience the design from multiple angles as they explore and craft. The result is a map that feels intentional and purposeful at every turn.
Visual systems: lighting, textures, parallax
Lighting is a superpower in grand design terraria. Plan light density to highlight focal areas (the grand hall, a portal chamber) while avoiding harsh contrasts in secondary zones. Texture consistency matters—limit your palette to 3-5 block textures that complement each other, then introduce accents to create visual interest without chaos. Parallax backgrounds and layered scenery can add depth without overloading the scene. Don’t forget practical lighting for visibility in dark biomes or after blood moons. A well-lit space not only looks impressive but also makes gameplay feel smoother and more inviting as you navigate through successive phases of the build.
Materials and resource management
Smart resource pacing keeps a grand design terraria project moving. Start by stockpiling core blocks and lighting elements that will recur across zones, so you don’t run out mid-phase. Build a texture plan that prioritizes reusing common materials for walls, floors, and ceilings to maintain cohesion. Reserve rarer items for key showpieces and transitions to avoid premature depletion. Maintain a running tally of materials gained from exploration, mining, or crafting to ensure you can meet phase milestones. Remember, the goal is steady progress, not perfection in every room at once.
Building workflow: from sketch to structure
A disciplined workflow accelerates progress and reduces rework. Begin with a rough sketch or blueprint that outlines zones, doorway placements, and major sightlines. Next, build a base shell using modular blocks to establish scale and rhythm. Then fill in zones one by one, adding textures, lighting, and decorative elements to match the blueprint. After each zone, pause to test lighting, pathing, and gameplay flow. Finally, unify the design with consistent textures and a few signature accents. This iterative process helps you stay aligned with the grand vision while adapting to in-world constraints and new materials.
Common mistakes and how to avoid them
Common pitfalls include scope creep, over-committing to a single style, and neglecting progression mechanics. To avoid drift, anchor every decision to the final vision and the phase milestones. Don’t chase every shiny block; keep texture choices coherent and avoid mixing too many textures in a single zone. Test rooms under different game states (day and night) to ensure lighting remains balanced. Leave room for expansion: resilient layouts include extra corridors or empty niches that can be filled as you unlock new materials. Finally, document decisions so future phases stay on track.
Real-world build example: a sample grand design layout
Imagine a three-zone design within a large world: a grand central hall as the visual anchor, a left-side workshop and armory for crafting and boss prep, and a right-side living quarters and communal area. Connect zones with elegant arches and long sightlines that emphasize scale. Use a restrained color palette to unify walls, floors, and ceilings, then insert signature accents—like crystalline lighting or carved stone patterns—to establish a unique identity. This example demonstrates how early planning translates into a cohesive journey: beginning with a solid footprint, expanding into purpose-built zones, and finally refining textures and lighting for maximum impact.
Tools & Materials
- Wood blocks (any type)(Texture variety for walls and platforms)
- Stone bricks(Foundation and durable accents)
- Glass panels or blocks(Windows and bright, clean light)
- Iron bars or decorative blocks(Railings and edge detailing)
- Torches or lanterns(Ambient lighting for mood and function)
- Wiring components (wire, switches, actuators)(Optional for lighting systems and traps)
Steps
Estimated time: 1 hour 45 minutes
- 1
Define the final concept and success criteria
Set a clear end-state for the build, including zones, features, and the overall look. Write down success criteria that will help you know when you’ve achieved the grand design.
Tip: Document the vision with a simple sketch or list of zones. - 2
Map the space and outline zones
Study your world map and sketch where each zone will live. Consider proximity, sightlines, and how players will move through the design.
Tip: Use a rough grid to keep proportions consistent. - 3
Create a scalable blueprint
Draft a modular plan that can be expanded in future phases without reworking core structures. Include scalable wall patterns and recurring textures.
Tip: Limit texture changes to a few core blocks for cohesion. - 4
Build base shells for each zone
Raise the primary walls and ceilings to establish scale. Focus on rhythm and alignment so each zone feels connected.
Tip: Place major doorway lines first to guide subsequent placement. - 5
Fill zones with textures and lighting
Add textures and lighting to establish mood and function. Ensure brightness is balanced and highlights focal points.
Tip: Test lighting at different times in-game to avoid harsh shadows. - 6
Introduce functional systems
Implement doors, switches, and decorative mechanics that enhance gameplay. Tie these systems to each zone’s identity.
Tip: Keep wiring simple to avoid clutter and lag. - 7
Polish visuals and cohesion
Refine textures, polish edges, and unify color schemes across zones. Add signature accents to tie the design together.
Tip: Use a small set of accent blocks to create focal points. - 8
Test in-game and iterate
Play through the build to spot flow issues and lighting problems. Note improvements and implement changes in the next pass.
Tip: Schedule short test runs after every major change. - 9
Document and plan the next phase
Capture notes on decisions and create a plan for phase two or three. Confirm how new materials will integrate with the current design.
Tip: Keep a running log of lessons learned for rapid iteration.
Got Questions?
What defines a grand design terraria project?
A grand design terraria project starts with a clear end-state and a phased plan that grows with progression. It emphasizes cohesive layout, consistent textures, and functional zones, all tied together by a master blueprint.
A grand design project starts with a clear end-state and a phased plan that grows with progression, with cohesive layout and zones.
How do I start planning my build?
Begin with a simple concept and three milestones. Sketch zones on paper or digitally, outline major routes, and decide on a limited texture palette to ensure cohesion.
Start with a simple concept, then map milestones and zones, keeping textures cohesive.
How long does a grand design terraria project typically take?
Duration varies by world size and playtime, but expect multiple sessions for planning, building, and iteration. Focus on completing each phase before expanding to the next.
Duration varies, but plan for several sessions to complete each phase.
Should I prioritize aesthetics over gameplay in early phases?
Balance is key. Establish a strong architectural foundation first, then layer in decorative elements that support gameplay and progression.
Foundational design first, then add decorations that support gameplay.
Do I need special items to start a grand design terraria?
No single item is required to begin. Start with basic materials to build the core layout, then unlock or craft special accents as you progress.
Start with basics, and add special accents as you progress.
How can I ensure future phases fit into the existing design?
Design with modular zones and repeatable textures. Maintain alignment lines and consistent scale so new areas slot in without visual disruption.
Use modular zones and repeatable textures to fit future areas.
Can I adapt grand design principles to smaller worlds?
Absolutely. Scale down the zone concept and use fewer materials, but preserve the phased approach and cohesive color palette.
Yes, adapt the phased plan to smaller spaces while preserving cohesion.
Watch Video
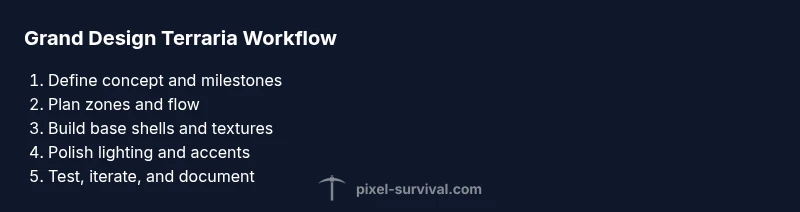
Key Points
- Plan before placing blocks.
- Define scalable phases for growth.
- Unify textures and lighting across zones.
- Iterate with in-game testing and documentation.