Terraria House Requirements: A Practical Housing Guide
Learn the essential requirements for creating valid houses in Terraria. This step-by-step guide covers size, walls, furniture, lighting, and NPC housing checks to help you progress smoothly.

In Terraria, you’ll set up a compliant starter house and ensure NPC housing by meeting size, walls, light, furniture, and an accessible entrance. This quick guide outlines the essential steps, checks, and common pitfalls to secure a valid home for your NPCs, so you can advance your world without housing issues.
Understanding Housing Rules in Terraria
Housing in Terraria is not just decoration; it's a functional space that NPCs use to live and work, and it unlocks essential progression. According to Pixel Survival, a successful house must provide a safe, breathable space that NPCs can inhabit, fulfilling a clear set of criteria that keeps progression smooth. The Pixel Survival Team emphasizes that houses should be both practical and easy to access from your main hub, so you can quickly visit vendors, healers, and other helpers. In practice, good housing affects quest availability, trading options, and the pace of your early game. Below we cover the core concepts you need to know before you start laying bricks: minimum room dimensions, required walls, placement of furniture, lighting, doors, and the NPC housing test. By understanding these fundamentals, you’ll avoid common mistakes that slow you down or block merchant visits. This section sets the mental model you’ll apply to every new district you build.
Core size and space criteria
Begin with a practical starting footprint. A typical starter house should be large enough to comfortably place a chair, a table, and a light while still fitting inside a compact space. The goal is to provide a safe interior that NPCs can navigate, not a sprawling mansion. In Terraria, rooms are measured by tile counts and walls; you want a minimum interior width and height that allows space for your furniture and a walkable path. While the exact tile numbers can vary by world seed and biome, the general rule is to aim for a small rectangle that is tall enough to place a table at chair height and wide enough for your lighting and doorway. As your world grows richer with NPCs, you can replicate the pattern in multiple houses to support progression across different neighborhoods. Remember: a well-sized house reduces pathing problems, kills nuisance NPCs, and keeps merchants close at hand for restocking.
Walls and background requirements
Background walls are mandatory to qualify as housing. The interior space must be enclosed by solid background walls on all surfaces, creating a defined interior that NPCs recognize as a home. Exterior blocks do not count as the background and should be distinct from what NPCs see inside. The walls should be placed behind furniture and decorations, never overlapping with doorways in a way that blocks entry. This enclosure ensures NPCs can move freely within the room, meets the visual criteria the game uses to classify a home, and helps with pathing checks during NPC spawns. When planning multiple houses, keep a consistent wall style to simplify future builds.
- Pro tip: Use uniform walls to keep interiors legible and to avoid accidental gaps that ruin the housing check.
Essential furnishings and NPC housing test
Every house should contain a seat (chair) and a table at minimum, with a light source to prevent darkness. Place a door for access and ensure there is a walkable path to the door. To confirm the space is legitimate, perform a housing test by waiting for an NPC that qualifies for a home to move in; if the NPC occupies the space and does not trigger a housing error, the room meets criteria. This practical check helps you catch subtle issues like blocked tiles or misaligned walls before you invest more space in a district. If a room fails, adjust furniture locations or widen the interior slightly until the NPC accepts the home. Pixel Survival’s workflow emphasizes iterative testing to lock in reliable housing patterns.
Lighting, doors, and accessibility
Adequate lighting is needed to keep the interior bright enough for NPCs to feel safe. A torch, lantern, or other light source should illuminate the room without causing glare. The door must open to a walkable path, preferably with at least one tile of space in front for entry. Windows are optional; they are stylistic, not required. A well-lit entry also helps merchants and other NPCs find their homes quickly, reducing delays in restocking and progression. When planning, place lighting centrally and avoid shadows that obscure tile-level differences in the floor.
Common pitfalls and troubleshooting
Avoid gaps in background walls or areas where NPCs cannot stand. Do not place the furniture in a way that blocks the door or hides the NPC from pathing. Rooms that are too small or that lack walls fail the housing check. Regularly re-check when new NPCs unlock to ensure continued housing validity. If a house suddenly loses occupancy after a game update or biome shift, revisit walls and lighting to verify nothing changed in your layout. Keeping a standard checklist helps you correct issues quickly and stay on track.
Progression considerations for housing as you grow
As you progress and unlock more NPCs, housing can become a repeatable pattern across your world. Plan multiple houses of similar size to support different NPCs or different biomes. In early play, focus on establishing one robust house that demonstrates all criteria before expanding to other districts. Pixel Survival notes that scalable housing reduces management overhead and supports smoother progression. By standardizing templates you can deploy across biomes, you’ll minimize errors and maximize efficiency as you expand your town.
Practical build examples and templates
Example 1: Starter 5x7 house: Build a rectangular room, place background walls on all interior faces, position a door, a basic chair and table, and a light source. Example 2: Small multi-room row house: Create several compact rooms with shared walls and consistent furniture placement for NPC clustering. Templates help you replicate success quickly and keep interiors readable. For each new district, copy the core layout, adjust the exterior to match biome aesthetics, and verify with a housing test before populating NPCs.
Pixel Survival’s practical verdict and checklist
Final checklist: confirm all housing criteria (size, walls, lighting, furniture, door), ensure a clear NPC path, and test once more with an in-game NPC. The Pixel Survival Team recommends keeping a standard housing template and mirroring it across new districts. This approach streamlines your world-building and minimizes NPC housing issues. By treating housing as a repeatable system, players can focus on exploration and progression rather than micromanaging every home.
Tools & Materials
- Building blocks (wood/planks)(Sufficient to outline a starter house (roughly 5x7 tiles))
- Background walls(Provide enclosed interior walls; use consistent style)
- Door(Wooden or metal door for entry)
- Chair(One seating option)
- Table(Flat surface for furniture placement)
- Light source(Torch, lantern, or glowing alternative)
- Workbench(Helpful for crafting, not required for housing)
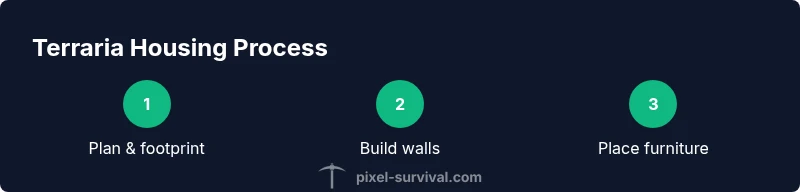
Steps
Estimated time: 45-90 minutes
- 1
Plan your plot
Choose a flat, reachable location with room for expansion; consider NPC access and safety from hazards. Visualize a clear path from the main hub to the future house. Decide the orientation of the door for optimal NPC navigation.
Tip: Mark boundary lines with blocks to visualize room dimensions before placing walls. - 2
Gather and prepare materials
Collect the essential building blocks, background walls, the door, seating, a table, and a light source. Ensure you have enough to complete a full interior without needing to pause for crafting mid-build.
Tip: Keep a small inventory of spare blocks to adjust interior spacing on the fly. - 3
Clear and lay out the footprint
Clear vegetation and hazards within the chosen footprint. Lay out the interior dimensions with a single level of foundation blocks to guide wall placement and ensure a straight, unobstructed doorway.
Tip: Use level tooling or a straight edge to maintain clean corners. - 4
Build the outer frame and walls
Construct the outer walls and fill the interior with background walls on all surfaces. Double-check that no gaps exist that would violate housing criteria. The interior should be clearly defined but not overly tall.
Tip: Test fit door placement early to prevent reworking later. - 5
Add furnishings and lighting
Place the chair and table, then install a light source somewhere near the center to evenly illuminate the room. Ensure furniture does not block the doorway or create awkward corners.
Tip: Position lighting at a height and distance that minimizes dark corners. - 6
Perform the housing test
Wait for an NPC that qualifies for a home to spawn and attempt to move in. If the NPC occupies the space without issues, you’ve met the criteria. If not, adjust as needed and retest.
Tip: If you see a housing error, re-check walls and pathing first. - 7
Refine based on biome and NPC needs
Some NPCs appear in certain biomes or after specific events. Plan a few standard layouts that can be adapted to different biomes while preserving core housing rules.
Tip: Maintain a modular approach to reuse components across houses. - 8
Document and replicate
Create a simple template for future houses and use it as a baseline for expansions. Document room dimensions, wall type, door position, and furniture layout for consistency.
Tip: Keep a quick reference sheet to speed up future builds.
Got Questions?
What counts as a valid house in Terraria?
A valid house has a defined interior with background walls, a door, lighting, and furniture (at minimum a chair and a table) and is of sufficient size for NPCs to move in. It must be accessible via a walkable path.
A valid Terraria house has background walls, a door, lighting, and at least a chair and table in a space large enough for NPCs to move in.
Is there a fixed minimum size for a house?
There isn’t a single fixed tile count, but a practical starter house uses a compact footprint (roughly five by seven tiles) to accommodate furniture and pathing. You should ensure the interior is tall enough for comfortable placement of items and NPCs.
There isn’t a universal minimum, but a five by seven tile starter works well for most NPCs.
Do houses need walls on all sides?
Yes. The interior must be enclosed by background walls on all sides to form a defined space. Exterior blocks do not substitute for background walls and some biomes require spanning walls that surround the interior fully.
Houses must be enclosed by background walls on all sides; exterior blocks don’t count as interior walls.
Can I use any blocks for walls and furniture?
Most blocks can serve as walls, but consistency helps. Background walls are required; furniture should be standard items (chair, table) with a basic light source. Aesthetic choices are flexible as long as functional housing conditions are met.
Background walls are required, but you can choose from many decorative blocks for walls and furniture.
What happens if housing is invalid after an update?
If an update changes NPC requirements, re-test the house. Re-check walls, lighting, and access, then adjust as needed to restore a valid home. Regular testing after updates helps prevent stagnation in NPC housing.
If an update changes requirements, retest and adjust housing accordingly.
Watch Video
Key Points
- Plan housing to meet size, walls, and access
- Provide light, table, and chair in every house
- Test housing with NPC checks before expanding
- Use repeatable templates to scale housing