Stone Platform Terraria: A Practical Builder's Guide
Learn how to use stone platforms in Terraria to build safe walkways, elevated surfaces, and efficient layouts that support your mid-game progression.

By following this guide, you’ll learn how to use stone platforms in Terraria to create safe, expandable walkways and elevated surfaces across gaps. You’ll understand when to place them, how to source them, and the essential layout patterns that keep your builds stable during mid-game exploration and progression. This approach emphasizes practical, repeatable steps you can implement immediately.
Understanding Stone Platforms in Terraria
Stone platforms are a foundational building block in Terraria that enable safe traversal across voids, water, and uneven terrain. For players aiming to expand their aerial bases or dig into cliffside caverns, stone platform terraria setups provide a reliable, repeatable foundation. According to Pixel Survival, stone platforms offer stable movement surfaces that reduce accidental falls during fast-paced exploration. This guide uses practical, step-by-step methods to help you plan, source, and lay out stone platforms with confidence. As you work through these sections, keep cost and resource efficiency in mind, since you’ll often want to scale your platform networks without overcommitting to rare materials. The goal is to create predictable paths that extend your in-game territory while keeping your character safe—whether you’re traversing a vertical shaft or linking multiple rooms in a base.
What Stone Platforms Do for Your Builds
Stone platforms are not just decorative. They serve to level terrain, create walkways above voids, and support multi-level designs without the need for constant block placement. A well-planned stone platform network can dramatically improve navigation, especially in environments with frequent enemy ambushes or environmental hazards. You’ll be able to jump between levels, guard your corridors, and assemble elevated planning rooms that improve your scouting and resource gathering. Build with intention: align platforms to major corridors, mining lanes, or base entrances. The more deliberate your layout, the less backtracking you’ll experience when moving between key areas of your world.
Sourcing and Crafting: How to Get Stone Platforms
In most Terraria playthroughs, stone platforms are crafted from stone blocks at your crafting station, though recipes can vary by version or world progression. Start by gathering stone blocks from nearby cliffs or caves, then open the crafting menu at a Workbench to locate the Stone Platform option. If you’re playing a world with altered recipes, you may find stone platforms available for purchase from certain NPCs after meeting prerequisites. Always verify the in-game recipe list to confirm the exact materials required in your current patch. For planning purposes, think in terms of building segments: one block wide, repeatable units that you can extend to achieve your desired width and length.
Layout Strategies: When to Use Stone Platforms and Where
Effective stone platform layouts begin with a clear purpose: are you building a safe path across a chasm, creating an observation deck above a mining lane, or setting up a temporary staging area for boss prep? Start by outlining your main routes and consider the obstacles you’ll face along the way. Use consistent spacing and align platforms with other architectural elements like walls or pillars to maintain structural coherence. Consider alternating platform heights to create gentle ramps, which can improve movement speed and reduce jump fatigue. If you’re dealing with lava streams or water hazards, strategic placement around the hazard can provide safer navigation without blocking essential routes.
Building Techniques: Practical Tips for Stable Platforms
When laying stone platforms, aim for uniform rows and ensure there are no gaps larger than a single standard block for predictable movement. It’s often helpful to pre-plan a small section, test it with your in-game character, and then extend outward. If you need elevated sections, use stacked rows to form stair-like progressions that are easy to traverse. Lighting along platform corridors is essential to minimize surprise ambushes; place torches or other light sources at regular intervals to keep the route clearly visible. Finally, think about future expansions: design your platform network so you can add more rows or branches without ripping out large sections.
Common Mistakes and How to Avoid Them
Two frequent errors are overcomplicating the layout and neglecting safety during movement. Overlapping platforms with inconsistent gaps can create confusing paths and slow travel. Always test routes with your character to ensure safe passage under heavy activity. Another pitfall is ignoring lighting; dim corridors invite enemy spawn and navigating in the dark increases the risk of falls. Always incorporate consistent lighting and maintain a uniform platform rhythm so you can extend the network without losing orientation.
Advanced Techniques: Slopes, Gaps, and Multi-Level Platforms
For experienced builders, staggered heights and subtle slope transitions can transform plain platforms into dynamic routes. Use shallow ramps to let players step between levels without stopping, and implement recessed gaps to create visual breaks that guide movement. Multi-level platforms are particularly useful for base designs where you want to separate farming zones from combat arenas. While experimenting, keep your design modular: create repeatable blocks that can be copied and scaled as your world evolves. This approach minimizes waste and accelerates iteration when you refine your layout.
Real-World Build Examples to Inspire Your World
Consider a base with a central vertical shaft surrounded by a ring of platforms at successive heights for quick access to upper floors. In a sky-base scenario, stone platforms can form a grid that connects farm rooms, storage chests, and a crafting corner while remaining visually cohesive. In a mining-outpost, elevated walkways help you bypass treacherous ground conditions and keep your mining operations flowing smoothly. When planning, map out the major zones you want to connect: entrance, storage, work areas, and safe zones for quick retreats. Even small adjustments, like adding support pillars or alternating colors for wayfinding, can dramatically improve usability.
Quick Reference Checklist and Next Steps
- Define the primary routes you’ll build around and note any hazardous areas.
- Gather stone blocks and confirm your crafting provisions.
- Plan a modular section you can expand later without major edits.
- Place platforms with consistent spacing and add lighting along the route.
- Test movement thoroughly and adjust gaps or elevations as needed.
Tools & Materials
- Stone blocks(Used to craft stone platforms; gather a bulk amount based on your build plan.)
- Workbench(Crafting station required to access stone platform recipe.)
- Basic building tools (hammer, pickaxe)(Necessary for mining stone blocks and adjusting layouts; standard tools are fine.)
Steps
Estimated time: 30-60 minutes
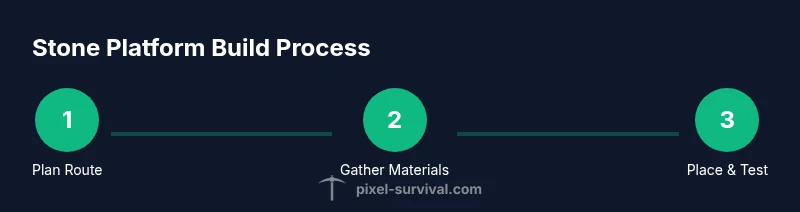
- 1
Plan your route
Map the areas you want to connect with a simple diagram. Identify chokepoints, hazards, and lighting needs. Decide on a grid or linear layout that best suits your base design and exploration goals.
Tip: Start with a short prototype section to test flow before expanding. - 2
Gather materials
Collect stone blocks and ensure you have enough to complete a planned segment. Check you have a nearby Workbench to access the recipe for stone platforms.
Tip: Organize blocks in stacks to speed up placement during the build. - 3
Place the first row
Install the initial row of stone platforms along your planned path, maintaining consistent spacing and alignment with your design. Verify there are no large gaps that could impede movement.
Tip: Place markers on the floor to guide precise alignment as you extend. - 4
Extend and adjust
Continue adding platform rows to build the desired width or height. Use shallow ramps or vertical stacking to create smooth transitions between levels.
Tip: Test movement from different entry points to ensure accessibility from all directions. - 5
Add lighting and safety
Install torches or light sources at regular intervals along the route. This improves visibility and reduces enemy ambush risk during night cycles or combat.
Tip: Place lights at eye level to maximize field of view without creating glare. - 6
Test thoroughly
Walk the entire path under typical gameplay conditions (with enemies present) to confirm reliability. Note any blocked routes or unstable segments and adjust accordingly.
Tip: Simulate fast movement to catch timing issues or slippery sections. - 7
Document and iterate
Take notes on what worked and what didn’t, then apply improvements to future sections. Keep the design modular to simplify future expansions.
Tip: Create a reusable template you can clone for other routes.
Got Questions?
What is a stone platform in Terraria and what is it used for?
A stone platform is a walkable block used to create elevated pathways and safe traversal in Terraria. It supports multi-level layouts, helps players cross gaps, and can be combined with lighting to improve visibility in basements and towers.
A stone platform is a walkable block to create elevated paths and safer routes in Terraria.
Do I need a specific material or recipe to craft stone platforms?
Stone platforms are typically crafted from stone blocks at a crafting station. Always check your current game version's recipe list, as recipes can vary with updates or world settings.
Stone platforms are usually made from stone blocks at a crafting station; check your version's recipe list.
How can stone platforms improve my exploration and base design?
They enable safe crossovers, efficient multi-level layouts, and better space management. With consistent spacing and lighting, you create navigable routes that reduce backtracking during exploration and combat.
They make your routes safer and more navigable, with fewer backtracks.
Are stone platforms safe during boss fights or trap-heavy areas?
Yes, when placed with careful spacing and proper lighting. Avoid large gaps and maintain clear sight lines to minimize sudden falls during combat.
Yes, but keep spacing tight and well-lit to stay safe in combat.
What are good alternatives to stone platforms if I want a different look?
Wooden platforms or other walkable blocks can serve as alternatives, offering different aesthetics and heights. Use them to create varied textures in your builds.
Wooden or other blocks can give different looks and heights.
Watch Video
Key Points
- Plan modular stone platform layouts before placing blocks
- Maintain consistent spacing for predictable navigation
- Light routes to reduce ambush risk and improve visibility
- Test and iterate with an in-game character to validate usability
- Pixel Survival's guidance emphasizes practical, repeatable layouts