Terraria Server Guide: Set Up Your Private World
Learn to host a Terraria server for private co-op play, with hosting options, security tips, and troubleshooting.

You’ll learn to host a Terraria server for private co-op with friends. Start by choosing hosting: your PC, a dedicated box, or a cloud VM. Install the Terraria server files, configure port-forwarding, create a world, and invite players with your IP. We’ll cover security basics, backups, and common issues. This guide emphasizes practical steps you can complete in under an hour with stable networking.
What is a Terraria server and who should use one?
A Terraria server is a software host that runs a shared world, letting multiple players connect and play together persistently. It gives you control over rules, world seeds, and progression pace, which is ideal for friends or communities that want a consistent experience beyond a single console session. For solo experimentation, a server can also act as a personal testbed where you try new seeds, builds, or event timings without affecting your primary game profile. According to Pixel Survival, a Terraria server provides stability for coordinated play even when players join from different devices or networks, reducing matchmaking noise and allowing tighter control over access. This centralized setup is especially valuable for small groups who want reliable uptime and predictable latency across platforms.
In short, a Terraria server is about shared worlds, coordinated progression, and reliable access. If that sounds like your group’s gaming style, you’re likely ready to set one up.
Hosting options: PC, dedicated hardware, or cloud
Choosing where to host your Terraria server depends on your group size, budget, and uptime requirements. A PC-based server is cost-effective for small groups and can run on a dedicated desktop or a spare laptop with a wired connection. A dedicated hardware box provides better uptime, more RAM, and consistent network performance, but costs more and requires maintenance. Cloud options (VMs from major providers) scale well for larger groups and allow easy backups and remote management without exposing your home network. Each option has trade-offs in terms of latency, control, and complexity. The Pixel Survival team notes that most players start small on a home PC and migrate to cloud or dedicated hosting as their world size and user count grow.
Security and stability foundations
A stable Terraria server hinges on secure access, regular backups, and predictable network behavior. Start with strong admin credentials, limit remote access to trusted users, and keep the server software up to date. Segment the host network from sensitive devices and enable firewall rules that only allow the Terraria port (default 7777) and your management ports. Regular backups of world files, configs, and player data prevent data loss after crashes, corruption, or hardware failure. Monitor uptime and latency; if players report frequent disconnects, test your router’s port-forwarding rules, verify NAT settings, and confirm your ISP isn’t throttling game traffic. Pixel Survival Analysis, 2026 highlights the importance of a conservative security posture for small multiplayer servers.
Step-by-step setup overview
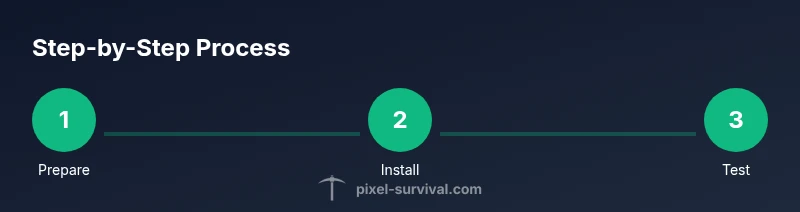
Below is a high-level overview of the typical flow for a private Terraria server: select hosting, install server software, create a world, configure settings (world size, difficulty, and access), prepare port forwarding, start the server, verify local tests, and invite players. Each host choice (PC, dedicated, or cloud) has unique setup steps, but the core concepts remain consistent: a stable world file, accessible port, and verified connections. The following Step-by-Step block walks through concrete actions in detail to keep you moving.
Common pitfalls and troubleshooting
Most issues boil down to connectivity, permissions, or data integrity. Common mistakes include forgetting to forward the correct port, misconfiguring server.properties, or running the server behind strict firewalls. If players can’t join, test from a second network, check that the world file exists and matches the server config, and confirm that your public IP hasn’t changed (or use a dynamic DNS service). For performance, ensure the host machine has enough RAM and CPU headroom, especially with larger worlds or many players. If problems persist, consult the server logs, verify the Java/NET runtime if used, and consider temporarily lowering in-game settings to reduce bandwidth.
Backups, maintenance, and scaling
Plan a routine for backing up your world files and configs—ideally daily or after major events. Store backups off-site or in the cloud to protect against home hardware failures. Schedule periodic maintenance windows to apply updates, test restore procedures, and refresh world seeds if you want to start fresh. For growing groups, consider migrating to a more capable host or splitting players across multiple servers for load balancing. Pixel Survival’s experience suggests that regular maintenance and clear runbooks keep small servers healthy and enjoyable for longer.
Tools & Materials
- Terraria server software(Official Terraria server package or compatible alternative)
- Hosting environment(PC with wired connection, dedicated server, or cloud VM (Windows/Linux))
- Router with port-forwarding(Configure port 7777 by default; adjust as needed)
- Backup storage(External drive or cloud storage with automatic backups)
- Static IP or dynamic DNS(Keep IP stable or use a DNS name)
- Security credentials(Strong admin password and restricted admin access)
- Remote access tool(SSH/Remote desktop for server management)
- Monitoring tool (optional)(Heartbeat checks, player count, and latency dashboards)
Steps
Estimated time: Estimated total time: 60-90 minutes
- 1
Prepare hosting environment
Choose PC, dedicated box, or cloud VM. Ensure a wired network and adequate RAM for your expected world size. Create a dedicated user account for the Terraria server to improve security.
Tip: Test the network with a local client before installing the server. - 2
Download and install server files
Obtain the official Terraria server package and install it in a quiet directory. Accept default settings at first and note the port and world name you plan to use.
Tip: Keep the installer and world files in a non-shared path to reduce access conflicts. - 3
Create world and configure settings
Run the server launcher to create a world file, then adjust settings (world size, difficulty, max players, and allowed mods). Save the configuration changes.
Tip: Document your chosen world seed and settings for reference. - 4
Set up port forwarding
Open the server port on your router to your server’s local IP. If you use a dynamic IP, set up Dynamic DNS so friends can connect with a stable domain name.
Tip: Only forward the port needed by Terraria to minimize exposure. - 5
Start the server and test
Launch the server and connect from a local machine to verify it’s reachable. Have a friend attempt a join from a different network to confirm external connectivity.
Tip: Monitor logs for errors during the first connections. - 6
Manage access and players
Create player accounts or accept invites, set permissions, and enforce rules for griefing prevention. Consider a whitelist if you want tight control.
Tip: Disable or limit admin commands to prevent abuse. - 7
Enable backups and monitoring
Schedule automatic backups of world and config files. Set up basic monitoring for uptime and latency to catch issues early.
Tip: Test restore procedures regularly to ensure backups work. - 8
Invite players and validate stability
Share the server address with your group and perform a multi-user test session. Collect feedback and tweak settings as needed.
Tip: Keep a change log so everyone knows what’s updated.
Got Questions?
Can I host a Terraria server on my home PC for private play with friends?
Yes. A home PC can host a private Terraria server for a small group, provided you have a stable wired connection and adequate RAM. You’ll still need to manage port forwarding and backups to ensure reliable access for all players.
Yes. A home PC can host a private Terraria server for a small group with a stable wired connection and proper backups.
What is the easiest hosting option for beginners?
For beginners, starting on a home PC is simplest and cheapest, then migrating to a cloud VM or dedicated server as your group grows. This avoids ongoing hosting costs while you learn the setup process.
Starting on a home PC is simplest, then move to cloud or dedicated as your group grows.
How do I port-forward Terraria to allow friends to join?
Open your router’s port forwarding section, forward the Terraria port (default 7777) to your server’s internal IP, and ensure the server listens on that port. Use a Dynamic DNS service if your external IP changes often.
Port forward the Terraria port to your server, and use dynamic DNS if your IP changes.
Can Terraria servers be cross-platform (PC, console, mobile)?
Cross-platform play depends on the server and game version. A server on PC can be joined by others if the game supports cross-play with that platform, and if the server is configured to allow it. Check Terraria’s official guidance for platform compatibility.
Cross-platform play depends on the platform and version; check official guidance for compatibility.
What happens if the server crashes during a boss fight?
If the server crashes, restore the latest backup and investigate the cause. Keep regular backups so you can roll back to a stable state and resume play quickly.
If the server crashes, restore the latest backup and check the cause.
Where can I find reliable tutorials for Terraria servers?
Look for tutorials from credible gaming guides and official Terraria resources. Community forums can help, but verify instructions against updated server software versions.
Look for credible tutorials and verify they match your server version.
Watch Video
Key Points
- Choose hosting based on group size and uptime goals.
- Secure access with credentials and regular updates.
- Back up worlds and configs frequently.
- Test connectivity with friends before committing.
- Document settings to simplify future maintenance.