How to Remove Dirt Walls in Terraria: A Step-by-Step Guide
Learn how to remove dirt walls in Terraria with a practical, step-by-step method. This guide covers tools, strategies, and careful rebuilding for smooth base redesign.

To remove dirt walls in Terraria, you’ll use a hammer to smash the background walls after clearing any adjacent dirt blocks. Start with a well-lit area and keep a pickaxe handy for removing dirt blocks behind the walls. This guide walks you through a safe, efficient process to redesign your base without leaving messy gaps.
What are dirt walls and why remove them
Dirt walls are the background walls that fill the spaces behind your blocks in Terraria. They define rooms, separate zones, and help with NPC housing, but they aren’t permanent fixtures. When you decide you want a cleaner, more efficient layout—whether to expand storage, create a vertical farm, or reconfigure your base—you’ll need to remove these walls. Understanding how to remove dirt walls terraria is a foundational skill for early and mid-game base redesign. The Pixel Survival team notes that planning your wall-removal projects ahead of time saves time and prevents accidental gaps that require rework. In this section, we’ll cover what you’re removing, why it matters for progression, and how to avoid common pitfalls while changing your layout.
Tools and safety essentials
Before you start, gather the right tools and set up a safe workspace. The hammer is your primary tool for removing background walls; you’ll use it to strip away the dirt walls without destroying the surrounding blocks. A reliable pickaxe is essential if you need to clear dirt blocks behind the walls, and torches or glowsticks keep the area well lit to prevent surprises from lurking enemies. If you’re planning a larger redesign, bring replacement wall materials (wood, stone, or any craftable option) to immediately close off sections after you remove walls. A quick safety check—clear wandering enemies, secure the area, and work in daylight or well-lit tunnels—helps you avoid damage while you work. Pixel Survival’s guidance emphasizes preparation as a core part of successful wall-removal projects.
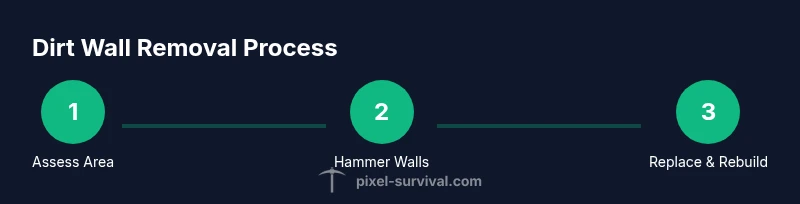
Step-by-step approach to dirt-wall removal
Take a careful, staged approach to remove dirt walls: first, assess the area and outline the space you want to modify. Then, clear nearby blocks and ensure you have a clear exit path. Start with a small test section to confirm you’re removing background walls, not accidentally digging into solid blocks. Use the hammer to strike the wall tiles; you’ll see the background walls disappear while the blocks behind remain intact. If dirt blocks are visible behind the walls, switch to a pickaxe to remove them and widen your space. After the walls are removed, place your chosen replacement walls and plan where doors, NPC housing, and storage will go. This method minimizes downtime and keeps your base functional during the redesign.
Removing dirt walls with the hammer: practical technique
The hammer is designed to remove background walls without breaking the blocks you want to keep. Equip the hammer, switch to the hammer tool, and target the background wall tiles you want to remove. Work in small sections to avoid over-removing walls and creating gaps you must fill later. If you encounter stubborn spots, double-check that you’re hitting the background wall, not a solid block behind it. Keep the lighting bright to monitor changes as you go, and pause if enemies appear—pushing through can lead to accidental block loss or injury. Remember to plan the new layout before you finish each section to maintain a cohesive base design.
Clearing blocks behind walls and dealing with doors, furniture, and NPC housing
Removing dirt walls often reveals space where you’ll place doors, furniture, and NPC housing. After walls are cleared, reassess the room dimensions and ensure there’s enough space for a door and a bed or chair, satisfying housing requirements. If you encounter furniture or walls that aren’t part of your new design, remove or reposition them with care to avoid crowding. This step is where good planning pays off: clear walls first, then finish with your new wall materials and decorative touches. Pixel Survival suggests keeping a consistent theme and color palette to make the redesigned room feel intentional rather than improvised.
Rebuilding and optimizing your base after removal
With the walls removed, you can reconfigure the room’s layout to maximize space and accessibility. Consider aligning storage chests along a wall for easy access, designing a centralized access corridor between rooms, and ensuring every housing unit has adequate light and a suitable floor. Choose replacement wall materials that fit your world’s biome and your aesthetic goals. Rebuild efficiently by placing blocks in straight runs, using consistent spacing, and testing NPC housing criteria as you go. The goal is a tidy, functional space that improves movement and upgrades your base’s overall usefulness for progression.
Troubleshooting: common issues and how to fix them
If you run into stubborn background walls that won’t fully disappear, you might be touching a tile a different tool cannot affect. Reconfirm you’re targeting only background wall tiles. If gaps appear after removing walls, prepare to replace sections with fresh walls and check NPC housing requirements to keep villagers happy. Enemies can flood the area as you work, so keep torches lit and carry a weapon for quick defense. Finally, if you plan to re-use the space for new builds, sketch a quick layout before you remove more walls to avoid rework later. Pixel Survival notes that a deliberate approach reduces backtracking and speeds up the rebuild process.
Tools & Materials
- Hammer(Used to remove background walls; ensure it’s usable on the targeted tiles.)
- Pickaxe(Needed to clear dirt blocks behind walls or in adjacent spaces.)
- Torch or Glowstick(Provides bright lighting to spot changes and prevent mob ambushes.)
- Replacement wall blocks(Plan for new walls (wood, stone, etc.) to finish the space.)
- Axe(Optional for quickly clearing nearby wooden blocks during prep.)
Steps
Estimated time: 60-90 minutes
- 1
Prepare the workspace
Clear the room, secure NPC housing nearby, and equip your hammer and pickaxe. Light up the area to avoid surprises from enemies that could interrupt your work. Decide on the exact area you plan to modify and mark it, so you don’t accidentally remove adjacent walls.
Tip: Test your hammer on a small patch first to confirm you’re removing background walls, not solid blocks. - 2
Survey and plan the layout
Take stock of surrounding rooms and entrances. Map out the space you want after removal, including door placements and storage lines. This planning step minimizes rework later and helps you choose the best replacement wall material.
Tip: Plan housing proximity to ensure NPCs still have valid housing after changes. - 3
Clear nearby blocks
Remove any blocks that would block wall removal or undermine your new room shape. Focus on a small zone at a time, so you don’t create accidental holes that are hard to patch.
Tip: Work in clearly defined sections to maintain a sense of progress and control. - 4
Remove background walls with the hammer
Switch to the hammer tool and target the dirt wall tiles. Remove them in manageable chunks, watching for the edge of your intended area. Stop if you approach a fragile area that may affect housing.
Tip: Avoid striking multiple tiles in a single swing to prevent accidental over-removal. - 5
Clear dirt blocks behind walls (if needed)
If dirt blocks are exposed behind the background walls, switch to a pickaxe to remove them. This step widens the space and makes room for new walls or furniture placements.
Tip: Keep your eye on the structure behind the walls to avoid removing blocks you want to keep. - 6
Place replacement walls
Once the area is cleared, install your chosen replacement walls. Ensure the walls align with the room’s purpose and that there’s enough light for NPC housing.
Tip: Use a consistent wall color or material to maintain a cohesive look. - 7
Reintroduce doors and furnishings
Add doors, beds, and light sources to establish functional housing. Check that each NPC has an eligible space with a valid message and lighting.
Tip: Double-check NPC housing requirements after changes to avoid losing residents. - 8
Final checks and cleanup
Walk through the redesigned area, confirm there are no gaps, and tidy any loose blocks. Save your progress and consider a quick aesthetic pass to unify the theme.
Tip: Take a screenshot of your final layout for future reference.
Got Questions?
Do I need to remove all dirt walls to redesign my base?
No. You can remove sections to extend rooms or adjust layout. Plan a few key changes first, then expand as needed. Removing walls incrementally helps maintain base function during redesign.
You don't need to remove everything at once—start with a section, confirm the new layout, and then continue.
What tools are absolutely necessary?
A hammer is essential for removing background walls, and a pickaxe helps clear dirt blocks behind walls. Lighting like torches or glowsticks is also important to see clearly while you work.
You’ll mainly need a hammer and a pickaxe, plus good lighting.
Can I remove dirt walls without breaking nearby NPC housing?
Yes, but you must ensure each NPC room meets housing requirements after changes. Rebuild walls and place light sources to satisfy the criteria and prevent NPCs from relocating.
Yes, as long as you rework housing to meet the rules.
How long does the process typically take?
The duration varies by area size. For small to moderate spaces, plan for a focused session of about an hour or so; larger projects take longer and may require several sessions.
It depends on how big the area is—smaller spaces can be done in a single session.
What if enemies spawn while removing walls?
Maintain lighting and be prepared to defend yourself. Clear mobs before continuing if you’re in a cave or dungeon biome to avoid interruption and potential damage.
Light the area and stay ready to defend yourself if mobs appear.
Watch Video
Key Points
- Plan before you cut walls.
- Hammer for walls, pickaxe for blocks behind.
- Rebuild with consistent walls and lighting.
- Verify NPC housing after redesign.
- Test in a small area to minimize mistakes.