Terraria Roof: Step-by-Step Roof Building Guide
A practical guide to designing and building durable terraria roofs. Step-by-step progression from wood to brick, with styles, materials, and tips to protect NPC housing and enhance your base.

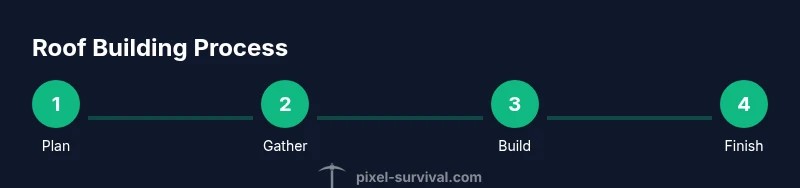
This guide shows you how to plan, gather materials, and construct a sturdy terraria roof that protects NPC housing, manages weather exposure, and adds visual appeal. You’ll learn progression-friendly materials, various roof styles, and practical steps to execute a reliable roof from early wood to mid- and late-game options like stone and brick.
Why a sturdy terraria roof matters
A well-designed roof is more than aesthetics in Terraria; it protects NPC housing from rain, wind, and mobs that threaten visibility and comfort. The terraria roof also helps maintain a stable interior temperature visually and keeps light controlled so NPCs feel safe. A solid roof boosts NPC happiness, reduces the chance of housing violations, and improves overall base cohesion. According to Pixel Survival, starter roofs built with wood set the foundation for functional houses, but upgrading to more durable materials is essential as you progress and face tougher biomes. This article focuses on practical roof design that balances function and form, and it uses the keyword terraria roof to anchor concepts across sections for quick reference.
Roof styles and their impact on space
Roof styles in Terraria range from flat, utilitarian designs to pitched or gabled structures that mimic real-world architecture. Flat roofs are quick to build and good for compact bases, but pitched or stepped roofs minimize rain catching and overheating and can improve NPC lighting dynamics inside the shelter. Gabled roofs create more space in the upper rooms, enable dramatic silhouettes, and often pair well with decorative elements like dormers or overhangs. When you plan a terraria roof, consider how the chosen style affects interior height, the number of NPCs you can house, and your ability to place torches or decorative lamps without shadowy corners.
Materials, progression, and maintenance
In the early game, terraria roof construction leans on wood blocks due to availability. As you gather stone and brick, you can upgrade to sturdier materials that resist weather and have a longer lifespan. A common rule of thumb is to start with wood for the skeleton and switch to stone blocks or brick blocks for the main surface as soon as resources allow. Regular maintenance is also important: clean gaps, replace worn blocks after biome changes, and ensure the roof overhangs the walls slightly to protect interiors from rain and sunlight. Pixel Survival analysis shows that progression-friendly materials help players balance resource collection with base safety, especially in biomes with frequent weather events.
Planning for overhangs, slopes, and rafters
A terraria roof gains depth with overhangs and appropriate slopes. An overhang helps shield walls from rain, while a gentle slope makes the roof visually pleasing and easier to navigate. You can create slopes using stairs, half-bricks, and diagonally placed blocks. Experiment with different configurations to find a balance between aesthetic appeal and functional protection. When designing a terraria roof, plan the rafter lines so the slope runs evenly from peak to edge, avoiding awkward gaps that could trap enemies or create dark spots where enemies spawn.
Starter terraria roof design: quick, reliable, early-game
If you’re new to roof-building, start with a simple, boxed form that uses wooden blocks and wooden stairs for the slope. Construct the outer frame one or two blocks above the wall line, then fill in with wood blocks. Place wooden stairs along the edge to create a shallow pitch; this keeps rain out while remaining easy to repair. To speed up the process, prepare a small, organized supply chest with wood, wood stairs, torches, and a few extra blocks. This starter terraria roof will keep NPCs from complaining and give you a solid template to iterate on as you gather more materials.
Upgrading roofs as you progress: mid to late game
As you gain access to stone and brick, upgrade the roof structure to improve durability and appearance. Stone blocks offer a higher health pool and better weather resistance, which reduces the chance of roof-related housing issues during storms. Brick blocks add a refined aesthetic and can be colored with paint to match your base theme. When upgrading, preserve the underlying support and adapt stair placements to preserve the roof’s slope while increasing interior height where needed. This approach keeps your terraria roof functional and visually cohesive across progression.
Lighting, climate, and NPC housing considerations
A terraria roof should not neglect lighting and interior climate. Place torches or lamps along rafters and corners to minimize shadowy areas under the eaves. Lighting helps NPCs feel safe and reduces the chance of hostile mobs spawning within your shelter. Consider how biomes and weather affect interior lighting—some players add skylights or upper windows to balance daylight with interior warmth. Ensure the roof design does not create gaps that invite rain or mobs or violate housing rules by leaving ceilings too low or walls exposed.
Common pitfalls and how to fix them
Common errors include flat roofs with no slope that trap rain, gaps along the eaves that allow weather to intrude, and roofs that don’t fully cover interior walls. Another mistake is overcomplicating the roof early on, which wastes resources and time. If you notice NPCs complaining about housing, check the shelter’s height, ensure the floor, walls, and lighting meet housing requirements, and confirm there are no obstructing blocks that prevent doors or windows from functioning. To fix issues, adjust slope angles, extend the overhang, or replace weak blocks with sturdier options like stone or brick.
Templates and build ideas you can copy
Templates offer ready-made references for terraria roof designs. Try a simple gabled roof template first, then a more elaborate hipped roof for larger bases. You can adapt these templates for single-room houses or multi-room bases with multiple wings. For a quick reference, keep a mental image of a peak, two slopes on each side, and a uniform overhang. Use color schemes that contrast with the walls to make the roof stand out, and consider integrating dormers for extra space and character. Remember to test the housing setup after completing the roof, paying close attention to NPC placement rules and lighting balance.
Tools & Materials
- wood blocks(Early-game staple; gather by chopping trees.)
- stone blocks(Mid-game upgrade; stronger and weather-resistant.)
- brick blocks(Late-game option for durability and aesthetics.)
- wood stairs(Create slopes to shape the roof.)
- stone stairs(Alternative to wood stairs for durability.)
- wooden platforms(Useful for overhangs and internal lofts.)
- torches or lamps(Lighting for safety and NPC happiness.)
- pickaxe (iron or better)(Needed to harvest most roof materials.)
- axe (iron or better)(Efficient for collecting wood and shaping frames.)
- hammer (optional but handy)(Helpful for adjusting walls and minor shaping.)
Steps
Estimated time: 90-120 minutes
- 1
Plan your roof footprint
Sketch the roof outline on paper or in-game using temporary blocks. Decide whether you want a flat, pitched, or hybrid roof. Note the interior height changes the feel of the space and the NPCs’ comfort near the ceiling.
Tip: Define the peak height and slope before gathering resources to avoid rework. - 2
Gather and organize materials
Collect the core blocks you’ll use for the roof: wood for early builds, stone or brick as progression allows. Keep stairs handy for shaping slopes, and stock enough torches for even lighting along the eaves.
Tip: Create a dedicated storage chest for roof materials to speed up construction. - 3
Set the base level and add a casual overhang
Place walls to form the outer boundary and extend the roof edge beyond the wall by one block to protect against rain. Overhangs also help with interior visibility and reduce spawn chances directly under the roof edge.
Tip: Overhangs should be consistent around the entire footprint to avoid awkward gaps. - 4
Build the main roof using blocks
Lay down the primary roof surface from the outer edge toward the center. Keep a steady rhythm and align blocks to create a smooth silhouette. If you’re using wood, ensure you have enough to avoid mid-construction shortages.
Tip: Work from the outer corners toward the center to minimize rework and improve symmetry. - 5
Create slopes with stairs or half-bricks
Add wood or stone stairs along the edge to form the pitch. If you want a sharper angle, alternate stairs with blocks to achieve a more defined line. Check for any gaps that could let rain drip into the interior.
Tip: Use wooden stairs for a softer, visually pleasing slope; switch to stone stairs for a stronger look. - 6
Anchor the roof to walls and add interior details
Ensure you’ve integrated the roof with solid walls beneath. Add floor and ceiling elements where needed, and place overhead lighting to prevent dark spots under the eaves.
Tip: Keep a few decorative lamps visible from the interior to aid nighttime visibility. - 7
Install lighting and ventilation features
Distribute torches evenly along rafters or walls to minimize shadows. If your roof design leaves gaps, add skylights or small window openings to improve airflow and brightness.
Tip: Avoid placing lights directly on the roof where they could attract attention from nearby enemies. - 8
Test housing and adjust as needed
Check NPC housing rules: ensure a valid space, no extra blocks blocking doors, and adequate light. Make small adjustments to slope, overhang, or door placement to maximize NPC happiness.
Tip: After changes, re-test housing to confirm compliance with the NPC requirement. - 9
Refine aesthetics and color
Add color accents with paint or contrasting block choices. Consider dormers or decorative trims to personalize the terraria roof while maintaining protection and function.
Tip: Document your favorite aesthetic combinations for future builds.
Got Questions?
What is the best material for a terraria roof in early game?
Wood blocks are the most practical material for an early terraria roof due to availability and ease of use. They’re quick to collect and place, allowing you to establish a functional shelter fast. As you progress, upgrade to stone or brick for increased durability and longer lifespans.
Wood is the best choice early on. Upgrade later to stone or brick as resources allow.
Can I build a flat roof, and is it advisable?
Flat roofs are possible but less protective in rain and biomes with weather effects. A small pitch helps shed rain and mobs while adding a touch of style. Start with a flat look if you’re short on blocks, then add a slight slope later as you collect more materials.
Yes, flat roofs work, but a gentle slope is usually better for protection.
How do I ensure my terraria roof keeps NPC housing valid?
Ensure the roof covers the interior space without blocking doors, maintains proper lighting, and leaves a clear airspace above the NPCs. The roof should not intersect with the required 1x2 tile house dimensions, and the walls must remain intact around the shelter.
Make sure housing rules are met: proper size, light, and unobstructed doors.
How can I add an overhang to my roof?
Extend the roof edge by blocks or use stairs along the outer edge to project the slope outward. An overhang protects walls from rain and improves the shelter’s visual balance. Keep the overhang consistent around the perimeter for a polished look.
Extend the roof edge with blocks or stairs for a neat overhang.
What are common roof-building mistakes to avoid?
Avoid flat, gap-filled roofs, inconsistent slopes, and roofs that don’t fully cover interior walls. Don’t neglect lighting under the eaves. Regularly test NPC housing after changes to ensure nothing blocks doors or light sources.
Common mistakes include flat roofs and gaps that invite weather or mobs.
Are there any performance considerations when building roofs?
Roof design itself typically doesn’t affect game performance, but overly complex roofs can slow you down during builds and mapping. Focus on clean lines and consistent slopes to speed up construction and reduce mistakes.
Keep designs simple to speed up building and avoid mistakes.
Watch Video
Key Points
- Plan your roof first, then gather materials.
- Choose progression-friendly materials to balance speed and durability.
- Use slopes and overhangs to protect interiors and improve aesthetics.
- Ensure NPC housing rules are satisfied after every major roof upgrade.
- Add lighting early to prevent shadowy corridors and spawns.