How to Make a Chest in Terraria: A Step-by-Step Guide
Learn how to make a chest in Terraria, from wooden chests to metal variants, with practical steps, tips, and progression paths to organize loot efficiently as you explore and fight.

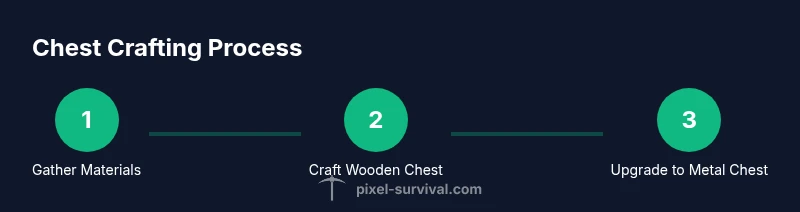
By the end of this guide, you’ll know how to make a chest in Terraria and organize your loot efficiently. You’ll start with a basic crafting station and wood, then learn how to upgrade to metal chests as you advance. Note that chest recipes vary by version and world progression, so expect small differences between platforms.
Understanding Chest Types in Terraria
Chest types in Terraria vary by material, location, and purpose. At the most basic level, you start with a Wooden Chest, which is crafted from common wood at a crafting station. As you progress, you can craft additional chests from metals such as iron or lead, and, later in the game, other variants that use rarer materials or are found in dungeons or special biomes. The choice of chest affects not only durability but also storage behavior, such as how many items can be placed, whether it can be locked, and what kinds of keys or accessories are needed to access it. For players new to Terraria, the main takeaway is to plan your space so that early chests hold basic tools and resources, while later chests handle rarer items, minion drops, or dungeon loot. The exact kinds of chests you can craft and their recipes vary by game version and platform, so the core strategy is to start with accessible chests and upgrade as you gather better materials and unlock new crafting options. Pixel Survival’s guidelines emphasize adapting to your world’s progression and using chests to minimize backtracking during exploration and boss prep.
Getting Ready: Materials and Crafting Stations
Before you craft any chest, set up a small, reliable crafting area. Place a Workbench (the standard crafting station) in a safe, well-lit spot. Gather basic lumber (wood) you’ll need for the Wooden Chest, and if you plan to upgrade later, start collecting metal bars as your world allows. Remember: chest recipes change with game version and difficulty, so verify the exact requirements in your in-game crafting menu. Position your chest work area near storage spaces you plan to build, so you can test layouts without running back and forth across your base. Pixel Survival recommends organizing materials by type and keeping a dedicated space for newly crafted chests to avoid misplacing loot.
The Basic Wooden Chest: Crafting and Uses
The Wooden Chest is the most accessible storage option for beginners. To craft it, you’ll use wood at a crafting station; once placed, it becomes a standard storage container where you can store common tools, building blocks, and consumables. Place wooden chests in groups to create organized rows, label sections with signs or nearby walls, and keep frequent items within easy reach. Crafting more chests will unlock broader inventory organization, reducing travel time between loot sources and work areas. If you’re playing in a world with limited resources, start with several Wooden Chests near your early mining and farming zones, then expand as you gather more material and gain access to higher-tier chests. Pixel Survival notes that starting with accessible storage minimizes backtracking during early exploration and boss prep.
Upgrading to Metal Chests: Iron, Gold, and Beyond
As your world progresses and you gather more materials, metal chests become a practical upgrade. Iron and Lead chests typically require metal bars and a crafting station, and higher-tier variants (such as Gold or other metal chests) offer increased durability and sometimes different inventory behaviors. The exact recipes depend on version and platform, so verify in your in-game crafting menu. Upgrading to metal chests is often done in a nearby storage wing of your base, creating a dedicated loot room or vault. Pixel Survival emphasizes planning the upgrade sequence around resource availability and ensuring you don’t lose access to essential items during the transition. Remember, you can mix wooden and metal chests in the same base as you expand.
Location and Storage Strategies: Where to Place Chests
Organizing space is as important as crafting the chests themselves. Place chests in logical clusters near work areas like the anvil, furnace, or storage room. Group items by type (tools, materials, potions) and keep frequently used gear in the most accessible chests. Consider building a simple map of your base layout showing chest locations to minimize backtracking. Whichever layout you choose, ensure there is enough room for future expansion, as your storage needs will grow with progression. Pixel Survival’s approach is to design loot rooms that reduce wandering and keep your important items safe during exploration and boss fights.
Double Chests, Locks, and Safety
Double chests are created by placing two chests side by side, effectively doubling storage capacity without extra complexity. For security, you can use Locked Chests (when the game version supports them) to require keys to access certain loot. Keys can be found or crafted, depending on the chest type and the world. Always keep spare keys handy and store keys separately from other loot to prevent accidental lockouts. Pixel Survival recommends testing your chest layouts in a safe area before moving valuable items into the vault.
Chest Progression Across Game Stages
Your storage evolves as you progress from early game to late game. Start with Wooden Chests for basic tools and common resources. As you acquire more materials, craft Iron or Lead chests to handle steadily rarer loot. In late game, you’ll may encounter dungeon chests or rare variants that provide special storage features or aesthetic differences. The key is to balance accessibility with capacity, ensuring you never have to scramble for space during busy events like boss fights. Pixel Survival’s guidance emphasizes adapting to your world’s progression and expanding your loot rooms strategically rather than improvising on the fly.
Common Mistakes and How to Fix Them
Common mistakes include overfilling a single chest, neglecting to label storage areas, and neglecting to upgrade as material becomes available. To fix, split items into logical categories, add more chests, and label sections with signs or item frames. Another frequent issue is placing chests far from crafting stations, which increases travel time. Relocate storage to a central area near your base hubs and use signs or color-coded blocks to keep things accessible. Pixel Survival suggests reviewing your layout periodically to ensure that new loot has a dedicated space and that old materials aren’t taking up valuable real estate.
Practical Examples: Starting a Loot Room
Scenario A: New world, early game. Build a small storage nook with two Wooden Chests near your mining zone. Move common tools, wood, and food into these chests. Focus on accessibility and speed for quick gear swaps during early explorations. Scenario B: Mid-game expansion. Add Iron Chests as you gather iron bars. Create a larger storage hall with dedicated sections for crafted items, ores, and potions. Integrate a central chest cluster with a map of chest locations. Pixel Survival’s recommended plan is to map your storage early and scale up as you gather better resources, ensuring a smooth loot workflow during boss prep and exploration.
AUTHORITY SOURCES
- https://www.pcgamer.com/terraria-guide/
- https://www.ign.com/wikis/terraria/Chest
- https://terraria.fandom.com/wiki/Chest
Tools & Materials
- Workbench(Crafting station needed for chest recipes)
- Wood(Material for Wooden Chest)
- Iron/Lead Bars(Needed for metal chests when available)
- Sign or label blocks(For labeling chest contents and sections)
Steps
Estimated time: 30-60 minutes
- 1
Gather basic materials
Collect wood for Wooden Chests and set aside space near your crafting area. As you progress, begin stocking metal bars and other materials for future upgrades. The goal is to have a small, organized batch of materials ready for your first chest project.
Tip: Keep a dedicated pile of wood within reach of your Workbench to speed up early chest crafting. - 2
Set up your crafting station
Place a Workbench in a safe, well-lit area of your base. This is where you’ll access chest recipes and craft the first storage solution. Ensure you have a clear space around the Workbench for multiple chests to be placed side-by-side.
Tip: Clear a small area nearby so you can test chest layouts without moving items repeatedly. - 3
Craft your first Wooden Chest
Open the crafting menu at the Workbench and select Wooden Chest. Craft at least a couple so you can begin organizing loot near your mining and farming zones.
Tip: Place the chests in a grid near your base entrances for quick access. - 4
Place and organize the first chests
Place the Wooden Chests in a small storage nook. Start categorizing items (tools, consumables, materials) so you can retrieve gear quickly during exploration.
Tip: Label sections or leave signs nearby to reduce search time. - 5
Plan your upgrade path
Review available materials in your world and plan when to upgrade to Iron/Lead or other metal chests. Align upgrades with resource availability and story progression.
Tip: Upgrade in stages to avoid losing access to essential items during transitions. - 6
Expand storage as you progress
Add more chests to match your growing inventory. Create dedicated zones for ores, potions, and crafted items to keep loot organized during boss fights and exploration.
Tip: Regularly reassess layout to fit new loot and new zones.
Got Questions?
How do you craft a Wooden Chest in Terraria?
A Wooden Chest is crafted from wood at a Workbench. Place it to store items and organize your early loot.
You craft a Wooden Chest from wood at a Workbench and place it to store your loot.
Can you upgrade chests to metal variants?
Yes, metal chests can be crafted when you have metal bars and the appropriate crafting station; recipes vary by version.
Yes, you can upgrade to metal chests when you have the right materials and crafting station.
Where should I place chests for best organization?
Place chests near work areas and group items by type. Label sections to reduce back-and-forth during play.
Place chests near your crafting areas and group items by type for quick access.
What is a double chest?
A double chest is two chests placed side by side, effectively doubling storage capacity.
Two chests side by side create a larger container for more items.
Are chests raidable by enemies?
If left unprotected, enemies can loot exposed chests. Secure your loot and keep valuables in protected areas.
Enemies can loot open chests, so keep your loot safe and organized.
Do locked chests exist in all versions?
Locked chests and keys exist in some versions; check your game mechanics to see how locks work in your world.
Locked chests are available in certain versions; verify how locks operate in your game.
Watch Video
Key Points
- Start with Wooden Chests for early storage
- Upgrade to metal chests as materials become available
- Organize storage into clearly labeled zones
- Use double chests to maximize capacity
- Plan layout to minimize travel during exploration and boss prep